
Tools
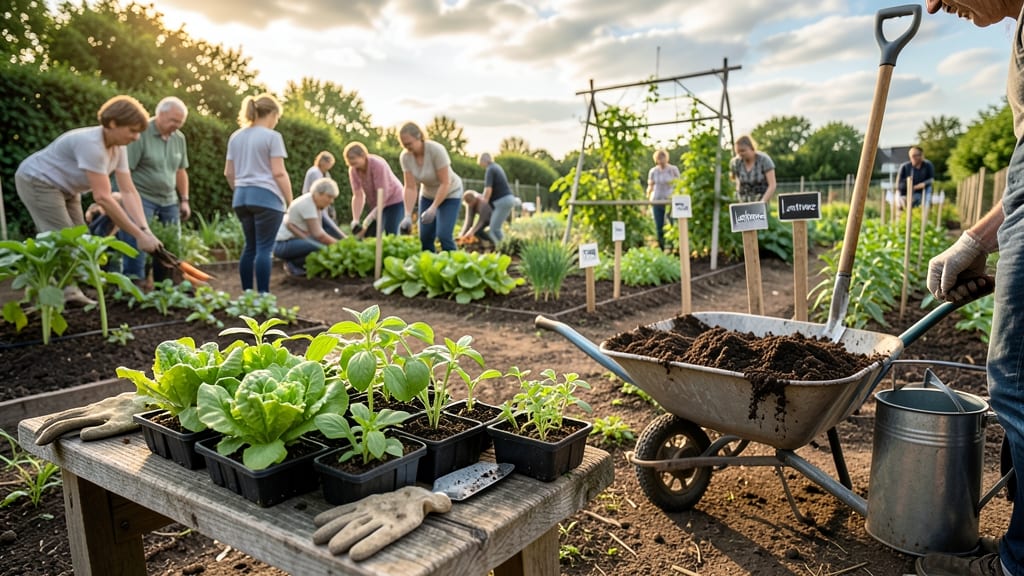
Creating a community garden transforms empty lots into thriving green spaces. 🌱 I’ve seen how a single plot can bring neighbors together, teach kids about nature, and even boost local food security—all while making a neighborhood more beautiful.
The key isn’t just digging dirt; it’s building trust, solving problems, and keeping people engaged long after the first shovel hits the ground.
Start with the basics: find available land (check city parks, schools, or abandoned lots), gather a small team of passionate volunteers, and tackle legalities like permits or liability waivers. A simple layout—raised beds for accessibility, shared tools, and clear signage—makes everything easier.
My first garden flopped because we overcomplicated the design; now I know: start small, keep it functional, and let the community shape it over time.
You’ll end up with a space that grows more than just vegetables—it grows relationships. Kids learn where food comes from, seniors share gardening wisdom, and everyone takes pride in their neighborhood.
The best part? Once the garden takes root, maintenance becomes a shared responsibility, and the harvest (both literal and social) keeps coming back.
Works in cities, suburbs, or rural areas—just adapt the approach. Urban gardens might focus on vertical space and container plants, while rural plots can include larger beds and seasonal crops. The blueprint is flexible; what matters is the people behind it. Ready to turn an idea into soil?
📚 In This Guide
- What you need
- Instructions
- Tips and common mistakes
- Wrapping up and next steps
What you need
- ● Land & Location: Plot size: Minimum 10’x10’ per gardener (scale up as needed).
- ● Sunlight: 6+ hours of direct sun daily (south-facing ideal).
- ● Water access: Hose bib or irrigation system within 50’ of plot.
- ● Soil quality: Test for pH (6.0–7.0) and nutrients (DIY kits ~$20).
- ● Soil & Amendments: Topsoil or compost: 2–3 cubic yards per 100 sq. ft. (bulk bags or loose).
- ● Organic matter: Compost (1–2 inches mixed into top 6” of soil) or aged manure.
- ● Fertilizer: Balanced (10-10-10) or slow-release organic (e.g., fish emulsion).
- ● Basic Tools: Shovels/spades: 2–3 heavy-duty models (for digging/turning soil).
- ● Rakes: 1 bow rake + 1 leaf rake (for leveling and debris).
- ● Garden fork: 1 sturdy model (for aerating soil).
- ● Wheelbarrow: 1 large-capacity (3+ cubic ft.) (for hauling soil/compost).
- ● Gloves: 5–10 pairs (waterproof, durable).
- ● Watering tools: Hose with adjustable nozzle + 5–10 watering wands.
- ● Infrastructure: Fencing: 4–6’ tall (chicken wire or wood for pest control).
- ● Trellises: 2–4 (for climbing plants like beans or cucumbers).
- ● Signage: Plot markers (e.g., wooden stakes + labels).
- ● Soil testing kit (for advanced nutrient analysis).
- ● Drip irrigation system (saves water and time).
- ● Seed-starting trays + grow lights (for early seedlings).
- ● Tool shed or storage bin (to keep supplies organized).
- ● Benches or compost bins (for community use).
- ● First-aid kit (for minor cuts/scrapes).
Instructions: building your community garden from the ground up
Here's how to transform empty space into a thriving, shared garden that brings neighbors together.
🌱 Step 1: Assess and Prepare the Land
Start by evaluating the site for sunlight exposure, soil quality, and accessibility. Most community gardens need 6+ hours of direct sun daily—mark the sunniest areas with stakes. I always test soil pH with a simple kit (aim for 6.0-7.0 for most vegetables). If the ground is compacted or contaminated, plan to amend with 3-4 inches of compost or till in organic matter before planting.
Check local water sources and drainage. Poor drainage leads to root rot and wasted plants. If the area slopes, create swales or raised beds to prevent water pooling. Involve volunteers early—this is where enthusiasm meets practical needs, and you'll uncover hidden resources like donated soil or tools.
🪴 Step 2: Design the Layout for Accessibility and Diversity
Sketch a simple grid with 3-4 foot wide paths between beds for wheelchair access and easy maintenance. I recommend raised beds (12-18 inches tall) for better drainage and reduced soil compaction. Assign sections for different gardeners based on skill level—beginner plots near water sources, advanced plots with more sun.
Include communal areas like a tool shed, seating, and a small compost bin. Label each bed with stakes or signs to prevent confusion. Real talk: the more organized the layout, the less conflict you'll see later about space allocation. Plant a mix of pollinator-friendly flowers (like marigolds or borage) around the perimeter to attract beneficial insects naturally.
☀️ Step 3: Organize Tools and Resources
Gather essential tools like hoes, rakes, and wheelbarrows—donate or borrow what you can't buy. Set up a shared tool shed with clear labeling and a sign-out system. I've seen gardens fail because tools disappeared or weren't maintained. Assign a tool steward to keep inventory and repair broken items.
Create a seed-sharing library with donated seeds and a sign-up sheet for swapping starts. Partner with local nurseries for discounted supplies or bulk orders. Start a community fund (even $5 per member adds up) for unexpected costs like fencing or irrigation. Transparency here builds trust—share financial records at monthly meetings.
🌿 Step 4: Establish Rules and Maintenance Schedule
Draft clear guidelines covering bed usage, watering schedules, and pest management. I always include a clause about sharing harvests with new members or neighbors in need—it keeps the garden's spirit alive. Post rules visibly and discuss them at the first meeting. Schedule weekly workdays where everyone contributes 1-2 hours; consistency prevents overgrowth and weeds.
Designate a lead gardener to handle emergencies (like animal intrusions) and a communications coordinator for updates. Use a group chat or bulletin board to share tips and reminders. Here's the thing—most gardens thrive when people feel ownership. Let members propose projects (like a children's garden or herb spiral) to keep engagement high.
⏰ Step 5: Launch with a Planting Party
Host a kickoff event where volunteers plant the first beds together. Bring potted starts and seeds for immediate action—seeing quick growth builds momentum. I like to assign each person a small plot to nurture personally, even if they share the harvest later. Provide gloves, water, and snacks to make it fun.
Celebrate the first harvest with a potluck. Document progress with photos and a shared album—visual proof of the garden's success keeps people coming back. Watch for early volunteers who take initiative; these are your future leaders. The goal isn't perfection—it's creating a space where everyone feels welcome to grow, quite literally and figuratively.
Tips & tricks for perfect community garden planning
Transforming empty space into a thriving community garden starts with these practical strategies that prevent common pitfalls and build lasting engagement.
Site Selection Insight: The 6+ hours of direct sun requirement isn't just a suggestion—it's non-negotiable for most vegetables. I've seen gardens fail when members planted in shady spots and blamed their poor harvests on "bad soil." Use a sun-tracking app for a week to map sunlight patterns before staking out your beds. For urban gardens, consider vertical growing on fences or trellises to maximize limited space while still meeting sunlight needs.
Soil Preparation Strategy: That 3-4 inches of compost recommendation is your foundation for success. Don't skimp! I once worked with a garden that spread only 1 inch of compost over compacted soil—plants struggled despite everyone's best efforts. Rent a rototiller for large areas or use broadforks for manual tilling. For contaminated soil, mix in 1 part compost to 3 parts native soil and test again after 3 months. The goal is loose, crumbly soil that holds moisture without becoming waterlogged.
Layout Design Hack: The 3-4 foot wide paths between beds aren't just for accessibility—they're your maintenance lifeline. Narrower paths get trampled and become muddy, while wider ones encourage people to actually use them. I recommend adding a gravel strip along the center path to prevent erosion and make wheelbarrow access easier. For gardens with limited space, consider "keyhole" beds that eliminate paths entirely while still allowing access from the center.
Community Engagement Booster: That 1-2 hour weekly workday commitment is where magic happens—but only if structured right. I've seen gardens collapse when expectations weren't clear. Create a rotating schedule where different members lead each week's workday. This builds leadership skills and prevents burnout. For larger groups, break the time into two 1-hour sessions with a 15-minute break in between. Bring snacks and music to make it social, not just work.
Pro Tips for Create A Community Garden
- Transforming empty space into a thriving community garden starts with these practical strategies that prevent common ...
- Site Selection Insight: The 6+ hours of direct sun requirement isn't just a suggestion—it's non-negotiable for most v...
- Soil Preparation Strategy: That 3-4 inches of compost recommendation is your foundation for success. Don't skimp! I o...
Frequently asked questions
Got questions about turning your community garden dream into reality? Here are some of the most common ones—and their answers—to help you get started with confidence!
How much time does a community garden really take to maintain?
A community garden requires ongoing commitment, but the workload varies. Active planting and weeding may take 2–5 hours weekly per plot during peak seasons (spring/summer). Off-season tasks (like soil prep or tool maintenance) drop to 1–2 hours monthly. Rotating tasks among members keeps it manageable!
When is the best time to start planning a community garden?
Ideally, begin 6–12 months before planting—especially if permits, funding, or partnerships are needed. For most climates, early spring (March–April) is perfect for soil prep, while fall (September–October) works for planning winter crops or next year’s layout. Pro tip: Check your local frost dates!
How can we fund a community garden on a tight budget?
Start small with low-cost solutions:
- Grants: Check local nonprofits or USDA programs for funding.
- Sponsorships: Partner with gardening stores or restaurants for tool/seed donations.
- Crowdfunding: Platforms like GoFundMe or Facebook Fundraisers work well.
- Swap labor: Trade gardening skills for materials (e.g., compost for lumber).
What if our soil is terrible? Can we still garden successfully?
Absolutely! Poor soil is fixable with these steps:
- Test your soil (local extension offices offer free/low-cost kits).
- Amend with compost, aged manure, or peat moss (aim for 2–3 inches mixed into the top 6–12 inches).
- Use raised beds for full control over soil quality (great for urban areas!).
- Grow soil-builders like clover or beans to naturally enrich the earth over time.
What do we do if neighbors or local rules oppose our garden?
Conflict happens—but solutions exist! Start by:
- Engaging early: Host a public meeting to share benefits (food security, beauty, crime reduction).
- Following zoning laws: Verify permits for water use, fencing, or structures.
- Offering compromises: Place gardens in visible, high-traffic areas to build goodwill.
- Leveraging champions: Recruit local leaders (e.g., teachers, city council members) to advocate.
Patience and transparency go a long way!
Wrapping up and next steps
Creating a community garden is more than just planting seeds—it’s about nurturing connections, fostering sustainability, and building a greener future for your neighborhood. 🌱 Whether you’re just starting or ready to take the next step, remember that every small effort—like securing land, engaging neighbors, or sourcing tools—brings your vision closer to life.
Now that you’ve got the blueprint, it’s time to roll up your sleeves and get growing! Start by reaching out to local groups or posting in community forums to rally volunteers.
The best gardens thrive with teamwork—so invite friends, families, and even kids to join the fun. Your green oasis is waiting!