
Size
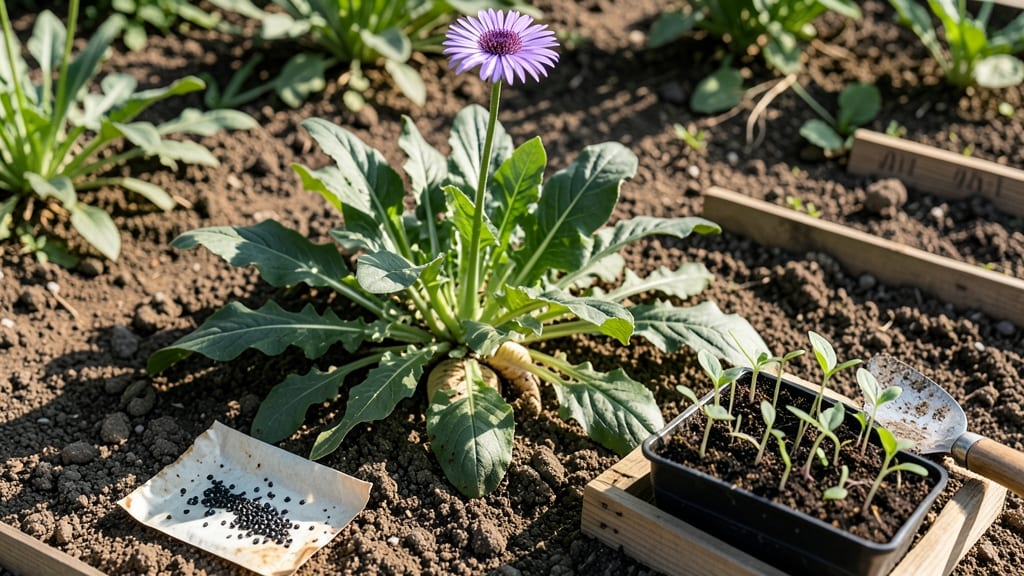
How to grow salsify unlocks a forgotten garden treasure—those crisp, carrot-like roots with a nutty, earthy flavor. 🌱 I planted my first batch last spring and was stunned by how easy (and delicious) this cool-season crop could be, especially when most gardeners rush to summer vegetables. The secret lies in patience and timing: salsify thrives in 40-60°F soil, making early spring or late summer the perfect windows. Start seeds indoors 8-10 weeks before frost, or sow directly in well-drained soil with 1-2 inches of compost mixed in. Thin seedlings to 6 inches apart—they need space to develop those thick, pencil-shaped roots. By harvest time (about 100-120 days), you’ll pull up 6-12 inch roots that store like potatoes. The flavor deepens after frost, but don’t wait too long—they’ll get woody. For a foolproof crop, pair with onions, lettuce, or brassicas to deter pests and improve flavor. This underused root deserves a spot in your garden. With minimal fuss, you’ll have a harvest that tastes like a gourmet secret—no fancy techniques required. Let’s get those seeds in the ground!
📚 In This Guide
- What you need
- Instructions
- Tips and common mistakes
- Wrapping up and next steps
What you need
- ● Salsify seeds: 1–2 oz (about 150–300 seeds) – choose heirloom or organic varieties for best results.
- ● Well-draining soil: Loamy or sandy soil with a pH of 6.0–7.5 (amend with compost if needed).
- ● Sunlight: Full sun to partial shade (6+ hours of sunlight daily).
- ● Watering can or hose: With a gentle spray nozzle for even moisture.
- ● Garden bed or containers: For in-ground planting: A 12–18" deep bed (salsify roots grow long!).
- ● For containers: 12" deep pots (at least 1 per plant).
- ● Row cover or mulch: Organic mulch (straw or grass clippings) to retain moisture and suppress weeds.
- ● Seed-starting trays: For indoor germination (if starting early).
- ● Fertilizer: Balanced organic fertilizer (10-10-10) or compost tea for nutrient boosts.
- ● Garden gloves: To protect hands while handling soil or roots.
- ● Plant labels: To track varieties and planting dates.
- ● Pest control: Neem oil or row covers (if aphids or slugs are a concern).
Step-by-step instructions for growing salsify from seed
This cold-hardy root thrives with patience—here’s how to coax those tender, carrot-like roots to maturity.
🌱 Step 1: Start Seeds Indoors for Early Growth
Salsify seeds germinate best in cool conditions, so begin them indoors 8-10 weeks before your last frost date. Fill 2-3 inch deep seed trays with sterile seed-starting mix—never garden soil, as it compacts too easily. Moisten the mix until it holds together when squeezed but doesn’t drip.
Scatter seeds ¼ inch deep (they’re tiny, so don’t bury too deeply) and cover lightly with a fine layer of mix. Mist gently with water until the surface is damp but not soggy. Place trays in a 60-65°F environment—too warm and they’ll rot before sprouting. A seedling heat mat set to 55-60°F speeds germination, which typically takes 14-21 days.
🌿 Step 2: Transplant Seedlings to the Garden
Wait until seedlings develop 2-3 true leaves and soil temperatures reach 50°F before moving them outdoors. Harden off seedlings by placing them outside in partial shade for 1-2 hours the first day, gradually increasing exposure over 7-10 days. Choose a site with full sun and well-draining soil—salsify hates soggy roots.
Space seedlings 12-18 inches apart in rows 18 inches apart to allow roots room to grow. Dig holes just deep enough to cover the root ball, then water deeply to settle the soil. Mulch with 2-3 inches of straw to retain moisture and suppress weeds—this is critical, as salsify has shallow roots and needs consistent soil moisture.
☀️ Step 3: Maintain Soil Moisture and Fertility
Salsify thrives in cool-season conditions and bolts quickly when temperatures exceed 75°F. Water deeply 2-3 times per week, aiming for 1 inch of water per week—more in sandy soil, less in clay. Let the top 1 inch of soil dry between waterings to prevent rot, but never let it become bone-dry. You’ll know you’re on track when leaves stay deep green and crisp.
Side-dress with compost or balanced fertilizer (10-10-10) when plants reach 6 inches tall to encourage root development. Avoid high-nitrogen fertilizers—they promote leafy growth at the expense of root size. Watch for pale yellowing leaves, which signal nitrogen deficiency, or stunted growth, which may mean phosphorus or potassium is lacking.
⏰ Step 4: Harvest at Peak Maturity
Salsify roots are ready to harvest 120-150 days after planting, when they reach 1-1.5 inches in diameter. Pull gently but firmly—roots should come out cleanly. If the soil is dry, water it the day before harvesting to make extraction easier. Harvest on a cool, overcast day to preserve crispness, as roots bruise easily.
Store harvested roots in the fridge for up to 2 weeks, or blanch and freeze for long-term use. Don’t wait too long—roots left in the ground past maturity become woody and tough. If you miss the window, you can still harvest leaves for greens, though they’re less flavorful than the roots.
Tips & tricks for perfect salsify growth
Between us, salsify's patience-paying nature makes it a rewarding challenge—here's what nobody tells you about growing these earthy roots like a pro.
Seed Starting Wisdom: The 8-10 week indoor head start is non-negotiable for most climates, but here's the secret: use clear plastic domes over your seed trays to maintain that crucial 60-65°F environment without constant monitoring. I've found that a simple plastic wrap tent over the trays works just as well as expensive domes, and it creates the perfect humidity for those delicate seeds. The key is to remove the cover daily for 10 minutes to prevent fungal growth—this mimics natural rain cycles and keeps your seedlings strong.
Transplanting Technique: When you're hardening off those 2-3 true leaf seedlings, I've learned the hard way that gradual exposure is everything. Start with just 1 hour on day one in partial shade, then increase by 30 minutes daily—this prevents shock better than the standard 1-2 hour approach. Watch for leaves that look slightly wilted but perk up when you bring them back inside—that's your cue you're doing it right. And never transplant when soil temps dip below 50°F, even if your seedlings look ready.
Soil Moisture Mastery: The 1 inch of water per week guideline is perfect, but here's what I've discovered: in clay soils, you might need 2 inches because water pools instead of penetrating. Test your soil's moisture by sticking your finger 1 inch deep—that's how deep your salsify roots will be at this stage. If it feels dry, water immediately. The deep green and crisp leaf test is foolproof—if leaves start yellowing at the edges, you're either overwatering or dealing with nutrient deficiency.
Harvesting Hack: That 120-150 day window is tight, so here's my pro move: mark your calendar 110 days after planting and start checking roots weekly. Use a garden fork to gently probe the soil around your plants—you'll feel the roots before you see them. The 1-1.5 inch diameter rule is spot-on, but if you're growing in containers, roots might stay smaller. Harvest on an overcast morning when roots are firm and crisp—this is when they'll store best in your fridge for those 2 weeks.
Pro Tips for Grow Salsify
- Between us, salsify's patience-paying nature makes it a rewarding challenge—here's what nobody tells you about growin...
- Seed Starting Wisdom: The 8-10 week indoor head start is non-negotiable for most climates, but here's the secret: use...
- Transplanting Technique: When you're hardening off those 2-3 true leaf seedlings, I've learned the hard way that grad...
Frequently asked questions
Got questions about growing salsify? You’re not alone! Here are some of the most common concerns—plus quick answers to help you succeed.
Is salsify hard to grow?
Not at all! Salsify is actually quite resilient once established. It thrives in cool weather and tolerates poor soil better than many root vegetables. The key is patience—it takes time (90–120 days) to mature, but with the right conditions (full sun and well-draining soil), it’s a rewarding crop. Just avoid soggy soil, and you’ll be golden!
When is the best time to harvest salsify?
Harvest salsify when the leaves turn yellow and the roots reach about 1–2 inches in diameter—usually late fall or early winter. For baby salsify (thinner, sweeter roots), dig them when they’re pencil-sized (60–70 days after planting). Wait too long, and the roots become woody and bitter. A sharp knife or fork works best for digging!
Can I grow salsify in containers?
Salsify adapts well to containers, making it perfect for small spaces or urban gardens. Use a 5-gallon pot or larger with at least 12 inches of depth. Ensure the container has drainage holes and fill it with loose, fertile soil. Just keep an eye on moisture—containers dry out faster than garden beds.
What pests or diseases should I watch for?
Salsify is relatively pest-free, but keep an eye out for leaf miners (tiny larvae that create trails in leaves) and root maggots (which can stunt growth). To prevent issues, rotate crops yearly, avoid overwatering, and use row covers early in the season. If pests appear, handpick them or spray with neem oil for a natural solution.
What’s the best way to store harvested salsify?
Store salsify in a cool, dark, and humid place (like a root cellar or refrigerator crisper drawer) for up to 3–4 months. Brush off excess dirt, trim the greens, and wrap the roots in a damp paper towel before storing. Avoid washing until you’re ready to use them—excess moisture speeds up spoilage. Frozen salsify also works for soups or stews!
Wrapping up and next steps
Growing salsify is a rewarding journey that brings a unique, earthy flavor to your kitchen! With the right soil, patience, and a few key tips—like thinning seedlings and protecting them from pests—you’ll soon enjoy a bountiful harvest.
Whether you’re a seasoned gardener or just starting out, every root pulled from the soil is a victory!
Ready to take the next step? Try planting a small batch this season and experiment with recipes—salsify roasted, sautéed, or even in soups! Happy growing, and may your garden flourish with these delicious roots! 🌱✨