
How To
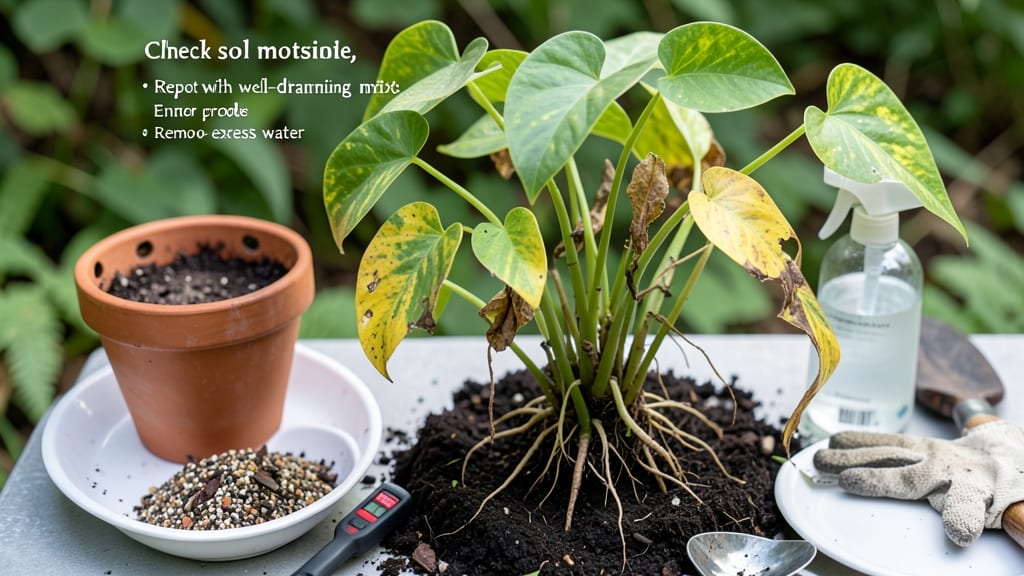
Your plant's sad, drooping leaves don’t mean it’s dead—just how to dry an overwatered plant when roots are drowning. 🌱 I've nursed back dozens of "hopeless" cases, and the secret isn't complicated: stop watering immediately and give roots a chance to breathe.
The key is acting fast before root rot takes over completely.
First, pull the plant from its pot and gently shake off excess soil to check roots. If they're black, mushy, or smell foul, trim those sections with clean scissors.
Healthy roots should be firm and white or tan. Repot in fresh, well-draining mix—cactus or succulent soil works great—and place the container in bright, indirect light.
Within 3-5 days, you'll see improvement as roots recover. Prune any yellow or wilted leaves to help the plant focus energy on revival. The real game-changer? Adjust your watering habits—only when the top inch of soil feels dry to the touch, and use pots with drainage holes.
This works for houseplants, herbs, or even struggling garden beds. The same principles apply whether you're dealing with a fussy fern or a thirsty fiddle-leaf fig. Once you've mastered the recovery, you'll spot early warning signs before it gets this far.
📚 In This Guide
- What you need
- Instructions
- Tips and common mistakes
- Wrapping up and next steps
What you need
- ● Well-draining potting mix: 1 bag (1–2 gallons) of a lightweight, airy blend (e.g., cactus/succulent mix or a 50/50 peat-perlite combo). Avoid heavy garden soil!
- ● Clean pot: 1 container with drainage holes (slightly larger than the current pot to allow airflow). Size: 1–2 inches wider than the root ball.
- ● Watering can or spray bottle: With a fine rose attachment for gentle hydration.
- ● Pruning shears or scissors: Sterilized (rubbing alcohol wipe) to trim mushy, blackened roots.
- ● Paper towels or a clean cloth: For blotting excess moisture.
- ○ Rooting hormone: Powder or gel to boost survival of trimmed roots (optional but handy for severe cases).
- ● Hydrogen peroxide (3%): 1 small bottle to disinfect roots and prevent rot (soak trimmed roots for 10 mins if available).
- ● Moisture meter: To track soil dryness post-revival (prevents future overwatering).
- ● Fungicide (systemic): Like Mycorrhizal fungi or copper-based spray to fight fungal infections if roots smell foul.
- ● Grow lights or sunny windowsill: For low-stress recovery if your plant is leafy but weak.
Step-by-Step instructions for reviving an overwatered plant
Here's how I rescue plants with soggy roots—no leaves lost, just happy roots again.
🌱 Step 1: Remove the Plant and Check the Roots
Gently slide the plant from its pot and shake off excess soil to reveal the roots. You'll see two types: healthy roots are firm and white, while overwatered roots turn mushy, brown, or black. If they smell foul, that's your first sign of root rot. Don't panic—this step is all about assessment.
Use your fingers to separate the roots carefully. If they crumble at the touch, the damage is severe. For mild cases, you'll find some firm roots mixed with soft ones. Trim away any black or mushy roots with clean scissors, cutting back to healthy tissue. This might seem drastic, but it's the only way to stop the rot from spreading.
💧 Step 2: Let the Roots Dry Out Completely
Place the plant in a dry, shaded spot away from direct sunlight. I like to set it on a paper towel to absorb any excess moisture from the roots. This drying process can take anywhere from 12 to 48 hours, depending on how saturated the roots were. You'll know it's ready when the roots feel dry and slightly firm to the touch.
Resist the urge to water or mist the plant during this time. The goal is to let the roots recover without adding more moisture. If the leaves start wilting, that's normal—they're adjusting to the change. Just keep them out of harsh light until the roots have dried completely.
☀️ Step 3: Repot in Fresh, Well-Draining Soil
Choose a pot with drainage holes if it doesn’t already have them—this is non-negotiable for recovery. Fill the bottom with a layer of coarse sand or perlite to improve drainage, then add a mix of potting soil and perlite (half and half). This lighter mix helps prevent future waterlogging.
Place the plant in the pot and fill in around the roots with the soil mix, pressing gently to secure it. Water lightly only if the soil feels completely dry to the touch. Overwatering now will undo all your progress. Instead, wait until the top inch of soil feels dry before adding more water.
⏰ Step 4: Adjust Your Watering Routine
From now on, water only when the top 1-2 inches of soil feel dry. Stick your finger in the soil—if it's damp, wait another day. Overwatered plants need a break from excess moisture. You'll notice new growth within 2-4 weeks if the roots have recovered, but be patient—some plants take longer to bounce back.
Monitor the plant closely for the first few weeks. If the leaves start yellowing again, it’s a sign of stress, but don’t overreact. Sometimes, the plant just needs time to adjust. Keep it in bright, indirect light and avoid fertilizing until you see new growth—roots need to heal first.
Tips & tricks for reviving an overwatered plant
Real talk: I've lost count of how many plants I've nursed back from the brink of root rot—here's what actually works.
Assessment is Everything: When you're checking roots in Step 1, focus on the color transition point between healthy and damaged roots. That's where you'll find the most critical boundary for trimming. I've seen plants recover beautifully after removing just the most severely affected roots—don't over-trim healthy sections unless they're clearly compromised. The goal is to preserve as much healthy root structure as possible to support regrowth.
Drying Strategy: The 12-48 hour drying period in Step 2 can feel like an eternity, but here's the thing: patience is your best tool. If your roots were particularly saturated, consider extending the drying time up to 72 hours by placing the plant on a wire rack or elevated surface with good airflow underneath. This prevents any lingering moisture from promoting further rot. You'll know you've succeeded when the roots snap cleanly when bent—no more squishy give.
Soil Mix Matters: For Step 3, I can't emphasize enough how critical that half-and-half potting soil and perlite mix is. The perlite creates air pockets that prevent future waterlogging while still providing enough structure for roots to anchor. If you're working with a particularly moisture-loving plant species, you might even increase the perlite ratio to 60% perlite/40% soil. This isn't just about drainage—it's about creating the right environment for roots to breathe and recover.
Watering Wisdom: When you're adjusting your routine in Step 4, think of it this way: you're training your plant to develop drought tolerance. The finger-in-the-soil test is your new best friend—it's more reliable than any moisture meter for this recovery phase. I've found that most revived plants actually prefer this less-frequent watering schedule once they've recovered, making future care much easier.
Pro Tips for Dry An Overwatered Plant
- Real talk: I've lost count of how many plants I've nursed back from the brink of root rot—here's what actually works.
- Assessment is Everything: When you're checking roots in Step 1, focus on the color transition point between healthy a...
- Drying Strategy: The 12-48 hour drying period in Step 2 can feel like an eternity, but here's the thing: patience is ...
Frequently asked questions
Got questions? You’re not alone—overwatering can feel like a plant emergency! Here are some of the most common concerns and quick fixes to get your green friend back on track.
How long does it take to revive an overwatered plant?
Recovery time varies by plant type and damage severity. Most plants show signs of improvement within 3–7 days of proper drying, but root rot may take 2–4 weeks to fully heal. Monitor soil moisture daily—if it stays soggy, extend drying time. Patience is key!
Can I use paper towels or newspaper to dry the soil faster?
Wrapping the pot in a paper towel or newspaper speeds up evaporation by creating a dry microclimate. Just ensure airflow isn’t blocked—aim for 1–2 inches of space around the pot. Avoid plastic, which traps moisture and worsens rot. Think "breathable" not "airtight."
What if my plant’s leaves are already yellow or mushy?
Don’t panic—those leaves are likely a casualty of overwatering. Trim them off with clean scissors to redirect energy to healthy growth. Focus on saving the roots first; new leaves will sprout as the plant recovers. Pruning = less stress for the plant!
How often should I check the soil while drying?
Check the soil’s moisture every 1–2 days by sticking your finger 1–2 inches deep. If it’s still damp, let it dry longer. Overzealous checking can disrupt the drying process—trust the process! Consistency > constant tinkering.
Will my plant survive if the roots smell bad?
If roots emit a sour or rotten odor, they’re likely infected. Trim away mushy, black, or slimy roots with sterilized scissors, then repot in fresh, dry soil. Some plants (like succulents) may not recover, but others (e.g., ferns, calatheas) can bounce back with proper care. Hope isn’t lost—act fast!
Wrapping up and next steps
Reviving an overwatered plant is totally doable—even if it feels overwhelming at first! 🌱 By following the right steps, like adjusting your watering habits, improving drainage, and giving your plant time to recover, you can nurse it back to health without losing its leaves. Remember: patience and consistency are key.
Now that you’re equipped with the know-how, take action! Start by assessing your plant’s roots and making those small but impactful changes. Before you know it, you’ll have a thriving green friend—and maybe even a newfound confidence in plant parenting! 🌿