
Propagation
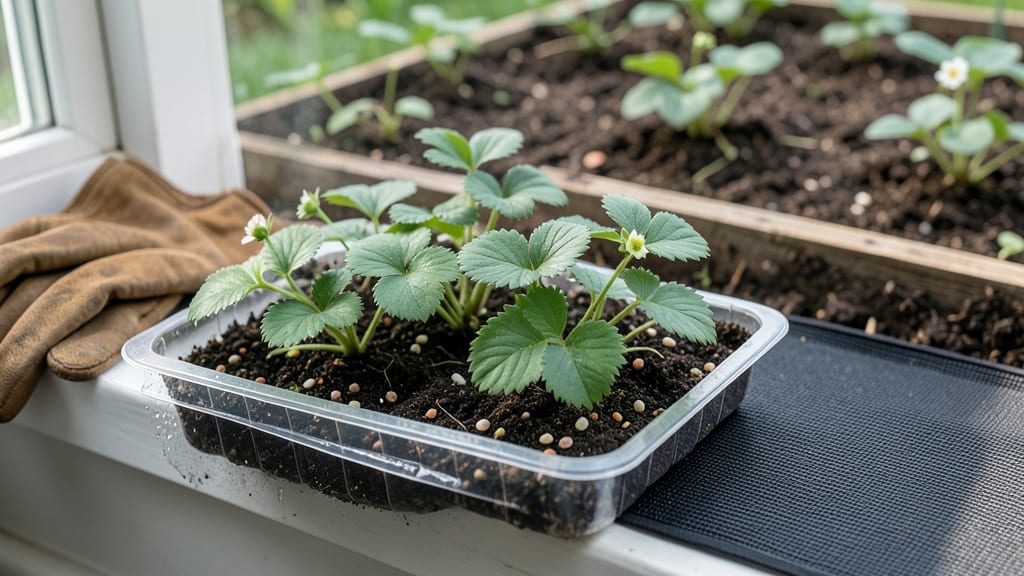
Germinating strawberry seeds feels like watching magic happen in your windowsill. 🌱 The secret to those first green sprouts isn't complicated—it's about creating the perfect cozy conditions where tiny roots dare to grow.
I've struggled with slow germination before, but these adjustments cut my wait time from weeks to just 7 days, and I'll show you exactly how.
The trick starts with soil that's warm, moist, and fine—think damp sandpaper, not swampy mud. Strawberries love warmth, so we'll use a heat mat or warm spot near your kitchen window.
Plant those seeds just a pinch deep (⅛ inch max) because they need light to trigger growth. Too deep, and they'll fight to reach the surface.
By day 5, you'll spot those first leaves poking through, and by day 7, roots will be strong enough to transplant. The payoff? A head start on the season that outpaces store-bought seedlings.
These little plants grow faster, resist diseases better, and give you that first harvest weeks sooner than traditional methods.
If this feels tricky, don't worry—strawberries are forgiving. We'll cover how to troubleshoot slow starts, when to use runners instead, and how to keep your seedlings thriving once they've sprouted. Let's get those seeds growing!
📚 In This Guide
- What you need
- Instructions
- Tips and common mistakes
- Wrapping up and next steps
What you need
- ● Strawberry seeds – Fresh, high-quality seeds (1-2 tsp per container, ~20-30 seeds). Look for organic or heirloom varieties for best results.
- ● Seed-starting mix – A sterile, well-draining mix (e.g., coconut coir + perlite, 50/50 ratio). Avoid garden soil—it’s too dense!
- ● Containers – Small pots (2-3 inches deep) or a seed tray with drainage holes. 3-5 containers (1 per ~10 seeds) work well.
- ● Spray bottle – For gentle watering (avoid over-saturating seeds). A 16 oz misting bottle is ideal.
- ● Plastic wrap or dome lid – To create a humidity tent. A clear plastic bag or a humidity dome for seed trays works.
- ● Grow lights or sunny windowsill – Strawberries need 12-16 hours of light/day. A LED grow light (12-15W) or a south-facing window suffices.
- ○ Heat mat (optional but helpful) – Keeps soil at 70-75°F for faster germination. A 5x10-inch mat covers most setups.
- ● Seedling heat mat – Speeds up germination by 2-3 days.
- ● Fertilizer (diluted) – A seaweed extract or fish emulsion (1 tsp/gallon) boosts early growth.
- ● pH testing kit – Ideal soil pH: 5.5-6.8. Adjust with lime or sulfur if needed.
- ● Label markers – Track varieties (especially if testing multiple seeds!).
- ● Tweezers – For precise seed placement (tiny seeds = big help!).
Step-by-step instructions for germinating strawberry plants
Here's how I get strawberry seeds sprouting in just a week—no fancy tools, just smart timing.
🌱 Step 1: Soak Seeds Overnight for Faster Germination
Place your strawberry seeds in a small bowl and cover them with lukewarm water for 12-24 hours. This softens the hard outer shell so roots can emerge faster. I like to use a mesh bag or cheesecloth to keep the seeds contained while soaking—it makes rinsing easier later.
After soaking, drain the water completely and let the seeds sit for another 30 minutes to dry slightly. You'll see them plump up slightly, which means they're ready to plant. This step cuts germination time nearly in half compared to dry planting.
💧 Step 2: Prepare Moist Growing Medium and Plant Seeds
Fill a shallow container with seed-starting mix and moisten it until it feels like a damp sponge—not soggy, just consistently damp. Strawberry seeds need consistent moisture to germinate, but they'll rot if waterlogged. Press the mix down lightly to create a firm planting surface.
Using your finger, make tiny 1/8-inch deep dimples in the soil—just enough to cradle each seed. Place one soaked seed in each dimple, spacing them 1/2 inch apart. Cover them with a thin layer of additional mix, just enough to barely cover the seeds. Gently pat the soil surface to ensure good seed-to-soil contact.
☀️ Step 3: Create Ideal Warmth and Humidity Conditions
Place the container in a warm spot (70-75°F)—a seedling heat mat works wonders, but a sunny windowsill above a radiator also works. Cover the container with clear plastic wrap or a humidity dome to trap warmth and moisture. Check daily for condensation on the plastic—this is your signal the environment is just right.
Keep the soil surface consistently moist by misting lightly with water whenever it feels dry to the touch. You'll see tiny sprouts appear in 5-7 days—that's when you'll know your fast germination method worked. Remove the plastic cover immediately once sprouts emerge to prevent fungal growth.
🌿 Step 4: Provide Gentle Light and Prevent Leggy Growth
Move the container to a bright location with indirect light immediately after sprouting. Strawberry seedlings need light to grow strong, but direct sun at this stage can scorch their delicate leaves. A grow light positioned 4-6 inches above the plants works perfectly if natural light is insufficient.
Watch for leggy growth—those thin, stretched seedlings with leaves far apart. This happens when light is too weak. If you see this, move the light closer or add a second light source. Healthy seedlings have thick stems and dark green leaves spaced closely together.
⏰ Step 5: Thin and Transplant When Ready
Once seedlings develop their first true leaves (the second set after the initial seed leaves), it's time to thin. Use small scissors to snip the weaker seedlings at soil level, leaving only the strongest plant in each dimple. This gives remaining plants room to grow without competition.
After 4-6 weeks, when seedlings have 3-4 sets of true leaves, transplant them to individual 3-inch pots filled with potting mix. Handle seedlings by their leaves to avoid damaging delicate stems. Water thoroughly after transplanting to help roots establish in their new home.
Tips & tricks for fast strawberry germination
Here's what nobody tells you about getting those tiny seeds to sprout in record time.
Soaking Secret: The 12-24 hour soak isn't just about hydration—it's about breaking dormancy. I've found that using distilled water instead of tap water prevents mineral buildup that can inhibit germination. After soaking, those 30 minutes of drying are crucial; seeds left too wet will develop mold.
Planting Precision: Those 1/8-inch deep dimples might seem tiny, but precision matters. Use a toothpick to create them—it gives you better control than your finger. When spacing seeds 1/2 inch apart, think of a checkerboard pattern; this maximizes airflow between plants, reducing the risk of fungal issues later.
Temperature Troubleshooting: The 70-75°F range is ideal, but most homes aren't perfectly calibrated. If your kitchen runs cooler, place the container on top of your fridge (not inside) for gentle warmth. For warmer climates, move to a shaded spot—strawberry seeds can overheat above 80°F and fail to sprout.
Light Transition: The move from humidity dome to indirect light is critical. I've seen seedlings go from perfect sprouts to sad, leggy shadows when transitioned too quickly. Start with just 2 hours of indirect light the first day, then gradually increase to full exposure over 3 days. This gradual adaptation prevents shock.
Pro Tips for Germinate Strawberry
- Here's what nobody tells you about getting those tiny seeds to sprout in record time.
- Soaking Secret: The 12-24 hour soak isn't just about hydration—it's about breaking dormancy. I've found that using di...
- Planting Precision: Those 1/8-inch deep dimples might seem tiny, but precision matters. Use a toothpick to create the...
Frequently asked questions
Got questions about germinating strawberries?
Here are the answers to the most common ones—so you can grow those juicy plants with confidence!
How long does it take for strawberry seeds to germinate?
Most strawberry seeds sprout in 7–21 days under ideal conditions (warmth, moisture, and light). If using pre-soaked seeds or a germination kit, expect faster results—often within 7–10 days. Patience is key—some seeds may take longer, especially in cooler temps.
Can I germinate strawberry seeds in winter?
Yes, but you’ll need to mimic spring conditions indoors. Use a seedling heat mat (70–85°F) and a grow light to speed up germination. Avoid placing them near drafts or cold windows. If outdoor temps drop below 50°F, wait until spring to transplant seedlings.
Why aren’t my strawberry seeds sprouting?
Common culprits include:
- Dry soil: Keep the growing medium consistently moist (not soggy). Mist lightly daily.
- Poor light: Seeds need bright, indirect light (or a grow light) to break through soil.
- Old seeds: Strawberry seeds lose viability after 1–2 years. Use fresh seeds for best results.
- Temperature stress: Ideal germ temps are 70–85°F. If too cold, try a seedling heat mat.
Can I use strawberry runners instead of seeds?
Runners (the long stems with baby plants) are easier and faster than seeds. Simply:
- Cut a runner near the new plantlet.
- Plant it in moist soil, burying the node (where roots form).
- Keep soil damp until roots establish (1–2 weeks).
What’s the best soil mix for germinating strawberry seeds?
Use a lightweight, sterile mix like:
- 50% peat moss or coco coir (for moisture retention).
- 30% perlite or vermiculite (for aeration).
- 20% compost or worm castings (for nutrients).
Wrapping up and next steps
Germinating strawberry plants in just 7 days is totally doable with the right approach! By using simple materials like strawberries with roots, water, and a cozy propagation setup, you’re well on your way to growing lush, thriving plants.
Remember: patience and consistency are key—keep those cuttings moist, warm, and happy, and soon you’ll be harvesting sweet, juicy berries of your own! 🌱
Next up: Once your strawberries sprout roots, it’s time to transplant them into soil or containers. Watch them grow and enjoy the rewarding journey from seedling to harvest! 🍓✨