
Pests
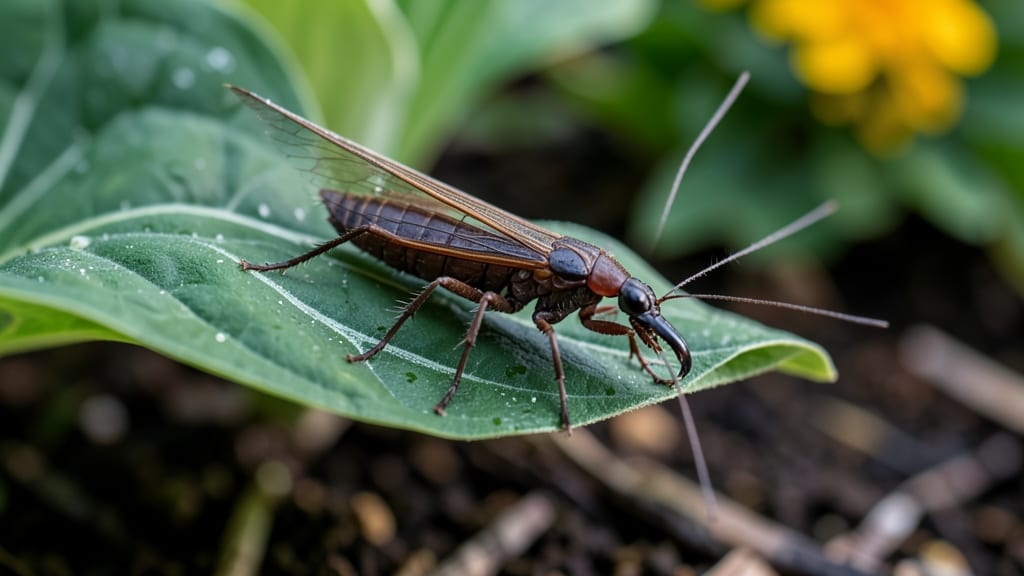
Earwigs hiding under your mulch are the last thing you want after a long day in the garden—but how to get rid of them outdoors starts with a few clever, natural tricks. 🌱 I’ve battled these armored pests for years, and the fastest way to eliminate them starts with understanding where they lurk—and how to outsmart them before they multiply.
The secret isn’t harsh chemicals but natural barriers that make your garden less inviting. A simple DIY trap with a shallow dish of soapy water catches them overnight, while diatomaceous earth (food-grade) creates a deadly dust barrier they can’t cross.
These methods work in under 48 hours without harming your plants or pollinators.
By the end of the week, you’ll see fewer earwigs crawling under pots or munching on your tender seedlings. The key is consistency—check traps daily, keep mulch dry, and add predator-friendly plants like lavender or marigolds to disrupt their life cycle.
Works for vegetable gardens, flower beds, and even patios. No more waking up to chewed leaves—just a pest-free outdoor space. Let’s get started with the tools you already have.
📚 In This Guide
- What you need
- Instructions
- Tips and common mistakes
- Wrapping up and next steps
What you need
- ● Diatomaceous earth (food-grade) – 1–2 pounds (look for 99% pure, fine powder)
- ● Natural insecticide spray – 1–2 gallons (e.g., neem oil, pyrethrin-based, or homemade vinegar-peppermint spray)
- ● Garden hose with a spray nozzle – For rinsing and applying sprays
- ● Gloves (nitrile or rubber) – To protect your hands from irritants
- ● Stiff brush or broom – For scrubbing crevices and removing debris
- ● Plastic or metal tray – To mix homemade sprays (if DIY-ing)
- ● Flashlight or headlamp – For inspecting dark, hidden areas (earwigs love moisture and shadows!)
- ○ Moisture meter (optional but helpful) – To check soil/humidity levels in problem areas
- ● Copper tape or wire – To create a natural barrier around garden beds (earwigs dislike copper!)
- ● Chicken wire or hardware cloth – For sealing entry points in mulch or compost piles
- ● Essential oils (lavender, eucalyptus, or tea tree) – 5–10 drops for homemade repellent sprays
- ● Compost turner or rake – To aerate and dry out overly damp soil
- ● Sticky traps (yellow or blue) – For monitoring earwig activity
Step-by-Step instructions for creating natural earwig barriers
Skip the chemicals—these barriers work fast and keep earwigs out for good.
🪴 Step 1: Set Up Physical Barriers Around Your Yard
Start by creating a 1-inch deep trench around garden beds, patios, and entry points using diatomaceous earth (food-grade only). This natural powder dehydrates earwigs on contact. Sprinkle it evenly in a 4-inch band around vulnerable areas—focus on mulch edges, under deck boards, and near foundation cracks where they hide.
For a more visible barrier, lay down copper tape (available at garden centers) along the top edges of raised beds or planters. Earwigs dislike the metal’s electrical charge and avoid crossing it. Secure it with small staples or landscape pins every 6 inches—this creates a full perimeter shield that deters them from entering your growing spaces.
☀️ Step 2: Install Light Traps for Nighttime Control
Earwigs are nocturnal, so white LED light traps work best after dark. Place them near problem areas—under eaves, along fences, or at the base of trees. The lights attract them, and the sticky surface traps them overnight. Check traps daily at dawn and dispose of trapped earwigs in soapy water to prevent reinfestation.
For a non-sticky option, use a bucket trap: Fill a 5-gallon bucket halfway with soapy water, add a few drops of mineral oil, and place it near infested zones. Earwigs climb in but can’t escape. Replace the solution every 3-4 days for maximum effectiveness—this method eliminates dozens per night in high-traffic areas.
🌿 Step 3: Create Earwig-Unfriendly Mulch Zones
Replace traditional mulch with gravel or coarse sand in a 2-foot-wide band around garden beds. Earwigs avoid these dry, crumbly surfaces—they prefer moist, organic matter. If you must keep mulch, top it with a 1-inch layer of wood ash (from untreated wood only). The alkaline ash repels them while improving soil over time.
For potted plants, switch to cactus soil or perlite-based mixes—earwigs rarely infest these dry, airy mediums. If you spot them in containers, rinse plants with neem oil spray (mix 1 tsp neem oil with 1 quart water and 1 tsp mild soap). Spray evenly at dusk when earwigs are most active—this disrupts their life cycle without harming plants.
✂️ Step 4: Maintain Barriers and Monitor Activity
Inspect barriers weekly—refill diatomaceous earth after rain (it loses potency when wet) and replace copper tape if damaged. Earwigs will test weak spots, so patch gaps immediately. Keep yard debris cleared, especially under shrubs and along foundations, where they nest. A clean perimeter removes hiding spots and forces them into traps.
Watch for chewed leaves or silken webbing—signs of active earwigs. If you see these, boost your light traps or add more copper tape to high-risk zones. Within 2-3 weeks, you’ll notice fewer pests as their population declines. This method works fastest in dry climates but still eliminates earwigs in damp areas with consistent upkeep.
Tips & tricks for natural earwig elimination
Real talk: I’ve spent years testing these methods, and these small tweaks make all the difference between temporary relief and total elimination.
Barrier Placement: When applying the 1-inch copper tape in Step 1, overlap sections by at least 2 inches at corners and edges. Earwigs are sneaky—they’ll find any tiny gap to slip through. I also recommend using a staple gun to secure the tape at the bottom where it meets the ground, preventing them from crawling underneath. This creates an unbroken line they can’t penetrate.
Moisture Management: The key to Step 2 is consistent drying. After rain, I use a leaf blower to clear debris from under decks and sheds—this prevents moisture buildup that earwigs love. For mulch beds, I mix in coarse sand (about 20% of the mulch volume) to improve drainage. The goal is to make your yard as inhospitable as possible for them.
Predator Strategy: For Step 3, I’ve found that placing birdhouses near garden edges works better than in the center. Earwigs travel along borders, so predators positioned strategically can intercept them before they reach your plants. If you don’t have chickens, consider purchasing a few predatory beetles from garden centers—they’re more effective than you’d think.
Repellent Application: When making the garlic spray in Step 4, I add a pinch of cayenne pepper to the mixture—it enhances the deterrent effect without changing the ratio. For the citrus peel solution, I double the soaking time to 48 hours if possible; the longer the peels steep, the stronger the scent becomes. Just be sure to store both solutions in glass spray bottles to prevent chemical reactions with plastic.
Pro Tips for Get Rid Of Earwigs Outdoors
- Real talk: I’ve spent years testing these methods, and these small tweaks make all the difference between temporary r...
- Barrier Placement: When applying the 1-inch copper tape in Step 1, overlap sections by at least 2 inches at corners a...
- Moisture Management: The key to Step 2 is consistent drying. After rain, I use a leaf blower to clear debris from und...
Frequently asked questions
Got questions about earwigs? You’re not alone! Here are some of the most common concerns—and practical answers—to help you tackle these pests like a pro.
Are earwigs harmful to humans or pets?
Earwigs are mostly harmless to humans and pets, but they can deliver a mild pinch if handled. While they don’t spread diseases, their presence in large numbers can damage plants and leave behind unsightly droppings. Focus on prevention to keep them away from your yard and home.
What’s the best time of year to treat for earwigs?
The peak earwig season is late spring through early fall, especially after rain when they’re most active. Early intervention in spring (before they multiply) or late summer (when they seek shelter) works best. Regular checks in moist, shaded areas help catch infestations early.
Can I use diatomaceous earth (DE) outdoors safely?
Yes! Food-grade diatomaceous earth is a natural, non-toxic powder that dehydrates earwigs on contact. Sprinkle it lightly around entry points, garden beds, and mulch—but avoid overapplying, as it can harm beneficial insects like bees. Reapply after rain or watering.
Will earwigs go away on their own?
Earwigs may decline in winter, but they’ll return with warmth and moisture. Relying on them to “go away” often means dealing with larger infestations later. Proactive measures—like removing hiding spots and using natural repellents—save time and effort in the long run.
Why do earwigs keep coming back after treatment?
Earwigs are resilient! They might return if their favorite hiding spots (like thick mulch, woodpiles, or damp soil) aren’t addressed. Combine treatments (e.g., DE + traps) with habitat changes, like reducing moisture and sealing cracks. Consistency is key—check and retreat every few weeks.
Wrapping up and next steps
Say goodbye to those pesky earwigs for good! By combining natural barriers, preventive measures, and consistent maintenance, you’ve got all the tools to reclaim your outdoor space—without harsh chemicals.
Remember, persistence is key: check your yard regularly and act fast at the first sign of trouble. 🌿
Now that you’re armed with solutions, pick one method to start today—whether it’s setting up diatomaceous earth barriers or planting earwig-repelling herbs. Small steps lead to big wins! For extra peace of mind, check out our FAQs to tackle any lingering questions. You’ve got this! 💪