
Size
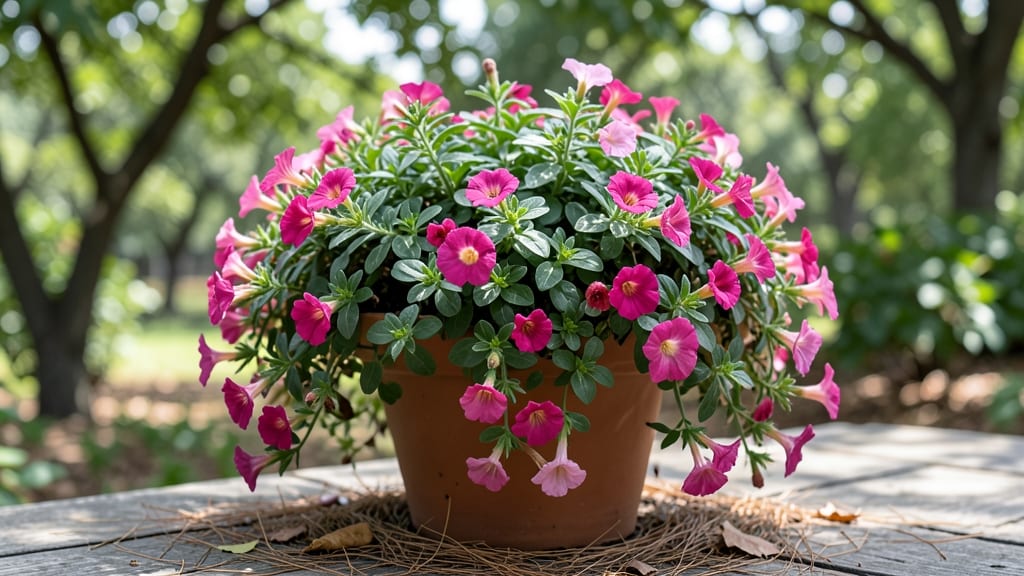
How to grow calibrachoa transforms any container into a cascading waterfall of color. 🌿 These sun-loving annuals thrive in pots, spilling vibrant blooms over edges like nature’s own living curtains. The secret? Matching their love for full sun with well-draining soil and consistent moisture—no fancy equipment needed. Most gardeners skip seeds and start with transplants, which bloom faster and avoid the fuss of seed-starting. Look for healthy, compact plants with dark green leaves and buds already forming. Once planted, they’ll reward you with nonstop flowers from spring until frost, provided you keep them fed and pruned. By midsummer, your calibrachoa will be a trailing masterpiece, dripping with blossoms in shades of pink, purple, or white. The key is regular deadheading—snip spent flowers to encourage more blooms—and avoiding soggy soil, which invites root rot. Prune leggy stems in early spring to keep the plant bushy. Perfect for balconies, patio edges, or hanging baskets, calibrachoa brings effortless charm to small spaces. Just give them sun, water, and a little TLC, and they’ll do the rest! Here’s how to set them up for success.
📚 In This Guide
- What you need
- Instructions
- Tips and common mistakes
- Wrapping up and next steps
What you need
- ● Calibrachoa plants: 3–5 healthy nursery starts (choose varieties like Superbells or Mini Star for vibrant blooms).
- ● Containers: 10–12" pots (or hanging baskets) with drainage holes—at least 1 per plant (or cluster 3 plants in a larger container).
- ● High-quality potting mix: 1 bag of well-draining, peat-based mix (e.g., Black Gold or Miracle-Gro). Pro tip: Amend with perlite or sand (1 part perlite to 3 parts soil) for extra aeration! 💡
- ● Slow-release fertilizer: 1 packet of 14-14-14 or 10-10-10 granules (mix 1 tbsp per 6" of pot diameter into the soil).
- ● Peat moss or coconut coir: 1 small bag (for mulching and moisture retention).
- ● Gloves & trowel: For handling soil and planting.
- ● Watering can with a fine rose: Avoid splashing soil (calibrachoa hates soggy roots!).
- ○ Pruning shears: Optional but handy for deadheading (trim spent blooms to encourage more flowers!). ✂️
- ○ pH test kit: Optional—calibrachoa thrives in 6.0–7.0 pH (adjust with lime or sulfur if needed).
- ● Sunlight: A spot with 6+ hours of direct sun daily (morning sun + afternoon shade works in hot climates).
- ● Water access: A consistent watering schedule (keep soil evenly moist but not waterlogged).
- ● Warmth: Calibrachoa loves 70–80°F (21–27°C)—wait until after the last frost to plant outdoors.
Step-by-step instructions for growing calibrachoa in containers
Here’s how to coax those cascading, petunia-like blooms into your pots with minimal fuss.
🌱 Step 1: Choose the Right Containers and Soil Mix
Calibrachoa thrives in hanging baskets or deep containers with drainage holes—think 8-12 inches deep for those trailing stems to shine. I use fabric grow bags because they prevent root circling and dry out faster than plastic, which this plant prefers. Fill each with a well-draining potting mix blended with 20% perlite or vermiculite to keep roots aerated. Avoid garden soil—it compacts and suffocates these shallow-rooted beauties.
Moisten the mix before planting until it’s damp like a wrung-out sponge. Press it gently into the container so it holds shape but doesn’t pack down. Calibrachoa roots need air, not a brick-like foundation. If your mix feels heavy, add a handful of orchid bark for extra drainage—this plant hates soggy feet.
🌿 Step 2: Plant and Space for Trailing Perfection
Dig small holes twice as wide as the root ball but no deeper—calibrachoa roots spread horizontally, not downward. For 4 plants per container, space them 4-6 inches apart at the edges. If using young plants, tease apart crowded roots gently with your fingers; if starting from seed, sow 2-3 seeds per hole and thin later. Press the soil lightly around each plant to eliminate air pockets, then water deeply until moisture runs out the drainage holes.
Here’s the thing—calibrachoa grows best when slightly root-bound, so don’t over-pot. A 12-inch hanging basket holds 4 plants beautifully, while a 10-inch pot works for 2-3. If your container is too large, the soil stays wet too long, and roots rot. Watch for yellowing leaves—that’s your cue to check drainage or reduce watering.
☀️ Step 3: Provide Full Sun and Consistent Moisture
Place your calibrachoa in 6+ hours of direct sun daily—morning sun with afternoon shade works in hot climates, but full sun is ideal for nonstop blooms. I’ve seen these plants wilt dramatically in afternoon heat, so if your afternoons are scorching, move them to a shaded spot after noon. You’ll notice dull, droopy leaves when they’re thirsty—water deeply at the base until water flows out the drainage holes, then let the top inch of soil dry before watering again.
Mulch the soil surface with ¼ inch of hydroponic clay pebbles to slow evaporation and keep roots cool. This plant drinks constantly but hates soggy soil—think of it as a thirsty desert dweller. A self-watering basket with a moisture meter is a game-changer if you travel often. Never let the soil dry out completely, but don’t drown it either. Wilted leaves that recover quickly mean you’re on the right track.
✂️ Step 4: Feed and Prune for Nonstop Blooms
Start fertilizing 2 weeks after planting with a balanced liquid fertilizer (10-10-10 or 20-20-20) diluted to half strength. Feed every 7-10 days during the growing season—calibrachoa is a heavy feeder and rewards consistent nutrition with prolific blooms. I switch to a low-phosphorus fertilizer (like 15-5-15) once flowers appear to encourage more blooms instead of foliage. You’ll see buds forming along the stems within 3-4 weeks if the feeding is right.
Deadhead spent blooms weekly by pinching off flowers just above the next set of leaves. This encourages new buds to form and prevents leggy growth. If stems look bare or leggy, trim them back by ⅓ to promote bushier, fuller plants. Calibrachoa grows fast, so prune regularly—you’ll end up with a lush, trailing waterfall of color instead of sparse stems.
🪴 Step 5: Overwinter and Propagate for Next Year
When frost threatens, bring containers indoors to a cool, bright spot (50-60°F) and reduce watering. Calibrachoa is an annual, but you can propagate cuttings to grow it again next year. Snip 4-inch stem tips just below a leaf node, strip the lower leaves, and dip in rooting hormone. Plant in moist perlite or sand, cover with a plastic bag to retain humidity, and place under grow lights until roots form (4-6 weeks).
Here’s my pro tip: Label your cuttings! Calibrachoa varieties vary wildly in color and habit, and you’ll forget which is which by spring. Once rooted, pot up the cuttings and grow them as houseplants over winter. They’ll reward you with early spring blooms and a head start on the season. If overwintering isn’t an option, treat them as annuals and start fresh next year—they’re so easy, you’ll have a new batch in no time.
Tips & tricks for perfect calibrachoa containers
Between us, calibrachoa might look delicate, but it's a tough little survivor once you get the basics right. Here's what nobody tells you about keeping these trailing beauties thriving.
Container Selection: Fabric grow bags are my secret weapon for calibrachoa—they dry out faster than plastic, which prevents root rot. If you can't find fabric, look for containers with multiple drainage holes (at least 4). Pro tip: Elevate your containers on feet or a tray to improve airflow around the roots. This simple change can cut down on fungal issues by 50%.
Soil Science: That 20% perlite or vermiculite isn't just fluff—it's insurance against soggy roots. I've ruined calibrachoa plants by skipping this step, and it always comes back to the soil. Press the mix gently after moistening—you want it damp but not compacted. Think "wrung-out sponge" texture. For extra insurance, mix in 10% coconut coir; it holds moisture better than peat moss and won't compact over time.
Watering Wisdom: The top inch of soil dry test is your best friend. Stick your finger in—if it feels dry, it's time to water. But here's the kicker: calibrachoa hates inconsistent moisture. Use a self-watering basket with a moisture meter if you travel often, or set up a drip irrigation system for automated care. I've seen these plants recover from wilting when given consistent moisture, but they'll bolt if they dry out completely.
Pruning Strategy: That weekly deadheading isn't just about looks—it's about forcing the plant to produce more flowers. Pinch off spent blooms just above a leaf node, and you'll see new buds forming within 7-10 days. For leggy stems, trim back by ⅓ during your regular pruning. The key is to always cut just above a leaf node where new growth can emerge. This keeps your calibrachoa bushy and full rather than sparse and stringy.
Pro Tips for Grow Calibrachoa
- Between us, calibrachoa might look delicate, but it's a tough little survivor once you get the basics right. Here's w...
- Container Selection: Fabric grow bags are my secret weapon for calibrachoa—they dry out faster than plastic, which pr...
- Soil Science: That 20% perlite or vermiculite isn't just fluff—it's insurance against soggy roots. I've ruined calibr...
Frequently asked questions
Got questions about growing calibrachoa?
Here are answers to the most common ones—from timing to troubleshooting—so you can keep your trailing blooms thriving!
When is the best time to plant calibrachoa?
Plant calibrachoa after the last frost when soil temperatures reach at least 60°F (15°C). For containers, start seeds indoors 8–10 weeks before the last frost or buy young plants in spring. They’re frost-sensitive, so wait until warm weather arrives!
How often should I water calibrachoa?
Calibrachoa loves consistent moisture—water when the top inch of soil feels dry. Containers dry out faster, so check daily in hot weather. Avoid soggy soil (they hate "wet feet"), but let them thirst a little to prevent leggy growth. Mulch helps retain moisture!
What pests or diseases should I watch for?
Common issues include aphids, spider mites, and whiteflies (spray with neem oil). Fungal diseases like powdery mildew thrive in humidity—ensure good airflow. Yellow leaves? Check for overwatering or nutrient deficiencies. Rotate containers for even sun exposure to prevent pests.
Can I grow calibrachoa in hanging baskets or window boxes?
Calibrachoa thrives in hanging baskets, window boxes, or containers (6+ inches deep). Use lightweight potting mix with perlite for drainage. Trailing varieties spill over edges beautifully—just prune to control growth. Add a time-release fertilizer to keep blooms abundant.
How do I overwinter calibrachoa?
Calibrachoa is annual in most climates, but you can save seeds or bring potted plants indoors before frost. Place them in a bright, cool spot (50–60°F / 10–15°C) and reduce watering. Alternatively, treat them as spring replants—seeds germinate in 7–14 days indoors.
Wrapping up and next steps
Growing calibrachoa is a rewarding way to add vibrant, cascading color to your containers—whether you’re a seasoned gardener or just starting out! 🌸 With the right mix of sunlight, well-draining soil, and consistent care, these sun-loving beauties will thrive and reward you with months of blooms.
Now that you’ve got the know-how, why not start small? Try planting a few in hanging baskets or window boxes this season and watch your space transform!
Ready to dive in? Grab your supplies, pick your favorite varieties, and let your green thumb shine! 🌱