
Picking
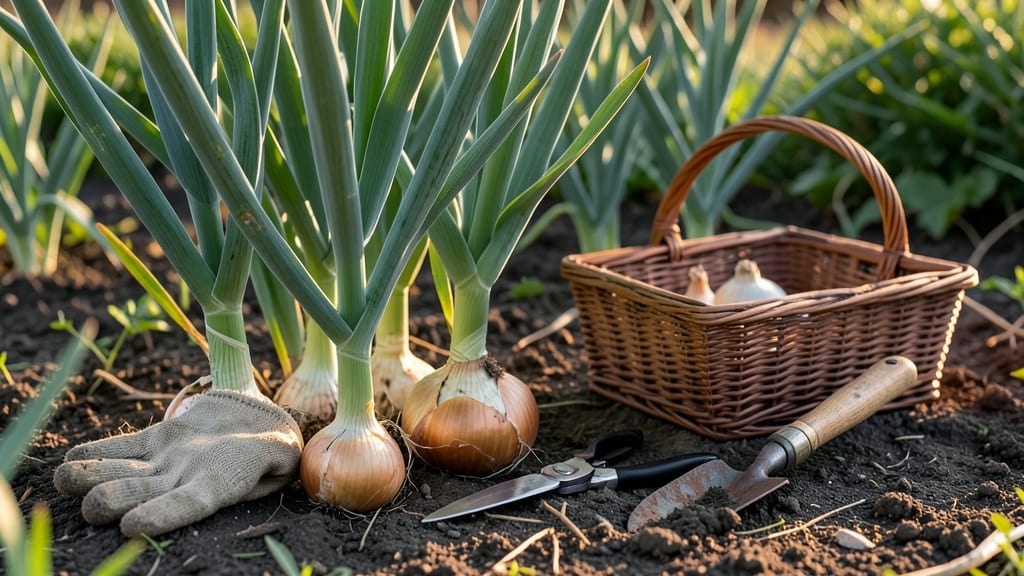
Harvesting onions at home means long-term storage with zero guesswork. 🌱 The secret isn’t timing—it’s watching for those crisp, papery tops that signal perfect maturity. I’ve cured hundreds of bulbs this way, and they last through winter without a single rot.
Start when 60% of tops turn brown and dry, but before they flop to the ground. Use a fork to loosen soil around the base, then gently pull—not yank—to avoid bruising. Shake off excess dirt immediately; any remaining soil speeds up spoilage.
After harvesting, cure onions in a dry, shaded spot for 2-3 weeks. Lay them in single layers, stems up, until necks are completely dry and papery. Store in mesh bags or boxes where airflow keeps them crisp through spring.
This method works for both short-day and long-day varieties. Skip the fridge—cool, dark corners preserve them better than any plastic container. Ready for next season’s planting? These bulbs will be.
📚 In This Guide
- What you need
- Instructions
- Tips and common mistakes
- Wrapping up and next steps
What you need
- ● Garden gloves – A pair of sturdy, well-fitted gloves (e.g., nitrile-coated or leather) to protect your hands from dirt, sharp onion tops, and potential skin irritation.
- ● Pruning shears or sharp scissors – A pair of clean, sharp shears (e.g., Felco or Fiskars) to trim onion tops neatly without damaging the bulbs.
- ● Garden fork or hand trowel – A 4-6 tine garden fork or a sturdy hand trowel to gently loosen soil around onions without piercing the bulbs.
- ● Baking sheet or drying rack – A large, flat surface (e.g., wire cooling rack or wooden cutting board) to lay onions for curing. Ensure it’s at least 18x12 inches to accommodate a full harvest.
- ● String or twine – A 1-2 mm thick natural or synthetic string (e.g., jute or cotton) to bundle onions for hanging during drying.
- ● Dry, well-ventilated space – A location with consistent temperatures (60–70°F), low humidity (40–60%), and good airflow (e.g., a garage, shed, or covered porch). Avoid direct sunlight.
- ● Newspaper or mesh bags – Unbleached newspaper or breathable mesh bags (e.g., 10x12 inch onion storage bags) for final storage once fully cured.
- ● Onion harvester or digging fork – A specialized tool (e.g., Ergonomic Onion Harvester) to speed up the process if harvesting a large quantity.
- ○ Food-safe spray bottle – For lightly misting onions with 1 part vinegar to 3 parts water (optional antifungal treatment during curing).
- ● Hygrometer & thermometer – To monitor humidity and temperature in your drying space for optimal curing conditions.
- ● Labeling tags & marker – To label varieties (e.g., Yellow, Red, or White) and harvest dates if storing multiple types.
Step-by-Step instructions for harvesting onions at home
Here's how I harvest onions for perfect dry-cured bulbs every season—no guesswork, just reliable storage.
🌱 Step 1: Wait for the Right Visual Cues
Harvest onions when the tops turn completely brown and fall over naturally. This usually happens about 3-4 weeks after the flowers (if any) have died back. You'll see the tops look crispy and papery rather than green and fresh. If you pull them too early, the bulbs won't store well.
Gently loosen the soil around the base with a fork or trowel, lifting the onions carefully to avoid bruising. Leave the roots attached—they help draw moisture from the bulb during curing. If you see any bulbs with soft spots or signs of rot, harvest those immediately and use them first.
💧 Step 2: Cure the Onions Properly
Lay the harvested onions in a single layer in a dry, well-ventilated spot with temperatures between 65-75°F and low humidity. A garage, shed, or even a screened porch works well. Avoid direct sunlight, which can cause the bulbs to dry out too quickly and turn papery.
Curing takes 2-3 weeks. You'll know they're ready when the necks (the part between the bulb and the roots) dry out and turn papery. If you see any mold or soft spots during curing, remove those onions immediately to prevent spoilage of the whole batch.
✂️ Step 3: Trim and Store for Long-Term Use
Once cured, trim the roots back to about ½ inch and cut the tops down to 1 inch above the bulb. This reduces moisture loss and prevents rot. Handle the onions gently—bruised bulbs won't store well. Store them in a mesh bag, open cardboard box, or paper bag to allow airflow.
Keep the onions in a cool, dark, dry place (like a pantry) where the temperature stays between 40-50°F. Check them periodically—healthy onions should stay firm and dry. If you notice any softening or sprouting, use those first. Properly stored, your onions should keep for 6-12 months.
⏰ Step 4: Monitor and Rotate Your Stock
Label your onions with the harvest date so you know which ones to use first. The oldest onions should go first to prevent waste. If you notice any bulbs sprouting or developing a musty smell, use them immediately—they won't keep well beyond that point.
For extra-long storage, you can also braid or hang onions in small bunches. This traditional method works especially well for varieties like red onions, which store beautifully when dried this way. Just tie them in small groups of 3-5 bulbs and hang them in a dry, dark place.
Tips & tricks for perfect onion harvesting
Here's what nobody tells you about getting flawless, long-lasting onion bulbs—lessons I learned after years of trial and error.
Visual Cues Matter: In Step 1, when you see those crispy, papery brown tops, that's your exact cue to harvest. I used to pull onions too early because the tops weren't fully brown, and those never stored well. The bulbs need that full 3-4 weeks after flowering to develop proper storage qualities. If your onions have any green still showing, wait a few more days.
Gentle Handling is Critical: When loosening those onions in Step 1, treat them like fragile glassware. I learned this the hard way after bruising a whole batch—those damaged spots rot during curing. Leave those roots attached during harvest; they're not just for looks—they help pull moisture out of the bulb during the curing process. Think of them as nature's own dehydrator.
Curing Conditions Count: That 65-75°F range in Step 2 isn't just arbitrary—it's the sweet spot for proper moisture evaporation without drying out too fast. I've ruined batches by leaving them in direct sunlight (they turned papery and tough) and by curing in humid conditions (they developed mold). A screened porch with afternoon shade works perfectly—just make sure that airflow is steady.
Pro Tips for Harvest Onions At Home
- Here's what nobody tells you about getting flawless, long-lasting onion bulbs—lessons I learned after years of trial ...
- Visual Cues Matter: In Step 1, when you see those crispy, papery brown tops, that's your exact cue to harvest. I used...
- Gentle Handling is Critical: When loosening those onions in Step 1, treat them like fragile glassware. I learned this...
Frequently asked questions
Got questions about harvesting onions at home? You’re not alone! Here are some of the most common concerns—and their answers—to help you master the process like a pro.
When is the best time to harvest onions?
The ideal time to harvest onions is when the tops turn yellow and flop over naturally—usually 10–14 days after they stop growing. If you wait too long, the bulbs may split or rot. For green onions, snip them when they’re 6–8 inches tall; they keep growing!
How do I know if my onions are ready for storage?
Onions are storage-ready when the neck (the part connecting the bulb to the stem) is 1/4-inch thick and papery dry. If it’s still green or moist, give them 1–2 more weeks in the sun. Store them in a cool, dry place (like a mesh bag) for long-term keeping.
Should I cut the tops before harvesting?
Yes! Trim the tops to 1 inch above the bulb with clean shears or scissors. This prevents disease and helps the neck dry faster. Never cut the roots—leave them intact to protect the bulb during curing.
What if it rains before my onions are fully dry?
Rain can delay drying, but don’t panic! Move onions to a covered, well-ventilated area (like a porch or garage) to finish curing. If they get wet during storage, they’ll spoil faster—so act quickly to save your harvest.
Can I harvest onions in the fall if I planted them late?
Late-planted onions (like short-day varieties) may mature slower but can still be harvested in late fall or early winter if your climate allows. Just ensure they’re fully cured before storing. If frost threatens, pull them early and dry them indoors under a fan.
Wrapping up and next steps
Harvesting onions at home is a rewarding experience that ensures fresh, flavorful bulbs ready for storage or immediate use! 🌱 By following the right timing, techniques, and drying methods, you’ll enjoy homegrown onions that last all year.
Whether you’re a seasoned gardener or just starting, this process is simple and satisfying—so grab your gloves and get ready to savor the fruits of your labor!
Now that you’re equipped with the knowledge, why not share your harvest with friends or experiment with new recipes? Try drying extra bulbs for long-term storage or gifting them to neighbors. Happy gardening—and may your onion crop be bountiful! 🌟