
Landscaping
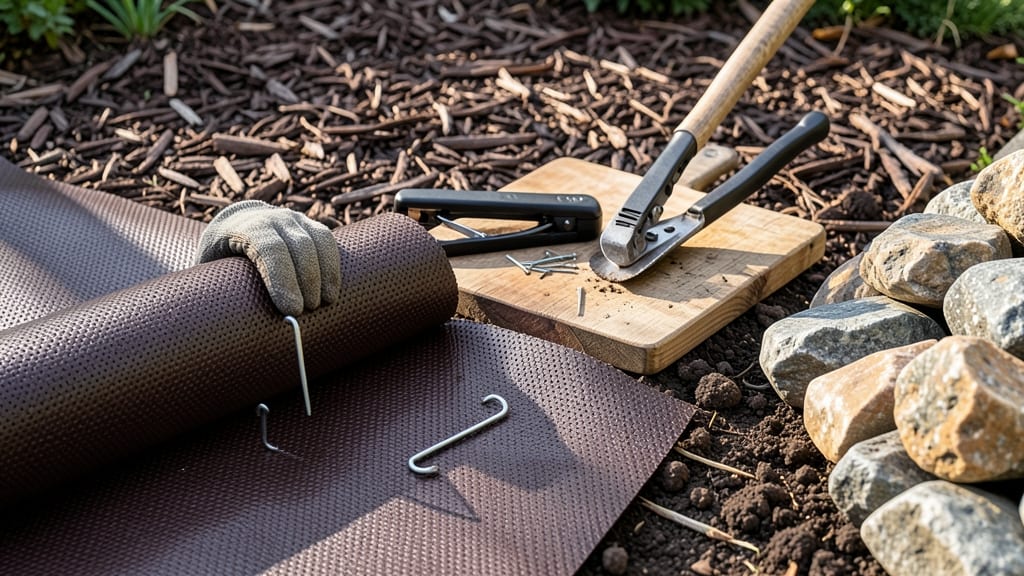
How to hold down landscape fabric properly is the key to keeping your garden looking sharp—no more watching it billow like a sail in the wind. 🌱 I’ve seen it shift, wrinkle, and even rip—until I learned these foolproof ways to keep it pinned down for good. The secret isn’t just weight; it’s the right combo of stakes, edging, and smart placement that makes the difference.
Heavy rocks, metal edging, or U-shaped landscape stakes are your best bets—but they’re only half the battle. I’ve buried stakes at 45-degree angles for extra grip, used galvanized pins for longevity, and even layered fabric under mulch for double protection. The goal? Zero shifting, even after heavy rain.
By the time you’re done, your fabric will stay put for years, blocking weeds while letting water and roots breathe. No more digging up fabric mid-season or watching mulch spill into your garden beds. The payoff? A clean, low-maintenance landscape that stays neat and functional all year.
Works for flower beds, vegetable gardens, or even slopes—just adjust the stakes based on terrain. Let’s get that fabric locked in tight!
📚 In This Guide
- What you need
- Instructions
- Tips and common mistakes
- Wrapping up and next steps
What you need
- ● Landscape fabric: A roll of non-woven, breathable fabric (e.g., polypropylene or polyester), sized to cover your project area with at least 6–12 inches of overlap. Choose a weight of 3–6 oz per square yard for most applications.
- ● Stakes: Plastic or metal U-stakes (12–18 inches long) – 1 stake every 2–3 feet around the perimeter.
- ○ T-stakes (optional but great for corners or high-wind areas).
- ● Heavy edging: Galvanized steel, aluminum, or plastic landscape edging (12–18 inches deep) to create a barrier and weigh down the fabric. Measure your project’s perimeter and add 10% extra for cuts.
- ● Landscape staples or fabric-specific nails: Galvanized or stainless steel, ½–¾ inch long, to secure fabric to edging or stakes.
- ● Shovel or spade: For digging holes (2–3 inches deep) for stakes.
- ● Utility knife or scissors: For cutting fabric to size.
- ● Measuring tape: To ensure precise cuts and stake placement.
- ● Gloves and knee pads: For comfort and protection.
- ● Pebbles or gravel: A 2–3 inch layer over the fabric to weigh it down further (especially in high-traffic areas).
- ● Landscape fabric adhesive: For sealing seams or edges if staples aren’t enough.
- ● Heavy rocks or pavers: Place along edges or corners for extra stability.
- ● Ground cover plants: Mulch or low-growing plants (like clover or moss) to blend the fabric into your design.
Step-by-Step instructions for securing landscape fabric properly
Here's how I keep fabric from shifting or blowing away—no more wrestling with flimsy stakes.
🪴 Step 1: Choose the Right Fastening Materials
Start with landscape fabric stakes made of galvanized metal or heavy-duty plastic—they won't bend or rust over time. I use U-shaped stakes because they grip the edges better than straight pins. For borders, galvanized edging (like aluminum or steel) creates a clean, permanent barrier that doubles as a visual finish. Avoid cheap plastic pegs—they snap in wind.
Measure your fabric sections first. You'll need one stake every 2-3 feet along straight edges and extra stakes at corners where fabric naturally wants to curl. For slopes or high-wind areas, space stakes every 18 inches—fabric moves more where it's exposed.
💧 Step 2: Install Stakes Before Laying Fabric
Drive stakes first, then drape fabric over them. This prevents fabric from bunching as you work. Push stakes 3-4 inches deep into firm soil—shallow stakes pop out when you pull fabric taut. Use a mallet for rocky ground or clay; a hammer works for loose dirt. Leave 1-2 inches of stake above the fabric so you can adjust tension later.
For curved edges, bend stakes slightly before driving them in. I like to pre-bend them at a 10-degree angle toward the center of the curve—this keeps fabric smooth without wrinkles. Mark stake locations with a spray paint dot if your soil is dark; you'll thank yourself when you're not guessing where to drive next.
☀️ Step 3: Secure Fabric Tightly and Evenly
Pull fabric taut as you go, starting from the center and working outward. This prevents puckering at the edges. Use fabric clips (not staples—they tear fabric) to hold sections in place while you adjust. I like spring-loaded clips because they grip without crushing the material. For large areas, overlap fabric seams by 6 inches and secure both layers with stakes.
Check tension by lifting each section—it should feel firm but not stretched. Too-tight fabric tears; too-loose fabric shifts. If you see shadows or gaps between fabric and soil, drive additional stakes until the surface looks smooth. This is especially critical under mulch—uneven fabric creates air pockets that invite weeds.
✂️ Step 4: Add Edging for Extra Protection
For permanent installations, press galvanized edging into the ground along the fabric's perimeter. Use a rubber mallet to avoid damaging the fabric. Edging keeps fabric pinned down while creating a clean border. For slopes, anchor edging with landscape screws into the soil every 2 feet. I like L-shaped aluminum edging because it's lightweight but sturdy.
Cut edging to length with tin snips—don't bend it, or it'll warp. At corners, mitre the edges at 45 degrees for a professional finish. For extra hold, fill the trench behind edging with small rocks before pressing it into place. This locks it in permanently without digging deep holes.
⏰ Step 5: Maintain and Adjust Over Time
Check stakes every 3-4 months, especially after rain or wind. Replace any that pull out or bend. I keep a small bag of spare stakes buried near the project—no more scrambling to the hardware store when a storm hits. If fabric shifts under mulch, lift the mulch, re-tighten, and replace it. Mulch adds weight, so you'll need to add stakes every 12-18 inches in high-traffic areas.
For long-term projects, replace fabric every 5-7 years—UV degrades it faster than you think. When you do, remove old stakes completely to avoid rust stains. I mark the original stake locations with spray paint before pulling them, so I know exactly where to drive the new ones. This keeps your landscape looking neat and weed-free for years.
Tips & tricks for securing landscape fabric like a pro
These practical tips will help you avoid common mistakes and get a flawless, long-lasting installation every time.
Stake Placement Strategy: When installing stakes every 2-3 feet along straight edges, I like to create a staggered pattern—offset each row by 1-2 feet. This creates a stronger grid that resists wind better than a straight-line arrangement. For corners, always add an extra stake at each 90-degree turn, even if it feels like overkill. Fabric has a sneaky way of curling at corners, and these extra stakes prevent it from peeling back over time.
Fabric Tension Test: After pulling fabric taut in Step 3, do this quick tension check: Gently lift a corner and see if it springs back immediately. If it sags slightly, you need one more stake in that section. Too-tight fabric will tear when you walk on it, while too-loose fabric creates gaps where weeds grow. Aim for that perfect "firm but flexible" feel—like a well-stretched drumhead. This is especially important before adding mulch, which adds weight and can cause shifting.
Edging Installation Hack: For slopes, I've found that burying edging at a slight angle (about 10 degrees) toward the uphill side creates a natural catch for fabric. This prevents fabric from sliding downhill over time. When cutting edging to length, always cut on the inside of your marked line—this ensures the edging covers the fabric completely without leaving gaps. For extra grip, I like to use a small amount of outdoor construction adhesive along the bottom edge before pressing it into place.
Seasonal Maintenance Tip: In high-wind areas, I recommend adding temporary stakes during storm season—even if your initial installation seems secure. Use bright-colored stakes so they're visible when checking. For winter installations, drive stakes slightly deeper (about 4-5 inches) since frozen ground is harder and provides better grip. Always check stakes after heavy rain—they can loosen when soil becomes saturated.
Pro Tips for Hold Down Landscape Fabric
- These practical tips will help you avoid common mistakes and get a flawless, long-lasting installation every time.
- Stake Placement Strategy: When installing stakes every 2-3 feet along straight edges, I like to create a staggered pa...
- Fabric Tension Test: After pulling fabric taut in Step 3, do this quick tension check: Gently lift a corner and see i...
Frequently asked questions
Got questions about keeping your landscape fabric in place? You’re not alone—here are the most common concerns and straightforward answers to keep your project on track!
What’s the best way to secure landscape fabric on a slope?
For slopes, use heavy-duty U-shaped landscape staples or galvanized nails every 12–18 inches along the edges. Add landscape fabric pins or plastic stakes in the center to prevent shifting. For steeper grades, layer fabric with soil retention mats or geotextile fabric for extra grip.
Can I hold down landscape fabric without stakes or pins?
Yes! Try these stake-free methods:
- Rocks or pavers: Place heavy stones (2–3 inches thick) over the fabric in a grid pattern.
- Mulch: Apply 3–4 inches of wood chips or pine straw—it weighs down fabric while suppressing weeds.
- Landscape edging: Install plastic, metal, or concrete edging to pin fabric edges in place.
How often should I check or re-secure landscape fabric?
Inspect your fabric every 3–6 months (or after heavy rain/storms). Wind, erosion, or settling soil can loosen staples or edges. Re-secure any lifted areas immediately—especially in spring and fall, when weeds are most aggressive. A quick 10-minute check can save hours of weed-pulling later!
Will landscape fabric hold down better with or without soil on top?
For optimal stability, cover fabric with 1–2 inches of soil before adding mulch or plants. Bare fabric is prone to blowing away; soil anchors it while allowing roots to penetrate. Skip the soil layer only in rock gardens or xeriscapes, where rocks or gravel will suffice.
What do I do if my landscape fabric keeps shifting after installation?
If fabric moves, start by removing and re-laying it—don’t just re-stake! Overlap seams by 6–12 inches and use more staples/stakes (aim for 1 every 12 inches). For stubborn areas, add a second layer of fabric under high-traffic spots or where soil erosion is likely. Pro tip: Water the soil lightly before securing to help it settle faster.
Wrapping up and next steps
Holding down landscape fabric doesn’t have to be a headache—with the right tools and techniques, you’ll create a durable, weed-free foundation that lasts for years. Whether you’re using landscape staples, edging, rocks, or even pavers, the key is securing that fabric firmly to prevent shifting or tearing.
Now that you’re armed with the best methods, it’s time to roll up your sleeves and transform your outdoor space!
Ready to take the next step? Grab your supplies, measure your area, and start laying that fabric like a pro! Your future self (and your garden) will thank you. 🌱✨