
How To
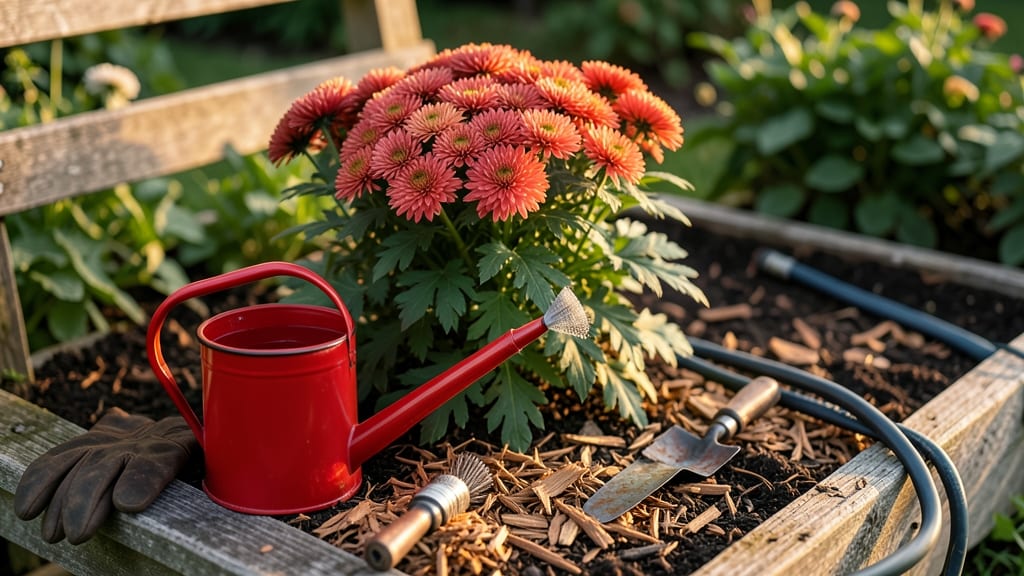
How to keep fall mums alive seems simple, but most gardeners lose them just as winter arrives—except this year, yours will thrive. The secret starts the moment those last blooms fade.
Most people cut back mums too late or mulch too thinly, leaving roots vulnerable. Cold-hardy varieties (like ‘Hardy Bonanza’) survive down to 10°F, but tender ones need extra protection. After blooming, trim stems to 3 inches and add 4-6 inches of mulch—this keeps roots warm without smothering the plant.
Watering is where most gardeners fail: too much drowns roots, too little stresses them. Keep soil evenly moist but not soggy, and avoid overhead watering in cold snaps. By spring, you’ll see fresh growth before your neighbors even notice their mums are gone.
For potted mums, move them to a sheltered spot before frost and wrap pots in bubble wrap. In warmer zones, a light winter pruning keeps them compact. Either way, your mums won’t just be a fall spectacle—they’ll come back stronger every year.
📚 In This Guide
- What you need
- Instructions
- Tips and common mistakes
- Wrapping up and next steps
What you need
- ● Healthy fall mums: 3–10 plants (depending on your space and goals). Choose hardy varieties like ‘Dynasity’ or ‘Mertie’ for cold tolerance.
- ● Containers (if potted): 1–2 drainage holes per pot (essential!)
- ● Size: 12–16 inches in diameter (1 plant per container or 3–5 plants in larger pots).
- ● Potting mix: Well-draining blend (50% peat moss/compost + 50% perlite/sand). Avoid heavy garden soil!
- ● Mulch: 3–4 inches of straw or shredded leaves (organic, weed-free).
- ● Fertilizer: Slow-release balanced fertilizer (10-10-10) or organic options like composted manure.
- ● Dosage: 1 tbsp per gallon of soil (sprinkle into the top layer).
- ● Pruning shears: Clean, sharp (sterilize with rubbing alcohol).
- ● Watering can or hose with nozzle: Fine mist setting for gentle watering.
- ○ Plant labels: Optional but helpful (write variety names or planting dates).
- ● Burlap or frost cloth: For lightweight winter protection (drapes easily over pots).
- ● Grow lights (LED, full-spectrum): If overwintering indoors (12–14 hours/day in low light).
- ● Thermometer: To monitor indoor temps (ideal: 40–50°F).
- ● Epsom salt: 1 tsp per gallon of water (monthly foliar spray for magnesium boost).
- ● Compost tea or fish emulsion: Occasional liquid feed for indoor plants (dilute to half-strength!).
Step-by-Step instructions for winter-proofing fall mums
Here’s how to transform your fall mums into hardy, repeat-blooming stars for next season.
Prune and Fertilize After the First Frost
Once your mums finish blooming and temperatures drop below 40°F, it’s time to give them a clean start. Use sharp pruners to cut back the stems by half their height, removing all faded flowers and seed heads. This prevents energy loss and encourages new growth. I like to make the cuts just above a leaf node or lateral bud—this ensures the plant knows exactly where to regrow from.
After pruning, apply a balanced, slow-release fertilizer (10-10-10 or similar) around the base of the plant. The goal is to provide nutrients for root development over winter, not a quick bloom boost. Water deeply right after fertilizing to help the granules dissolve into the soil. You’ll see the difference next spring when your mums bounce back stronger than ever.
Mulch Heavily to Insulate Roots
Mums are tender perennials, meaning their roots need protection from freezing temperatures. Once the ground cools to 50°F, spread a 4-6 inch layer of organic mulch (like shredded leaves, straw, or pine needles) around the base of the plant. Avoid piling mulch directly against the stems—leave a 2-inch gap to prevent rot. The mulch acts like a blanket, trapping heat and shielding roots from temperature swings.
I’ve found that mulching in late fall (after the first hard frost) gives the best results. Check the mulch layer in early winter—if it’s compacted or washed away by rain, add more to maintain that 4-6 inch thickness. This insulation is what keeps your mums alive through freezing nights and thawing days.
Protect from Harsh Winter Conditions
In regions with extreme winter temperatures (below 10°F), your mums will need extra shelter. After mulching, drape a breathable frost cloth or burlap sack over the plant, securing it with stakes or bricks to keep it from blowing away. This barrier blocks wind and snow while still allowing air circulation—critical for preventing mold or rot.
If you’re in a mild winter zone (where temperatures rarely drop below 20°F), you can skip the cloth and rely on mulch alone. The key is to monitor weather forecasts: if a hard freeze is predicted, add an extra layer of mulch or cover the plant before temperatures drop. You’ll know it’s working when the foliage stays green or turns a healthy brown (not black or mushy).
Water Sparingly Until Dormancy
Even in winter, mums need occasional hydration. Water the plants once every 2-3 weeks if there’s no snow cover, using lukewarm water to avoid shocking the roots. The soil should be slightly moist but not soggy—think of it as giving them a drink without drowning them. Overwatering in winter is a common mistake that leads to root rot, especially under thick mulch.
Stop watering entirely once the ground freezes solid. You’ll know it’s time when the soil feels hard as a rock when you press your thumb into it. Resume watering in early spring (when daytime temperatures consistently reach 50°F) to wake the roots from dormancy. A deep soak at this stage signals the plant to start growing again.
Prune and Feed for Spring Growth
As soon as the last frost passes and new growth appears (usually by mid-to-late March in most climates), it’s time to give your mums a fresh start. Cut back any dead or brown stems to 2-3 inches above the ground, using clean pruners. This removes last year’s growth and encourages fresh, vigorous shoots. I always prune on a dry morning—wet stems can harbor fungal diseases.
After pruning, apply a high-nitrogen fertilizer (like 20-10-10) to promote leafy growth. Water deeply right after to help the fertilizer absorb into the soil. Within 2-3 weeks, you’ll see new leaves emerging from the base of the plant—that’s your signal that the winter-proofing worked. From there, your mums will bloom again next fall, stronger and more reliable than ever.
Tips & tricks for perfectly winter-proofed mums
These simple yet game-changing strategies will help your mums survive winter like a pro—no more sad, frozen plants come spring.
Timing is Everything: The 6-8 week window before your first frost is your golden opportunity to prepare mums for dormancy. I've learned this the hard way—waiting until the last minute means plants aren't strong enough to handle winter stress. Mark your calendar now based on your local frost dates, which you can find through your local agricultural extension service or weather apps. This early prep gives roots time to harden and store energy for survival.
Pruning Precision: When trimming back your mums by one-third in Step 1, focus on removing only the oldest growth while preserving the younger, greener stems. These green stems contain more energy reserves and are better equipped to handle winter conditions. I always make my cuts just above a leaf node where new growth can emerge in spring. Avoid cutting into woody stems—they won't regrow and can leave your plant vulnerable to winter damage.
Fertilizer Strategy: That half-dose of balanced fertilizer in Step 2 isn't just about quantity—it's about timing and type. The slow-release formula ensures nutrients are available when roots need them most during early winter hardening. I've found that applying it in late afternoon prevents leaf burn from the sun's intensity. And remember, the 4-6 week window before frost is critical—this gives roots time to absorb nutrients before dormancy sets in.
Mulch Mastery: The 3-4 inch layer of organic mulch in Step 3 works wonders, but placement matters just as much as thickness. Keep that mulch 2-3 inches away from the stems to prevent moisture buildup that can cause rot. I've seen many gardeners make the mistake of piling mulch right against the stems, which creates a perfect environment for fungal diseases. Also, consider using straw over wood chips—it insulates better and breaks down more slowly, providing longer protection.
Pro Tips for Keep Fall Mums Alive
- These simple yet game-changing strategies will help your mums survive winter like a pro—no more sad, frozen plants co...
- Timing is Everything: The 6-8 week window before your first frost is your golden opportunity to prepare mums for dorm...
- Pruning Precision: When trimming back your mums by one-third in Step 1, focus on removing only the oldest growth whil...
Frequently asked questions
Got questions about keeping your fall mums thriving? You’re not alone! Here are some of the most common concerns—and expert answers to help you keep those vibrant blooms alive well beyond autumn.
Can I bring mums indoors to overwinter them?
Yes! If you live in a cold climate, you can move potted mums indoors (like a bright, cool room or garage) after the first frost. Just avoid drafts and keep them in partial shade—too much direct sunlight can stress them. Wait until spring to transplant them back outside.
What if my mums freeze or look wilted after winter?
Don’t panic! Trim back dead or brown foliage in early spring, then fertilize lightly. If roots are still alive (check by gently tugging on stems), they’ll bounce back. For extra insurance, mulch heavily in fall to protect roots from extreme cold.
Are there mums that survive winter better than others?
Look for hardy chrysanthemum varieties like ‘Dwarf Mums’ or ‘Hardy Garden Mums’ (e.g., ‘Bushy Mums’). These are bred to tolerate colder temps and often return year after year with minimal fuss. Ask your local nursery for cold-resistant options!
When is the best time to divide or repot mums for overwintering?
Divide or repot mums in early fall (before frost) or early spring (before new growth starts). Avoid disturbing them in late fall or winter, as roots are dormant and sensitive. Use well-draining soil and containers with drainage holes to prevent rot.
How do I know if my mums are getting too cold or too hot?
Watch for these signs:
- Too cold: Blackened stems, mushy leaves, or no new growth in spring.
- Too hot (indoors): Yellowing leaves, leggy growth, or buds that refuse to open.
Wrapping up and next steps
Keeping your fall mums alive through winter is totally doable with the right care—patience, the right timing, and a little TLC. Whether you’re bringing them indoors, mulching them snug, or overwintering them in pots, these tricks ensure those vibrant blooms return year after year. You’ve got this!
Ready to put your new skills to the test? Start by assessing your mums this week—check their health, gather supplies, and pick your overwintering method. Before you know it, you’ll be admiring those cheerful blooms again next fall! 🌸✨