
Planting
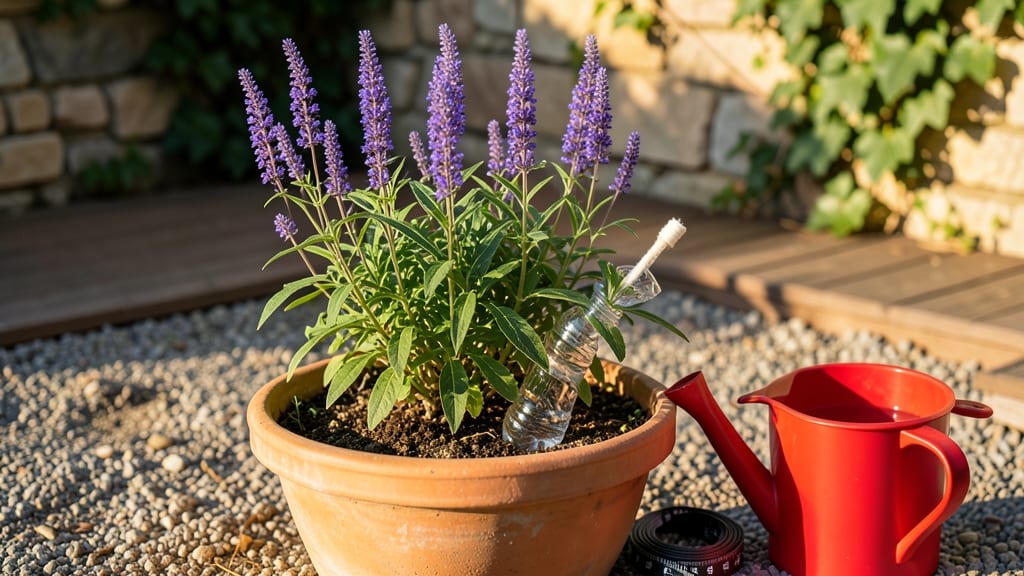
A plastic bottle and a thirsty plant changed everything—how to make a self-waterer that worked. The first time I built this system, my ferns stayed lush for three weeks without a single watering—no wilting, no brown edges, just steady growth.
It’s the gardening hack that finally lets you travel or forget to water without consequences.
You only need a clean plastic bottle, a small container, and some scissors. The bottle becomes a reservoir, the container holds your plant, and a simple wick (cotton rope or even an old sock) delivers water exactly where it’s needed.
No fancy tools, no expensive kits—just repurposed materials that work for everything from indoor herbs to outdoor tomatoes.
What you’ll end up with is a system that keeps roots consistently moist without drowning them, prevents soil-borne diseases from soggy conditions, and saves you from the guilt of a forgotten watering.
My snake plant thrived for six months on one setup, and the wicking method even works in sandy soil that drains too fast for regular watering.
Best part? It’s adaptable—add more bottles for larger pots, swap materials for different climates, and even turn it into a decorative planter. Here’s how to build yours in under 15 minutes with zero gardening experience needed.
📚 In This Guide
- What you need
- Instructions
- Tips and common mistakes
- Wrapping up and next steps
What you need
- ● Plastic bottle (16–32 oz) – Clean, empty, and with a tight-fitting cap (e.g., soda or water bottle).
- ● Wick material – Choose one: Cotton rope or twine (¼-inch thick, 12–24 inches long)
- ● Absorbent fabric strip (e.g., old T-shirt or microfiber cloth)
- ● Drill or sharp knife – For creating small holes in the bottle cap (⅛-inch diameter).
- ● Scissors or utility knife – To trim the wick or bottle if needed.
- ● Potting soil – Well-draining mix suitable for your plant type.
- ● Pot with drainage holes – Ensure it’s slightly larger than your plant’s current container.
- ● Multiple bottles – For larger pots or multiple plants (e.g., 2–3 bottles in a 12-inch container).
- ● Bamboo skewers or straws – To stabilize the wick and prevent bending.
- ● Waterproof sealant – To reinforce holes in the bottle cap (e.g., silicone or hot glue).
- ● Decorative elements – Paint, pebbles, or moss to camouflage the bottle for a polished look.
Step-by-Step instructions for building a DIY self-watering system
This method delivers consistent moisture without overwatering—ideal for busy gardeners or tropical plants that demand steady hydration.
Gather Materials and Prepare the Container
Start with a clean plastic bottle (1-2 liters works well) and a terracotta pot with drainage holes. You'll also need a utility knife, drill with small bit, scissors, and a wick material like cotton rope or thick yarn. The bottle will serve as your reservoir, while the wick draws water upward as needed.
Remove the bottle's cap and use the utility knife to cut a 1-inch square in the center of the cap. This opening will later hold your wick. Next, drill two small holes on opposite sides of the bottle, about 1 inch from the bottom. These holes will allow water to seep into the pot's soil through capillary action.
Assemble the Wick and Reservoir
Thread the cotton rope or yarn through the 1-inch square in the bottle cap, ensuring both ends extend equally. Knot one end securely to prevent slipping. The wick should be long enough to reach from the bottle's base to the pot's soil surface—typically 12-18 inches depending on your pot's depth.
Place the bottle upside-down into the terracotta pot, positioning the drilled holes at the bottle's base near the pot's drainage holes. Secure the bottle in place with a small amount of pebbles or gravel around its sides to stabilize it. The wick's free end should now hang loosely into the pot.
Fill the Reservoir and Plant
Add water to the bottle until it reaches just below the drilled holes—this ensures a steady, controlled release. Insert your plant into the terracotta pot, ensuring the wick's free end rests against the soil's surface. The wick will draw moisture upward as the plant consumes it, maintaining ideal hydration without soggy roots.
For best results, use a well-draining potting mix and avoid overpacking it around the plant's roots. The system works passively, but check the reservoir every 5-7 days to refill as needed. If the wick dries out completely, it may require 24 hours of soaking to restore capillary action.
Test and Adjust for Optimal Performance
Monitor the system for 24-48 hours to confirm the wick delivers water evenly. If the soil remains dry at the surface but damp below, your wick may need trimming or repositioning. Conversely, if the soil stays soggy, reduce the bottle's water level slightly—excess moisture can suffocate roots.
This DIY self-waterer works best for small to medium-sized plants in 6-12 inch pots. For larger containers, scale up by using a larger reservoir bottle or multiple wicks. The key is balancing water flow with your plant's specific needs—observe and adjust over time for foolproof hydration.
Tips & tricks for building a DIY self-watering system
A few clever adjustments can transform this simple system into a foolproof solution for your green thumb. Here's what I've learned after testing it with everything from fussy ferns to thirsty succulents.
Wick Material Matters: While cotton rope works well, I've found that terry cloth strips or even old T-shirts cut into strips absorb and release moisture more efficiently. The key is using material that's thick enough to hold significant water but thin enough to wick properly—about ¼-inch to ½-inch width works best. Test your wick by soaking it overnight; it should hold its shape without dripping when held horizontally.
Precision Drilling: The placement of those two small holes in Step 1 is more critical than it seems. Position them exactly opposite each other and 1 inch from the bottom to create balanced capillary action. If you don't have a drill, a heated nail or even a hot paperclip can melt small holes—just be patient and steady. For extra security, seal the edges with a tiny dab of hot glue to prevent unraveling.
Testing the Flow: Before planting, test your system's water flow by filling the bottle and observing how quickly water reaches the pot's soil. In 24-48 hours of monitoring, you'll notice whether the wick delivers water consistently or if adjustments are needed. If water pools at the bottom without rising, your wick may be too thick or the holes too low—simply trim the wick or reposition the bottle slightly higher in the pot.
Plant-Specific Adjustments: Succulents and cacti need far less frequent watering than tropical plants, so for these, reduce the bottle's water level to just ½ inch below the holes and check the reservoir every 10-14 days. For moisture-loving plants like ferns or peace lilies, keep the water level closer to the holes and monitor every 5 days. The same system adapts beautifully—just tweak the water volume and frequency based on your plant's thirst level.
Pro Tips for Make A Plant Self Waterer
- A few clever adjustments can transform this simple system into a foolproof solution for your green thumb. Here's what...
- Wick Material Matters: While cotton rope works well, I've found that terry cloth strips or even old T-shirts cut into...
- Precision Drilling: The placement of those two small holes in Step 1 is more critical than it seems. Position them ex...
Frequently asked questions
Got questions about DIY plant self-waterers? You’re not alone! Here are some of the most common concerns—and their easy solutions—to keep your green friends thriving with minimal effort.
How often should I refill the water reservoir?
Refill frequency depends on your plant’s thirst and climate. Most self-waterers need a top-up every 1-3 weeks, but monitor soil moisture—if it’s bone-dry, increase refills. Desert plants (like succulents) may only need water monthly, while tropical plants (like ferns) might need weekly checks. Pro tip: Use a clear bottle for the reservoir to eyeball water levels easily!
Will this work for all types of plants?
Self-waterers are great for most houseplants, herbs, and even small veggies (like basil or lettuce), but avoid heavy drinkers like monstera or bamboo palms—they may outgrow the system. Succulents and cacti? Skip this—overwatering is their kryptonite! Stick to plants with moderate water needs for best results.
What if my self-waterer leaks or stops working?
Leaks usually mean the wick or tube is clogged or the bottle isn’t sealed tightly. Troubleshoot:
- Check the wick/tube for blockages (rinse with water if needed).
- Ensure the bottle cap is airtight—add a thin layer of silicone sealant if gaps exist.
- For stubborn leaks, try a second wick or switch to a capillary mat system.
Can I use a self-waterer for outdoor plants?
Yes, but with caution! Outdoor setups need weatherproofing—use a food-grade plastic bottle (not glass) and secure it in a pot or bury it near roots. Avoid direct sun to prevent algae growth in the water. For container gardens, place the reservoir in the shade and refill more often (evaporation speeds up outside!). Warning: Pests like mosquitoes may breed in stagnant water—add a bayer larvicide tablet if needed.
Is a DIY self-waterer cheaper than buying one?
Absolutely!
A store-bought self-waterer (like Lechuza or Blum) can cost $30–$50+, while DIY versions use repurposed bottles, wicks, and pots—often under $5. Plus, you customize it for your plant’s needs! Just ensure your materials are non-toxic (no BPA plastics) and food-safe if using for edibles.
How do I adjust for winter vs. summer?
Plants slow down in winter, so reduce refills (check soil every 2–3 weeks). In summer, evaporation and thirst increase—refill weekly and place the reservoir in cooler spots (like a basement or shaded shelf). For heatwaves, add ice cubes to the reservoir to slow water release and keep roots cool.
Wrapping up and next steps
Creating your own plant self-waterer is a simple, budget-friendly way to keep your greens thriving with minimal effort! 🌱 With just a few household items and a little creativity, you’ve unlocked a hands-off solution for busy plant parents.
Whether you’re a seasoned gardener or a beginner, this DIY project proves that sustainable care doesn’t have to be complicated.
Now that you’re equipped with the know-how, why not take it a step further? Experiment with different container sizes, add decorative touches, or even build a multi-plant system. Your plants—and your schedule—will thank you! 🌿✨