
Landscaping
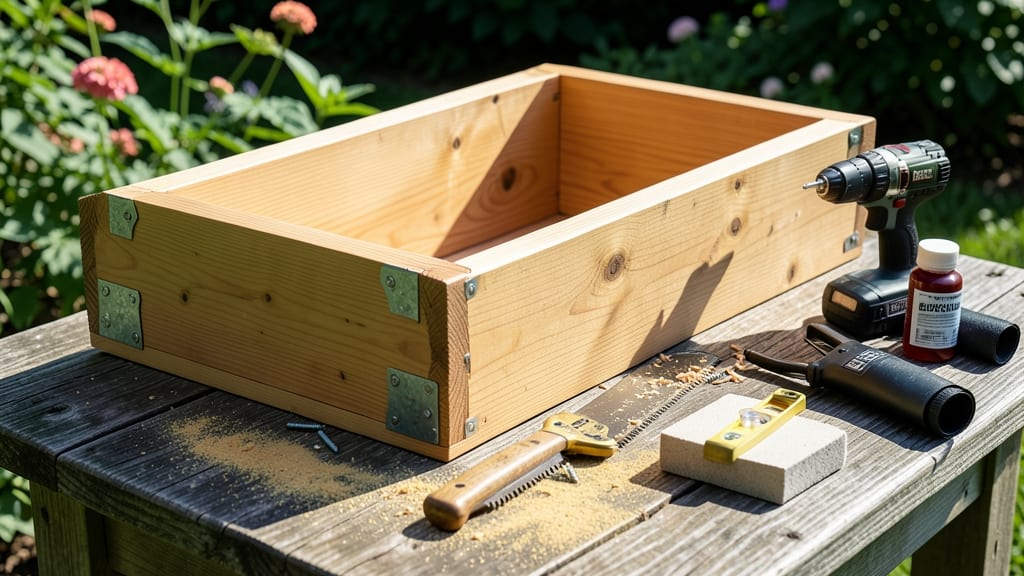
That first whiff of fresh cedar as you sand the wood—it means your garden’s about to get an upgrade with how to make a planter box out of wood. 🌿 Building a wooden planter box transforms bare soil into a defined, lush space where herbs, veggies, or flowers can thrive.
The best part? You’ll have it finished in 2 hours with just basic tools and a few key materials.
Cedar lasts years without rotting, while pine keeps costs low—both are great choices. Start with 2x6 boards for sides (10–12 inches deep) and 2x8s for the bottom, cutting lengths to fit your space.
A 45-degree angle on corners adds durability, and pre-drilling screws prevents splitting. Forget fancy designs at first—focus on drainage holes (1/4-inch) and a sturdy base to keep roots happy.
By the time you’re sealing the wood with outdoor paint or stain, you’ll already see how this simple project elevates your garden. The right dimensions mean no wasted space—herbs fit in 6-inch depths, while tomatoes need 12+ inches to sprawl.
Plus, built-in shelves or trellises turn it into a multi-level showstopper.
Common mistakes? Skipping the waterproof liner (landscape fabric works) or using untreated wood—both lead to warping. Pro tip: Add gravel at the bottom for extra drainage. Once filled, your planter won’t just look great—it’ll stay productive for seasons with minimal upkeep.
📚 In This Guide
- What you need
- Instructions
- Tips and common mistakes
- Wrapping up and next steps
What you need
- ● Wood: Untreated cedar, redwood, or pressure-treated pine (recommended for durability). 4 pieces of 2×6 or 2×8 lumber, cut to your desired length (e.g., 4 ft, 6 ft, or 8 ft for standard planter boxes).
- ○ Optional: Pre-cut lumber from a home improvement store for convenience.
- ● Exterior wood screws: 2.5-inch or 3-inch galvanized screws (resistant to rust). Aim for 12–20 screws per box, depending on size.
- ● Wood glue: Waterproof or exterior-grade glue (for added reinforcement).
- ● Landscape fabric: 1–2 ft wider than your box dimensions (to prevent weeds and retain moisture).
- ● Drill bits: Matching sizes for your screws (usually #8 or #10).
- ● Measuring tape (for precise cuts).
- ● Circular saw or miter saw (for clean, angled cuts).
- ● Drill/driver (with screw attachment).
- ● Speed square (for marking angles).
- ● Safety gear: Gloves, safety glasses, and ear protection (because safety first!).
- ● Sandpaper (80–120 grit) (to smooth rough edges).
- ● Level (to ensure your box is straight and even).
- ● Wood stain or sealant: Exterior-grade paint or stain to protect wood and match your garden decor.
- ● Corner braces or metal brackets (for extra stability on larger boxes).
- ● Drainage holes: 1/4-inch drill bit (if you want to add them for excess water flow).
- ● Pebbles or gravel (for the bottom layer of your planter).
Step-by-Step instructions for building a wooden planter box
Here’s my go-to method for crafting a sturdy, long-lasting planter box that elevates your garden beds while keeping weeds at bay.
🪴 Step 1: Measure and Cut Wood to Size
Start by sketching your planter’s dimensions on paper—most rectangular boxes work best with a 4:1 length-to-width ratio for stability. For a 24-inch-wide box (standard for most plants), aim for a 96-inch length if you want four equal sections (each 24 inches long). Use a tape measure to mark cuts on 2x6 or 2x8 pressure-treated lumber—this width ensures depth for healthy root systems.
Cut the wood with a circular saw or miter saw, wearing safety goggles. I like to clamp a straightedge guide to prevent wobbly cuts. For corners, you’ll need 45-degree angles on the ends of your long pieces to create a seamless join. Double-check measurements before cutting—wood expands slightly when wet, so plan for a ½-inch overage if your box will sit directly on soil.
🔨 Step 2: Assemble the Frame with Corner Brackets
Lay out your cut pieces to visualize the layout. For a 24-inch-wide box, the sides should be 8-12 inches tall (taller walls prevent soil spillage). Use exterior-grade corner brackets (not nails alone—they rust) to reinforce joints. Place a bracket at each corner, aligning the edges flush, then pre-drill ½-inch holes to avoid splitting the wood.
Drive 3-inch deck screws through the brackets into the wood, countersinking slightly to keep hardware hidden. I like to pre-assemble the frame on the ground, then lift it into place—this makes adjustments easier if the fit feels off. For extra durability, add a horizontal support beam midway up the sides if your box exceeds 12 inches in height.
🪴 Step 3: Line the Interior and Add Drainage
Before filling with soil, line the interior with landscape fabric to block weeds and improve drainage. Staple the fabric to the inside edges, leaving a 2-inch overhang at the bottom. Cut ½-inch drainage holes in the fabric along the bottom corners—this prevents waterlogging while keeping roots contained.
For a 24-inch-wide box, you’ll need about 3 cubic feet of soil per foot of length (e.g., 9 cubic feet for a 3-foot section). I mix equal parts potting mix and compost to ensure fertility. Add a 1-inch layer of gravel at the bottom if your site has poor drainage—this extra step saves plants from root rot in heavy clay soils.
✂️ Step 4: Secure the Box and Finish Edges
Once assembled, weigh down the box temporarily with bricks or sandbags to test stability. Adjust the corner brackets if the frame shifts. For a polished look, sand rough edges with 80-grit sandpaper, then apply outdoor-rated wood stain or paint to protect against moisture. Avoid sealing the interior—this traps excess humidity and invites mold.
Here’s the thing—most planter boxes sag over time. To prevent this, screw metal strapping horizontally across the middle of the sides before adding soil. Bury the box 1-2 inches deep in the ground along the edges, backfilling with soil to lock it in place. This buried edge also deters burrowing pests like voles.
Tips & tricks for building a sturdy wooden planter box
These practical insights will help you avoid common pitfalls and create a planter box that lasts for years.
Precision Cutting: Use a pencil to mark your cuts on the wood, then double-check with your tape measure before making any saw cuts. I’ve learned this the hard way—once I cut a 24-inch piece that was actually 23.5 inches, forcing me to start over. For the 45-degree corner cuts, a miter saw with a fine-tooth blade gives the cleanest results. If you don’t have one, a handsaw with a crosscut blade works too, but take your time to avoid splintering.
Bracket Placement: When assembling the frame in Step 2, position the exterior-grade corner brackets so the screws enter the wood at a 45-degree angle from the inside. This hidden approach creates a seamless look while maintaining maximum strength. For extra stability, add a second bracket midway up the sides if your box will be taller than 12 inches—this prevents racking over time. I’ve seen many DIY planter boxes fail because of this oversight.
Drainage Strategy: The ½-inch drainage holes in the landscape fabric might seem small, but they’re crucial. If your site has particularly heavy clay soil, consider adding a second layer of fabric with larger holes (about ¼-inch) at the very bottom. This creates a two-stage drainage system that works better than gravel alone. For the soil mix, I’ve found that adding a handful of perlite to the potting mix improves aeration without sacrificing fertility.
Long-Term Stability: The metal strapping mentioned in Step 4 is your secret weapon against sagging. For extra peace of mind, use galvanized steel strapping rated for outdoor use—it won’t corrode like regular metal. When burying the box, dig a trench slightly wider than the box’s base, then backfill with a mix of soil and compost. This creates a natural moat that further stabilizes the structure and prevents erosion around the edges.
Pro Tips for Make A Planter Box Out Of Wood
- These practical insights will help you avoid common pitfalls and create a planter box that lasts for years.
- Precision Cutting: Use a pencil to mark your cuts on the wood, then double-check with your tape measure before making...
- Bracket Placement: When assembling the frame in Step 2, position the exterior-grade corner brackets so the screws ent...
Frequently asked questions
Got questions about building your own wooden planter box? Here are some of the most common ones—and their answers—to help you get started with confidence!
What’s the best type of wood for a planter box?
For outdoor durability, cedar, redwood, or pressure-treated pine are top choices. Cedar resists rot naturally, while redwood offers a polished look. Avoid untreated woods—they’ll warp or decay quickly. If budget is tight, pressure-treated lumber is a sturdy, affordable alternative.
How long does a wooden planter box last?
With proper sealing and maintenance, a well-built planter box can last 5–10 years. Cedar and redwood may outlast pressure-treated wood due to their natural resistance. Reapply non-toxic wood sealant every 1–2 years to extend its life, especially in rainy or humid climates.
Do I need special tools to build a planter box?
Basic tools like a circular saw, drill, screwdriver, and measuring tape are essential. A jigsaw helps with curved edges, and clamps keep pieces steady while assembling. Rent or borrow tools if you don’t own them—many hardware stores offer tool rentals for DIY projects.
Can I make a planter box without screws?
Yes! Use corner brackets, pocket screws, or even strong wood glue for a screw-free design. For extra stability, mortise-and-tenon joints (a traditional woodworking technique) work well. Just ensure all connections are waterproofed to prevent rot.
What should I do if my planter box starts rotting?
Act fast! Remove any rotted wood, sand the area smooth, and apply a wood preservative or sealant. For severe damage, replace the affected planks. To prevent future rot, elevate the box slightly off the ground and ensure proper drainage with holes in the bottom.
Wrapping up and next steps
You’ve got everything you need to build a sturdy, stylish planter box that’ll elevate your garden in just a couple of hours! 🌱 Whether you’re a DIY beginner or a seasoned woodworker, this project is rewarding and customizable—perfect for adding charm to patios, balconies, or garden beds.
Now that you’re armed with tips, tools, and techniques, it’s time to grab your saw, break out those screws, and let your creativity grow.
Ready to take the next step? Start by sketching your design, gathering your materials, and—most importantly—enjoy the process! Once your planter box is complete, fill it with your favorite plants and watch your outdoor space transform. Happy building! 🛠️✨