
Planting
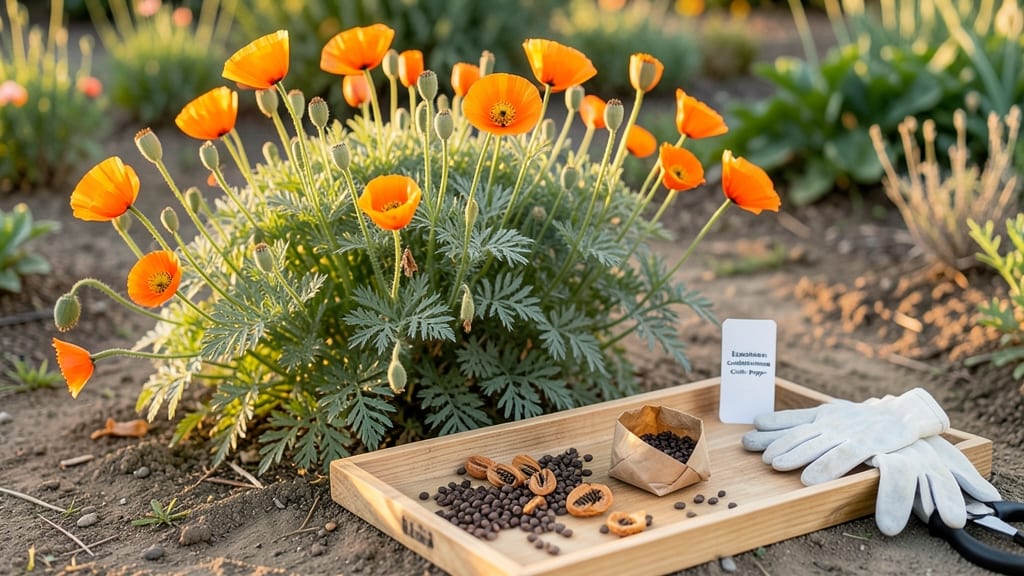
How to collect California poppy seeds arrives when pods turn papery and split open. 🌻 I’ve spent years watching these delicate blooms transform from vibrant orange to seed-filled treasures, and the timing is everything—harvest too early and you’ll get damp, moldy seeds; wait too long and they scatter into the wind.
Start by identifying mature pods—dry, brown, and slightly papery to the touch—then gently twist them from the stem. Use a clean paper bag to catch falling seeds (they’re tiny and fly away fast!), and avoid shaking plants to prevent contamination from soil or debris.
The best part? These seeds stay viable for years if stored properly.
Once collected, spread seeds on a dry surface to air-cure for a few days, then store them in a cool, dark place in a sealed container. By next spring, you’ll have a fresh batch ready to sprinkle across your garden—just like the wild hillsides that inspired them.
Pro tip: Harvest on a dry morning when dew has evaporated to keep seeds from sticking together. And if you’re replanting, scatter them lightly—they need sunlight to germinate, so don’t bury them!
📚 In This Guide
- What you need
- Instructions
- Tips and common mistakes
- Wrapping up and next steps
What you need
- ● California poppy plants (Eschscholzia californica): Mature plants with fully dried seed pods (typically late summer to early fall).
- ● Pruning shears or sharp scissors: For cleanly snipping seed pods—opt for bypass-style shears to avoid crushing delicate pods.
- ● Brown paper bags or breathable fabric sacks: 2–3 medium-sized bags (12"–16" diameter) to collect pods and prevent moisture buildup.
- ○ Glove (optional but recommended): Lightweight gardening gloves to protect hands from prickly stems or thorns.
- ● Small paintbrush or soft-bristle brush: For gently dislodging seeds from pods (e.g., a makeup brush works perfectly!).
- ● Fine-mesh sieve or colander: A ¼-inch mesh sieve to separate seeds from chaff (e.g., a window screen in a pinch!).
- ● Air-tight storage containers: Glass jars or resealable plastic bags with silica gel packets (to absorb humidity).
- ● Dry weather: Harvest on a sunny, windless day when pods are fully brown and brittle (humidity >50% risks mold).
- ● Mature pods: Wait until pods split open naturally or are paper-thin and dry—usually 4–6 weeks after flowering.
- ● Clean workspace: A flat surface (like a tarp or baking sheet) to lay out pods and prevent seed loss.
- ● Patience: Seeds take 10–15 minutes per pod to extract thoroughly—rushing can damage viability!
- ● Labeling tags: For tracking seed varieties (e.g., “Orange Double Bloom – 2024”).
- ● Hair dryer (cool setting): To speed-dry pods if humidity is high.
- ● Magnifying glass: For inspecting seeds for pests or damage.
- ● Seed catalog or notebook: To log germination rates or notes on plant performance.
Step-by-Step instructions for harvesting California poppy seeds
Here's how I gather seeds from mature plants without wasting a single golden treasure.
🌱 Step 1: Identify and Wait for Mature Seed Pods
California poppies produce distinctive round, papery seed pods that start green but turn brown when ready. Wait until at least 70% of pods on a plant have dried completely—they'll feel light and papery when tapped. Harvesting too early means immature seeds that won't store well.
I check pods daily in late summer (August-September) when they're fully dry but before they split open naturally. The stems should be brown and crispy—this is your signal the seeds are ready. Avoid harvesting in damp weather, as moisture ruins seed viability.
☀️ Step 2: Harvest Pods at Peak Dryness
Cut entire seed heads with 4-6 inches of stem attached using clean pruning shears. Hold a paper bag under the pods to catch falling seeds—California poppies release seeds easily when disturbed. Work on a dry, sunny day when humidity is low for best results.
If pods are still slightly green, place them in a brown paper bag with a rubber band and leave them in a warm, dry spot (like a garage) for 3-5 days to finish drying. Never use plastic bags—condensation will ruin the seeds.
💧 Step 3: Extract Seeds from Dry Pods
Once pods are completely dry, gently crush them with your fingers or a rolling pin over a clean sheet of newspaper. The papery husks will crumble while the seeds remain intact. I use a fine-mesh sieve to separate seeds from chaff—shake it gently over a bowl to catch the seeds while the debris falls through.
California poppy seeds are tiny and golden—about 1/8 inch long. You'll know you've done it right when you're left with a pile of uniform, shiny seeds and mostly empty husks. Store seeds in a paper envelope or airtight container in a cool, dark place.
⏰ Step 4: Clean and Store Seeds Properly
Spread seeds on a clean surface and use a small paintbrush to remove any remaining debris. I label each container with the harvest date—seeds stay viable for 2-3 years when stored properly. Keep them in a dry place below 70°F to prevent mold.
For best results, plant seeds immediately after cleaning. They germinate best when sown directly in well-drained soil and kept moist until sprouts appear. If storing long-term, add a packet of silica gel to the container to absorb any lingering moisture.
Tips & tricks for perfect California poppy seed harvesting
Real talk: Harvesting these delicate seeds takes patience, but these tricks will help you avoid common mistakes and maximize your golden yield.
Pod Selection: In Step 1, when checking pods for readiness, focus on the ones that feel hollow when tapped—this confirms they're fully dry inside. I've learned the hard way that even slightly green pods can yield seeds that won't store properly. The 70% rule is your friend: if most pods are brown and crispy, it's time to harvest.
Harvest Timing: The 3-5 day drying period in Step 2 is non-negotiable for slightly green pods. I keep mine in a garage with a small fan running to circulate air—this speeds up drying without risking moisture buildup. Never skip this step, even if you're eager to start processing!
Seed Extraction: When crushing pods in Step 3, work in small batches over newspaper to make cleanup easier. I use a rolling pin wrapped in a clean towel to avoid crushing seeds accidentally. For stubborn pods, place them in a paper bag and gently shake—this often releases seeds without needing to break them open.
Storage Wisdom: The 2-3 year viability mentioned in Step 4 only applies if you store seeds properly. I add a tiny pinch of silica gel to my containers (not the packets, just a small amount) to absorb any lingering moisture. Labeling containers with harvest dates is crucial—after 2 years, germination rates drop significantly.
Pro Tips for Collect California Poppy Seeds
- Real talk: Harvesting these delicate seeds takes patience, but these tricks will help you avoid common mistakes and m...
- Pod Selection: In Step 1, when checking pods for readiness, focus on the ones that feel hollow when tapped—this confi...
- Harvest Timing: The 3-5 day drying period in Step 2 is non-negotiable for slightly green pods. I keep mine in a garag...
Frequently asked questions
Got questions about collecting California poppy seeds? You’re not alone! Here are answers to the most common concerns—from timing to troubleshooting—to help you harvest those golden treasures like a pro.
When is the best time to collect California poppy seeds?
The ideal time is late summer to early fall (August–October), once the seed pods turn papery-brown and begin splitting open. Harvest them on a dry, sunny day when humidity is low to prevent mold. Morning collections are best—pods are crisp and easier to handle!
What if my pods are still green or haven’t opened?
Don’t rush it! Green pods need 2–4 more weeks to mature. If they’re fully closed but brown, gently twist them—seeds may still be inside. Pro tip: Leave a few pods on the plant to ensure full ripening. If pods rot or mold, they’re past their prime—remove them immediately to protect healthy ones.
Can I collect seeds from wild poppies, or should I grow them myself?
You can harvest wild seeds, but check local regulations first—some areas protect native plants. Growing your own from store-bought seeds is easier and more reliable. Wild seeds may carry pests or diseases. For guaranteed success, start with certified organic seeds from nurseries.
How do I store collected seeds for planting next year?
Clean seeds thoroughly, then store them in a paper envelope or breathable container (never plastic!) in a cool, dark, dry place (like a fridge). Label with the date—seeds stay viable for 2–3 years if kept dry. Freezing isn’t necessary unless you’re storing for >5 years.
What if birds or squirrels eat my seeds before I can collect them?
Cover pods loosely with fine mesh netting or a lightweight cloth to deter critters while allowing airflow. Harvest early in the morning when wildlife is less active. If pods are already damaged, save any intact seeds—birds often leave some behind!
| Quick Fix | Problem |
|---|---|
| Twist pods gently | Seeds stuck inside unopened pods |
| Spread pods in sunlight | Damp or moldy seeds |
| Use tweezers for fine seeds | Struggling to separate seeds |
Wrapping up and next steps
Collecting California poppy seeds is a rewarding way to preserve nature’s beauty—and your own golden harvest!
With the right timing, tools, and patience, you’ll transform dry pods into vibrant blooms for years to come. Now that you’re equipped with the know-how, why not share the joy? Try gifting seeds to fellow gardeners or planting them in a sunny spot to watch your garden glow with wild, cheerful poppies. 🌻✨
Ready to take the next step? Start small—even a handful of seeds can make a big difference. Happy harvesting!