
Planting
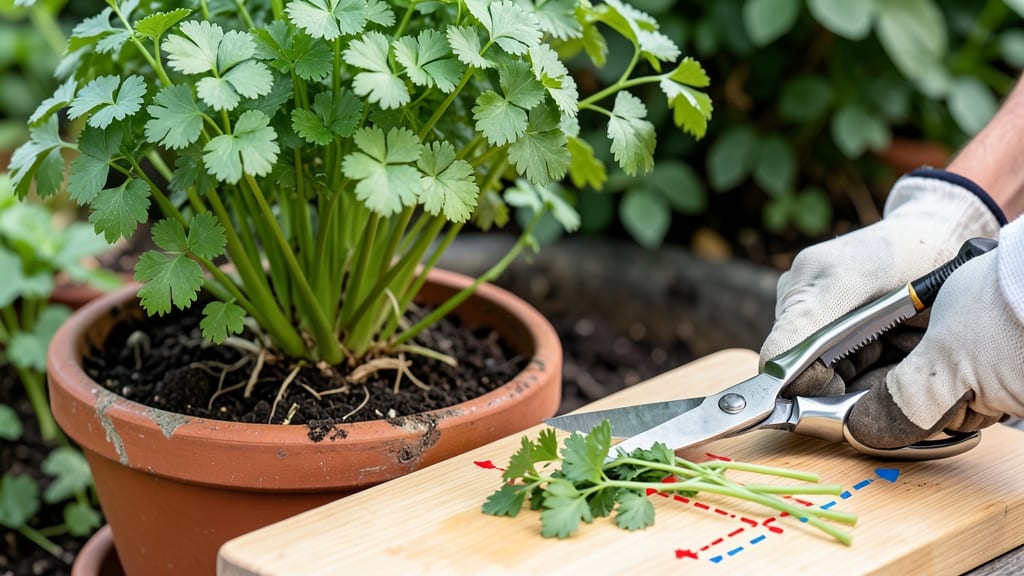
Learn how to cut herbs without killing the plant—the right technique means more leaves, less stress, and a garden that grows back stronger every time. ✂️ I’ve turned my herb garden from a patchy disappointment to a thriving, fragrant jungle by mastering the right way to harvest, one that keeps stems healthy and harvests endless.
Start by using clean, sharp scissors or pruners to avoid crushing stems. The golden rule? Cut just above a leaf node (where leaves meet the stem) to encourage new growth. For basil, snip the top leaves to promote bushiness, while mint responds better to trimming back by a third.
Timing matters too—morning cuts prevent wilting, and regular trims (every 4-6 weeks) keep herbs lush.
You’ll notice thicker stems and more leaves within weeks, not just more harvests but plants that stay vigorous for years. The secret is balance: never take more than a third of the plant at once, and always leave some leaves to feed the roots.
Even my black thumb herbs now thrive with this method.
Works for basil, mint, parsley, and more—just adjust the cutting angle and frequency. Here’s how to do it right without sacrificing a single stem.
📚 In This Guide
- What you need
- Instructions
- Tips and common mistakes
- Wrapping up and next steps
What you need
- ● Sharp pruning shears or scissors: Must be clean, sterilized, and sharp (avoid dull kitchen scissors—they crush stems!)
- ○ Gloves (optional but recommended): Nitrile or gardening gloves to protect your hands from sap, thorns, or dirt.
- ● Disinfectant (70% isopropyl alcohol or bleach solution): 1 part bleach to 9 parts water—sterilize tools before and after use.
- ● Small container or basket: A shallow tray or breathable bag to hold freshly cut herbs (avoid plastic bags to prevent wilting).
- ○ Labeling tags (optional): If you’re harvesting multiple herbs, use tags to identify them.
- ● Herb-growing journal: Track harvest dates, plant health, and growth patterns.
- ● Drying rack or hanging bundle: For preserving herbs long-term.
- ● Pest control spray (neem oil or insecticidal soap): Keep your plants healthy post-harvest.
Step-by-Step instructions for pruning herbs without damaging growth
Here's how to harvest your herbs for months without stunting their growth—or worse, killing them.
✂️ Step 1: Identify the Right Time to Cut
Wait until your herb plant has at least 4-6 sets of leaves before making your first cut. This ensures the plant has enough energy stored to regrow. For bushy herbs like thyme or oregano, look for woody stems—these are mature enough to trim. For leafy herbs like basil or parsley, wait until the plant has 3-4 inches of new growth since its last pruning.
Timing matters most in the morning after dew has dried but before midday heat. You'll see the leaves perking up and feeling crisp—this is when they're full of moisture and ready for harvesting. Avoid cutting in the evening; damp leaves take longer to dry and invite fungal issues.
🌿 Step 2: Use the Right Technique for Each Herb Type
For leafy herbs like basil, cilantro, or parsley, cut just above a pair of leaves where the stem meets the main branch. This encourages new growth from that node. I like to pinch off the top set of leaves with my fingers—it's gentler than snipping and prevents tearing. For woody herbs like rosemary or thyme, trim back 1/3 of the plant's height in early spring to encourage bushier growth.
Never cut into the woody base of the stem—this is where new growth originates. You'll know you're cutting too low when you see a thick, brown stem instead of a green, leafy section. For herbs like mint or oregano that spread aggressively, snip the stems at ground level to control their spread while still encouraging regrowth.
✂️ Step 3: Sterilize Tools and Make Clean Cuts
Before you start, wipe your pruning shears or scissors with rubbing alcohol to prevent spreading disease between plants. Dull blades tear stems instead of making clean cuts, which slows healing. You'll know your tools are sharp when they glide through the stem without crushing it. For delicate herbs like dill or chives, I use clean kitchen scissors instead of heavy-duty pruners to avoid damaging the stems.
Make cuts at a 45-degree angle just above a leaf node or bud. This increases the surface area for faster healing and prevents water from pooling on the cut, which can rot the stem. Avoid cutting into the center of the plant where stems are crowded—this restricts airflow and invites pests. Instead, focus on the outer growth for a healthier, fuller plant.
💧 Step 4: Water and Fertilize After Pruning
Give your herbs a deep watering immediately after pruning to help them recover. The roots need moisture to support new growth, especially if you've removed a significant portion of the plant. I water until I see excess moisture draining from the bottom of the pot—this ensures the roots get fully hydrated. For container-grown herbs, soak the soil until it's damp 1 inch down, but not soggy.
After a week, apply a balanced liquid fertilizer (like 10-10-10) at half strength to give the plant a nutrient boost. You'll notice new leaves emerging within 7-10 days if the plant is healthy. If you notice yellowing leaves after pruning, it's usually a sign of over-fertilizing—stick to the half-strength rule and water thoroughly to flush out excess salts.
☀️ Step 5: Monitor for Regrowth and Adjust Care
Place your pruned herbs in a spot with bright, indirect light for the first few days to reduce stress. If you're growing them outdoors, move them to a sheltered area for 24 hours before returning them to full sun. You'll see new growth within 2-3 weeks if the plant is healthy—look for fresh, vibrant leaves pushing out from the nodes where you cut.
If your herb isn't regrowing after 4 weeks, it might be struggling from over-pruning or poor soil. Check the roots for rot or pests, and repot if necessary. For herbs like basil that bolt (flower) quickly, pinch off any flower buds immediately—they sap energy from leaf production. With the right care, your herbs will keep producing lush, flavorful leaves for months.
Tips & tricks for healthy herb pruning
Real talk: I've killed more herbs than I care to admit by cutting them wrong. Here's what I learned the hard way about keeping your plants happy and productive.
Timing is Everything: The 3-4 week harvest schedule in Step 5 is your golden rule. I used to harvest whenever I needed leaves, and my basil would get leggy and sad. Now I mark my calendar and stick to the schedule—trust me, your plants will thank you with bushier growth and more flavorful leaves.
Tool Prep Matters: That 45-degree angle cut in Step 2 isn't just for show—it's about water runoff. I started sanitizing my tools with rubbing alcohol after every plant (even between basil and thyme) and noticed a huge difference in plant health. Diseased stems can spread quickly, so don't skip this step, even if it feels like overkill.
Seasonal Adjustments: When Step 5 mentions reducing harvests in late summer, I'm serious about this for perennial herbs. Last year, I ignored this for my rosemary and ended up with dead branches by winter. Now I give my woody herbs a break in fall and see fresh green growth come spring. It's like giving them a winter vacation!
Visual Cues for Healthy Cuts: Look for stems where the leaves meet the main branch—this is your 1/4 inch target from Step 2. I imagine cutting just above where two leaves join the stem (like a little V shape). This encourages new growth from that exact spot. For delicate herbs, pinch where the leaf meets the stem—no need for scissors at all.
Pro Tips for Cut Herbs Without Killing The Plant
- Real talk: I've killed more herbs than I care to admit by cutting them wrong. Here's what I learned the hard way abou...
- Timing is Everything: The 3-4 week harvest schedule in Step 5 is your golden rule. I used to harvest whenever I neede...
- Tool Prep Matters: That 45-degree angle cut in Step 2 isn't just for show—it's about water runoff. I started sanitizi...
Frequently asked questions
Got questions about keeping your herbs thriving while harvesting? You’re not alone! Here are answers to the most common concerns—so you can snip with confidence and keep your plants happy.
How do I know when it’s the best time to cut herbs?
Harvest herbs in the morning after the dew has dried but before the sun peaks (around 8–10 AM). This is when essential oils and flavors are at their strongest. Avoid cutting after rain or during extreme heat, as this can stress the plant. For leafy herbs like basil or cilantro, wait until they’ve grown at least 6–8 inches tall—this ensures regrowth without stunting.
Can I cut herbs too much? What happens if I over-harvest?
Over-harvesting weakens plants, leading to stunted growth, yellowing leaves, or even death. Never remove more than 1/3 of the plant at once, and avoid cutting into the woody stems (like rosemary or thyme). If you’ve already over-harvested, trim back lightly, water deeply, and fertilize with a balanced, organic option to encourage recovery. Patience pays off—herbs bounce back with proper care!
What’s the difference between pinching and cutting herbs?
Pinching
(removing the top sets of leaves with your fingers) encourages bushier growth and is great for young plants or herbs like mint or oregano. Cutting (using scissors or pruners) is better for mature plants and promotes longer, fuller stems. For herbs like basil, pinch early to shape the plant, then cut regularly to harvest. Think of pinching as training wheels and cutting as the main event!
My herb leaves turn yellow after cutting. Is this normal?
Mild yellowing near the cut area is normal—it’s the plant’s way of sealing wounds. However, if yellowing spreads or appears pale and mushy, you’re likely overwatering or cutting too close to the base. Fix it by:
- Reducing water slightly (let soil dry between waterings).
- Avoiding cuts within 1–2 inches of the stem base.
- Fertilizing lightly with a low-nitrogen option to boost recovery.
Are there any herbs I should never cut from the top?
Some herbs are sensitive to top-cutting and regrow better from side branches. Avoid cutting the very top of these:
- Rosemary: Prune sides to shape, but never trim the central leader.
- Thyme: Shear lightly after flowering to encourage new growth.
- Lavender: Cut back only after blooming to prevent woody stems.
Wrapping up and next steps
Cutting herbs the right way isn’t just about fresh flavors—it’s about keeping your plants thriving for years of harvests! 🌱 By mastering the one-third rule, using clean tools, and timing your cuts properly, you’ll encourage lush regrowth and avoid stressing your plants.
Now that you’re armed with these tips, there’s no reason not to enjoy a bountiful herb garden—so grab those shears and get pruning!
Your next step? Experiment with different herbs—try these techniques on basil, thyme, or rosemary to see which ones respond best. Happy harvesting! 🌿