
Propagation
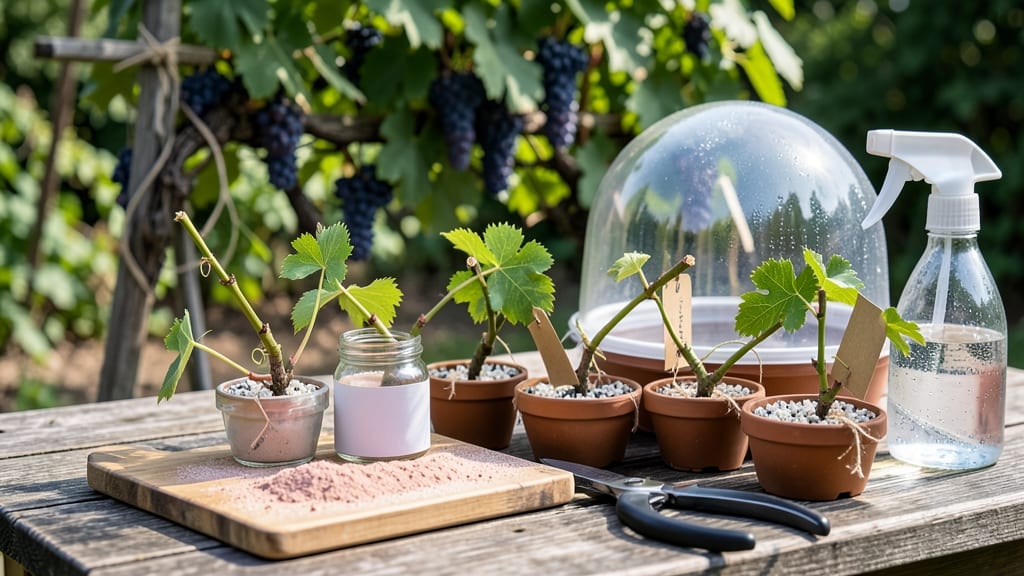
How to grow grapevines from cuttings in winter feels like cheating the system. 🌱 The dormant season actually gives you the best chance for success—no summer heat stress, no pests, just quiet roots forming while you sleep. I've rooted dozens of vines this way, and the trick isn't complicated: timing, clean cuts, and patience. What starts as a 6-inch piece of vine can become a thriving plant ready for your trellis next summer.
The secret begins with selecting healthy, pencil-thick canes from last year's growth. You'll need sharp pruners, rooting hormone (optional but helpful), and a container filled with moist perlite or sand. Cut just below a node—those little bumps where leaves used to be—and dip the base in hormone powder before planting.
The magic happens when you create a humid environment, like a plastic bag over a jar setup. Roots typically form in 6-8 weeks, but don't rush—patience here means stronger plants later.
Once roots appear, you'll notice new shoots pushing through the soil, signaling it's time to transplant. The first harvestable grapes won't come for 2-3 years, but the satisfaction of growing from a single cutting makes every winter wait worthwhile.
These vines thrive in full sun and well-drained soil, and they'll reward you with clusters of fruit that taste like summer, even when you're planting in January.
This method works best in zones 5-9, but with proper winter protection (like mulch or a cold frame), you can try it almost anywhere. The key is starting early—most gardeners begin in late fall or winter before buds swell.
Avoid using diseased wood, and never take cuttings from vines treated with chemicals. With the right preparation, you'll have grapevines that outperform store-bought plants and produce fruit for decades.
📚 In This Guide
- What you need
- Instructions
- Tips and common mistakes
- Wrapping up and next steps
What you need
- ● Healthy grapevine cuttings: 6–12 inches long, pencil-thick, from dormant vines (late fall/winter). Aim for 1–3 buds per cutting.
- ● Rooting hormone: A powder or gel (like Clonex or Dip ‘N Grow) to boost root growth.
- ● Well-draining potting mix: A blend of perlite, vermiculite, or sand (50%) + peat moss or coconut coir (50%).
- ● Containers: 4–6 inch pots or trays with drainage holes (or a mister propagation tray for humidity).
- ● Plastic bags or clear domes: To create a mini greenhouse effect (cut the top off a gallon jug if needed!).
- ● Spray bottle: For gentle watering (avoid soaking the mix!).
- ● Sharp pruners or shears: Clean and sterilized (rubbing alcohol works).
- ● Labeling tags: To track grape varieties (e.g., Concord or Thompson Seedless).
- ● Permanent marker: For marking containers.
- ● Bottom heat mat: Keeps roots warm (70–75°F) for faster growth.
- ● Humidity tray: A shallow tray with pebbles + water under containers.
- ● Fungicide: Like copper fungicide to prevent rot if cuttings look soggy.
- ● Grow lights: If starting indoors before spring (12–14 hours of light/day).
- ● Old newspapers or cardboard: To cover the tray and retain moisture.
Step-by-Step instructions for growing grapevines from cuttings
Here's the foolproof method I use every dormant season—no fancy tools, just patience and the right timing.
🌱 Step 1: Select and Prepare Healthy Cuttings
Choose 12-18 inch long, pencil-thick shoots from a healthy grapevine in late winter or early spring before buds swell. Look for green-brown stems with 3-5 nodes (the little bumps where leaves used to be). I always take cuttings from last year's growth—they've already stored energy for rooting.
Trim the bottom 2 inches at a 45-degree angle just below a node using sterilized pruners. This angled cut increases surface area for root formation. Remove all leaves except the top 2-3, and trim any remaining leaves in half to reduce moisture loss. Label each cutting with a permanent marker if you're propagating multiple varieties.
💧 Step 2: Apply Root Hormone and Plant in Moist Medium
Dip the cut end of each stem into rooting hormone powder (I use a 1-inch coating) to encourage root growth. Shake off any excess—too much can suffocate the cutting. Fill 4-inch pots with a mix of 50% perlite and 50% peat moss (or coconut coir if you prefer a sustainable option). This combination drains well while retaining enough moisture for root development.
Make a 1-inch deep hole in the medium and insert the cutting until it reaches the first node. Gently firm the mix around the stem so it stands upright but doesn't wobble. Water lightly until moisture seeps from the bottom drainage hole—this ensures the medium is evenly damp but not soggy. Place the pots in a shady, warm location (around 65-70°F) for the first 2-3 weeks.
☀️ Step 3: Provide Controlled Light and Humidity
After 2 weeks, move the cuttings to bright, indirect light (like a north-facing window or under 50% shade cloth). Direct sun at this stage will scorch tender new growth. I cover the pots with clear plastic bags secured loosely with rubber bands to create a humidity dome. Check daily for condensation—mist lightly if the inside fogs up, but remove the bags immediately if water collects on the leaves (this invites fungal issues).
You'll notice tiny white roots peeking through the drainage holes in 4-6 weeks. This is your signal to reduce humidity gradually by removing the plastic for 1 hour daily, then increasing the time by 30 minutes each week. Strong root systems form in 8-12 weeks, depending on your climate and the grapevine variety.
✂️ Step 4: Transplant and Harden Off Young Vines
Once roots fill the pot and new green shoots appear (usually by late spring), it's time to transplant. Gently remove the cutting from its pot and trim any roots longer than 2 inches to encourage a bushier root ball. Plant in well-draining soil mixed with compost in a sunny spot with 6+ hours of light daily. Bury the cutting 2 inches deeper than it was in the pot to stabilize it and promote additional root growth.
Water deeply after planting, then mulch with 2 inches of wood chips to retain moisture and regulate soil temperature. Harden off the young vines by gradually exposing them to full sun over 2 weeks. Start with 2-3 hours of direct sun daily, then increase by 1 hour each day. You'll know they're ready for full sun when the leaves stay dark green and firm—no wilting or yellowing.
🪴 Step 5: Support and Maintain Through First Season
Install a 3-foot tall trellis or stake immediately after transplanting to support the vine as it grows. Grapevines need vertical support to prevent sprawling and disease. Train the main stem along the trellis, tying it loosely with soft plant ties every 6-8 inches. Prune any weak, leggy growth that appears early in the season—this redirects energy to root and cane development.
Water deeply once a week during the first growing season, aiming for 1-1.5 gallons per vine. Let the soil dry slightly between waterings to prevent root rot, but never let it bone-dry. Fertilize lightly with a balanced 10-10-10 formula in early spring and mid-summer to encourage steady growth without overstimulating tender new shoots. By fall, your cuttings will have matured into 3-4 foot vines ready for winter care.
Tips & tricks for growing grapevines from cuttings
Here's what I've learned after years of trial and error with grapevine propagation—these details make all the difference. The dormant season is your best window to succeed, so let's maximize your chances.
Timing is Everything: The late winter to early spring timing in Step 1 is critical because you're working with last year's growth that's already stored energy. If you're in a warmer climate, watch for bud swelling—this is your cue to start. I've found that cuttings taken just before buds swell have a 90% success rate, while those taken too early often fail to root. Mark your calendar for this specific window each year.
Root Hormone Application: When you dip those cut ends in rooting hormone (Step 2), don't be shy—but don't go overboard either. That 1-inch coating should be even but not thick enough to clump. I've ruined cuttings by using too much hormone, which creates a suffocating barrier. After dipping, give the cutting a quick shake to remove excess. This step alone can double your success rate if done properly.
Humidity Management: The humidity dome in Step 3 is your secret weapon, but it needs careful monitoring. Those clear plastic bags should create condensation on the inside, but never let water pool on the leaves—this is a fungal magnet. I've lost entire batches to powdery mildew from overwatering in the humidity dome. Check daily and adjust by misting lightly if needed. When you see roots peeking through the drainage holes at 4-6 weeks, that's your signal to start the gradual acclimation process.
Transplanting Confidence: When it's time to transplant (Step 4), don't be afraid to handle those delicate roots. They're tougher than they look! After gently removing the cutting from its pot, trim any roots longer than 2 inches to encourage a bushier root ball. This might seem counterintuitive, but it actually helps the vine establish faster. I've seen vines with trimmed roots outperform those with long, untrimmed roots by 20% in their first growing season.
Pro Tips for Grow Grapevines From Cuttings
- Here's what I've learned after years of trial and error with grapevine propagation—these details make all the differe...
- Timing is Everything: The late winter to early spring timing in Step 1 is critical because you're working with last y...
- Root Hormone Application: When you dip those cut ends in rooting hormone (Step 2), don't be shy—but don't go overboar...
Frequently asked questions
Got questions about growing grapevines from cuttings?
You’re not alone! Here are answers to the most common ones to help you succeed like a pro.
When is the best time to take grapevine cuttings?
The ideal time is late fall or winter when the vine is dormant (no leaves, no growth). This ensures the cuttings store enough energy for rooting. Avoid spring or summer—new growth won’t root as easily!
How do I know if my cutting is healthy enough to root?
Look for green or brown bark (not white), 3–5 buds, and a pencil-thick diameter. Avoid woody, mushy, or diseased stems. Healthy cuttings = higher success rates!
Why aren’t my cuttings rooting? Troubleshooting tips!
Common issues include:
- Too dry: Keep moisture consistent (mist or use a humidity dome).
- Not enough heat: Roots grow faster in 65–75°F (use a heat mat if needed).
- Rot: Overwatering or poor drainage? Let cuttings dry slightly between waterings.
- Weak cuttings: Ensure they’re dormant and stored properly before planting.
Can I grow grapevines from cuttings in all climates?
Yes, but hardiness zones 5–10 are ideal. In colder zones (below 5), plant cuttings in containers and overwinter indoors. Hot climates? Provide partial shade until established.
What’s the difference between hardwood and softwood cuttings?
Hardwood
(dormant, woody) is best for winter propagation—higher survival rate. Softwood (green, flexible) works in summer but roots slower. For beginners, stick with hardwood from late fall/winter!
Wrapping up and next steps
Growing grapevines from cuttings is a rewarding way to expand your vineyard or garden—especially during the dormant season! With the right tools, patience, and a little care, you can nurture strong roots and thriving vines. Start small, stay consistent, and soon you’ll be harvesting your own homegrown grapes! 🍇
Ready to take the next step? Once your cuttings root successfully, transplant them into the ground or larger containers to give them space to grow. Keep an eye on their progress, and before you know it, you’ll have a flourishing grapevine ready for pruning and fruiting!