
How To
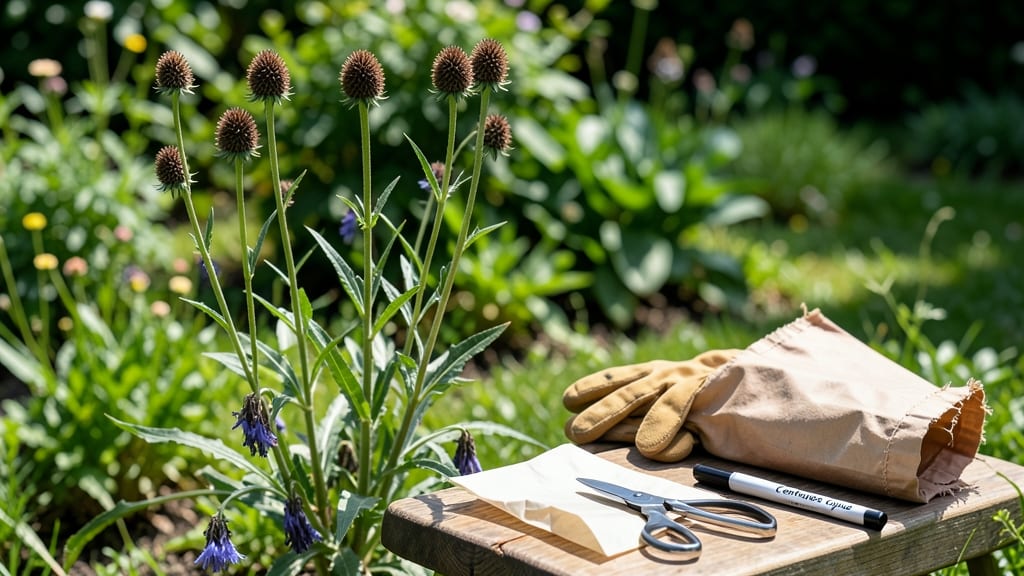
Harvesting bachelor button seeds 🌸 is the easiest way to ensure next year’s garden bursts with those cheerful blue blooms—without buying new packets.
But timing is everything: grab them too soon, and you’ll end up with weak, non-viable seeds; wait too late, and birds or wind might beat you to it. The secret lies in knowing exactly when those seed heads are ready to collect, and how to store them properly for planting.
If you’ve ever watched bachelor button flowers fade from vibrant blue to dry brown, you know the moment is fleeting. That’s why I’m sharing my foolproof method for harvesting at peak ripeness—when the seed heads turn crisp and papery, and the seeds rattle inside like tiny maracas.
This simple technique ensures you’ll have a stash of fresh seeds ready for spring planting, saving you money and guaranteeing those signature blooms year after year.
What most gardeners don’t realize is that proper drying and storage can make all the difference between seeds that sprout and ones that fail.
I’ll walk you through the exact steps—from cutting the right seed heads to storing them in a cool, dry place—so you can avoid common mistakes that ruin seed viability.
Whether you’re a beginner or a seasoned gardener, these tips will help you master the process and keep your bachelor button patch thriving for seasons to come.
Ready to turn this year’s flowers into next year’s garden? Let’s dive into the exact timing, tools, and techniques you need to harvest bachelor button seeds like a pro—so you can enjoy those cheerful blooms without the hassle of replanting every spring.
When to harvest bachelor button seeds for maximum viability
Harvesting bachelor button seeds at the right moment ensures high germination rates for next year’s garden. The key is watching for flower head maturity—when the petals drop and the seed heads turn brown and papery.
This usually happens 2-3 weeks after flowering, but timing varies by climate and region. In dry areas, seed heads may dry faster, while humid climates can delay the process by a week or more.
Start monitoring your bachelor button plants in late summer (around July to early September). Look for dried, brown seed heads that feel crisp to the touch. If you gently shake a seed head and hear seeds rattle inside, that’s your cue—they’re ready for harvest.
Waiting too long risks seed dispersal by wind or birds, while harvesting too early yields underdeveloped seeds that won’t sprout.
Here’s how to identify the perfect harvest window: - Flower petals have fallen off naturally. - Seed heads are completely brown, not green or yellow. - Seed heads feel dry and brittle, not moist. - Seeds easily detach when touched or shaken.
| Stage | Visual Cues | Action |
|---|---|---|
| Early Flowering | Petals fully open, blue/purple | Monitor for drying |
| Petal Drop | Petals fall; seed heads turn green-brown | Wait 1-2 weeks |
| Seed Maturity | Heads fully brown, crisp, seeds rattle | Harvest immediately |
| Overripe | Seeds scatter easily; heads may split | Seeds may be non-viable |
In hot, dry climates, bachelor button seeds often mature faster—sometimes as early as late July. Conversely, in cooler or humid regions, you might not see fully dried seed heads until mid-to-late September.
Pay attention to your local frost dates: if a hard frost is forecasted, harvest seeds at least 2 weeks ahead to avoid losing your crop.
Pro tip: Harvest on a dry, sunny day to minimize moisture exposure, which can cause mold or seed rot. Early morning is ideal—dew-free seed heads are easier to handle and dry faster.
If rain is in the forecast, harvest a few days early and finish drying indoors. Always use clean, sharp scissors or pruners to avoid damaging the seed heads.
One common mistake is harvesting seeds too soon because the flower heads look dry. Test for readiness by squeezing a seed head gently: if seeds don’t easily fall out, they’re not ready.
Overripe seeds may scatter before you can collect them, reducing your yield. Aim to harvest at least 80% of your seed heads before they release seeds naturally.
Climate also affects seed storage viability. In arid regions, seeds dry out quickly and can be stored sooner, while humid climates may require extended indoor drying (up to 2-3 weeks) to prevent mold.
If you’re unsure, harvest a few seed heads early as test samples—if they’re still moist after a week of drying, wait longer before harvesting the rest.
For large-scale harvesting, consider using breathable paper bags to collect seed heads directly from the plant. Label each bag with the harvest date and variety (if applicable) to track maturity. Store bags in a cool, dry place until fully dried, then transfer seeds to airtight containers for long-term storage.
Remember: bachelor button seeds are light-sensitive and short-lived. For best results, plant harvested seeds within 1-2 years to maintain high germination rates. With the right timing, you’ll enjoy self-sowing bachelor buttons for years to come—no extra planting required!
Step-by-step guide to collecting and storing bachelor button seeds properly
Harvesting bachelor button seeds at the right time ensures high germination rates and saves you money for next year’s garden. The key is to act before birds and wind scatter the seeds naturally.
I’ve learned that patience pays off—waiting too long means losing your hard-earned blooms to nature’s whims. Here’s my foolproof method for collecting and storing seeds like a pro.
Start by gathering your tools of the trade: a pair of clean scissors or pruning shears, a brown paper bag (to catch seeds), and a dry, shaded workspace.
Avoid plastic bags—they trap moisture and spoil seeds. I always work on a clean sheet of newspaper or cardboard to keep things organized and prevent cross-contamination with other seeds.
Now for the visual guide—here’s exactly how to do it right:
🌾 Step 1: Identify Mature Seed Heads
Look for completely brown, papery flower heads that feel crisp to the touch. The petals should have fallen off naturally, leaving only the seed-filled center. If you see green or partially colored heads, wait a few more days.
🌿 Step 2: Harvest at the Right Time
Cut the dry seed heads with clean shears, leaving a 1-inch stem. Do this on a dry, sunny morning when humidity is low. Avoid harvesting after rain—moisture ruins seed viability.
📜 Step 3: Dry the Seeds Properly
Hang the seed heads upside down in a well-ventilated, dry place (like a garage or shed) for 1-2 weeks. This allows seeds to fully dry and loosens them from the heads. Shake the heads gently over your paper bag to collect seeds.
💧 Step 4: Store Seeds Correctly
Once completely dry, transfer seeds to a paper envelope or breathable container. Label it with the harvest date and variety. Store in a cool, dark place (like a fridge) where they’ll stay viable for 2-3 years.
One common mistake I made early on was storing seeds in airtight containers—this traps moisture and causes mold. Always use paper or fabric bags to allow airflow. Another tip: if you’re unsure about seed maturity, do the "shake test".
Hold a seed head over your bag and give it a gentle shake. If seeds fall out easily, they’re ready!
For large-scale harvesting, consider leaving a few seed heads on the plant as a "sacrificial offering" to birds and pollinators. This balances your garden’s ecosystem while still giving you plenty of seeds to store.
Just don’t overdo it—aim to harvest at least 70% of the seed heads for your own supply.
With these steps, you’ll have a reliable seed stash for years to come, ensuring your bachelor button blooms return every season with minimal effort. Happy harvesting! 🌸