
Companion Plants
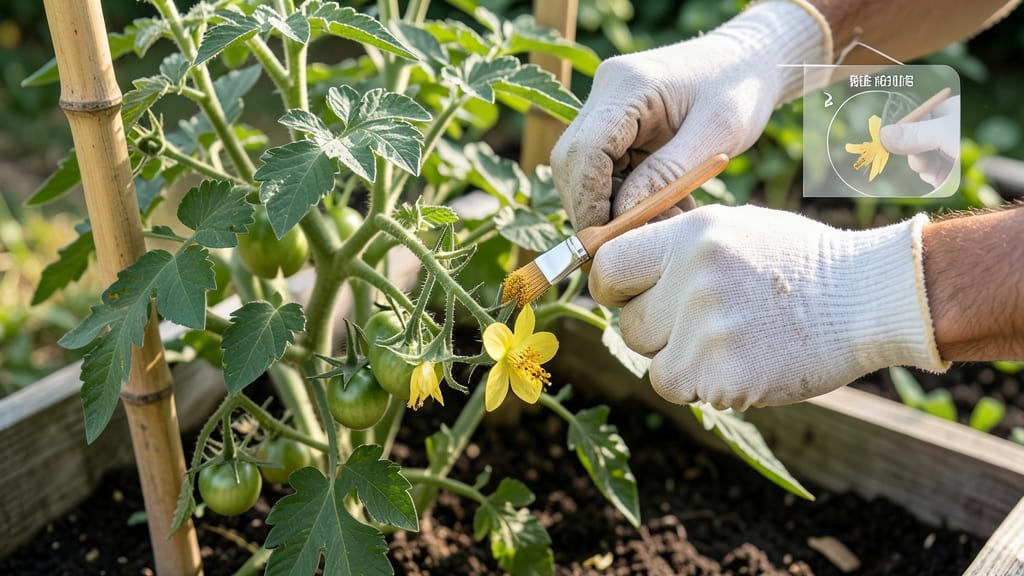
How to manually pollinate tomato plants guarantees bigger fruit when nature won’t cooperate. 🌱 I’ve watched my greenhouse tomatoes struggle in still air—until I learned this simple brush technique that doubles my harvest every season. The secret lies in timing and gentle handling. Pollinate on dry mornings when flowers are open, using a soft brush or cotton swab to transfer pollen from male to female parts. Humidity and wind usually handle this, but indoor or protected plants need your help. You’ll notice thicker walls and fewer blossom-end rot issues in your tomatoes. The process takes just 2-3 minutes per plant, and the results—juicier, more uniform fruit—are worth every second. Works for both determinate and indeterminate varieties, and even saves struggling plants during rainy seasons. Here’s exactly how to do it right the first time.
📚 In This Guide
- What you need
- Instructions
- Tips and common mistakes
- Wrapping up and next steps
What you need
- ● Soft-bristle paintbrush (or a clean, dry cotton swab—no paint residue!)
- ● Tomato plants with open flowers (morning is best for fresh pollen!)
- ○ Gloves (optional but helpful to keep hands clean and avoid transferring oils)
- ● Spray bottle with water (for light misting if pollen is sticky)
- ● Notebook & pen (to track pollination dates and progress)
- ● Magnifying glass (to spot pollen grains clearly)
- ● Small handheld fan (for gentle airflow on stubborn flowers)
- ● Pollen collection tool (like a clean, dry toothpick for precision work)
- ● Sunny, dry day (ideal weather for best pollen transfer)
Step-by-step instructions for manually pollinating tomato plants
Here's the simple method I use to boost fruit set—no fancy tools, just a gentle touch.
🌿 Step 1: Identify Flowers Ready for Pollination
Pick flowers that have opened fully but haven't set fruit yet—you'll see petals spread wide like a tiny yellow star. Focus on healthy blossoms with sturdy stems and no signs of wilting. I check my plants every morning because early blooms get the best pollination timing.
Gently shake each flower cluster to feel for pollen—it should feel slightly powdery between your fingers. If the flower feels dry or the petals are curling, it's past its prime and won't produce fruit. Only work with fresh, vibrant blooms for the best results.
💧 Step 2: Use a Soft Brush to Transfer Pollen
Take a clean, dry paintbrush or cotton swab and lightly brush the anthers (those yellow pollen-producing parts) of one flower. You want to collect pollen without damaging the flower—just a light sweep is enough. I use a new brush for each plant to avoid cross-contamination with diseases.
Move to another flower in the same cluster and brush the stigma (the sticky center) gently. You'll see pollen grains stick to it—this is how fertilization happens. For each tomato flower, I make 3-4 passes to ensure good pollen transfer. Never press hard; you're just helping nature along.
☀️ Step 3: Pollinate at the Right Time of Day
Do this between 8 AM and 10 AM when flowers are fully open and pollen is freshest. Humidity is usually lower in the morning, which helps pollen stick better to the stigma. I avoid pollinating after rain because wet pollen washes away and won't work properly.
After pollinating, leave the flowers alone—they'll need 5-7 days to develop into small green tomatoes. Watch for the petals to drop and a tiny fruit to form at the base. If you see flowers falling off without setting fruit, you might need to pollinate again or check for environmental stress.
✂️ Step 4: Maintain Ideal Conditions After Pollination
Keep your plants in full sun (6-8 hours daily) and water consistently—1-1.5 inches per week—to support fruit development. I avoid overhead watering after pollination because wet flowers can develop blossom-end rot later. Instead, water at the base in the morning.
Remove any suckers (those little shoots in the leaf axils) to direct the plant's energy toward fruit production. I also prune away any leaves touching the soil to prevent disease. With proper care, your manually pollinated tomatoes will grow into plump, flavorful fruits ready for harvest in 60-70 days.
Tips & tricks for perfect tomato fruit set
Here's what nobody tells you about getting the most out of your manual pollination efforts.
Timing Secret: The 8 AM to 10 AM window is non-negotiable for best results. I've learned this the hard way after watching flowers drop without setting fruit when pollinated later. Morning humidity is lower, which helps pollen stick better to the stigma. If you must pollinate later, wait until after dew has dried completely—wet pollen simply won't adhere properly.
Tool Technique: Don't waste money on fancy pollination tools—an old makeup brush or cotton swab works perfectly. The key is cleanliness: use a new brush for each plant to prevent disease spread. I keep a small jar of rubbing alcohol nearby to wipe brushes between plants. For stubborn pollen, gently tap the brush against your wrist to release any excess before transferring to the stigma.
Visual Cues: In Step 1, look for flowers where the petals are fully spread but haven't started to curl at the edges—that's your perfect pollination window. The pollen should feel slightly powdery when you shake the flower gently. If you see pollen clinging to the petals, that flower is already past its prime and won't produce fruit. This visual check saves me from wasting time on flowers that won't set.
Post-Pollination Care: After those 5-7 days of waiting, don't be tempted to shake the plant to check for fruit development. Gentle handling is crucial—those tiny green tomatoes are still fragile. I've found that plants with manually pollinated flowers need slightly more water during this critical period (about 1.25 inches per week) to support fruit formation. The extra care pays off with bigger, healthier tomatoes ready for harvest in 60-70 days.
Pro Tips for Manually Pollinate Tomato Plants
- Here's what nobody tells you about getting the most out of your manual pollination efforts.
- Timing Secret: The 8 AM to 10 AM window is non-negotiable for best results. I've learned this the hard way after watc...
- Tool Technique: Don't waste money on fancy pollination tools—an old makeup brush or cotton swab works perfectly. The ...
Frequently asked questions
Got questions about manually pollinating your tomato plants? You’re not alone! Here are some of the most common concerns—and their answers—to help you master the gentle brush method like a pro.
Why do my tomato flowers keep falling off before fruiting?
This is often a sign of stress—whether from heat, drought, or poor pollination. If your flowers drop before setting fruit, try pollinating them manually (especially in greenhouses or rainy climates) and ensure consistent watering. Overwatering or underwatering can also cause blossom drop, so aim for 1–1.5 inches of water per week.
How often should I pollinate my tomato plants?
Pollinate your tomatoes every 2–3 days during peak flowering (morning or late afternoon). For greenhouse-grown plants or those with heavy flower clusters, daily gentle brushing may be needed. Once fruit sets, reduce to once every 5–7 days unless you notice unopened flowers—those need extra attention!
Will manual pollination work in hot or humid weather?
Yes! Heat and humidity can actually reduce natural pollination by slowing bees or making flowers sticky. Manual pollination is especially helpful in these conditions. Choose cool mornings or evenings (60–85°F) for brushing, and avoid pollinating when flowers are wet—this can spread disease.
What if I don’t have a paintbrush? Can I use something else?
Use a cotton swab, feather, or even a soft paintbrush from your craft stash. Avoid anything fuzzy or rough—it can damage delicate flower parts. For large plants, a small handheld fan on low can also work in a pinch (just don’t overdo it—too much airflow can stress the plant).
Why are my pollinated flowers still not turning into tomatoes?
Check for these issues:
- Lack of sunlight: Tomatoes need 6–8+ hours of direct sun daily.
- Nutrient deficiency: Yellow leaves? Add balanced fertilizer (10-10-10) or compost.
- Temperature extremes: Below 55°F or above 95°F can halt fruit development.
- Pests/disease: Inspect for aphids, whiteflies, or fungal spots.
Wrapping up and next steps
Manually pollinating your tomato plants is a simple yet powerful way to boost your harvest—no fancy tools or expertise required! 🌱 With just a gentle brush or your fingertips, you’re giving your plants a helping hand to produce those juicy, flavorful tomatoes you’ve been dreaming of. Now that you’re equipped with the know-how, why not take the next step? Head out to your garden, grab your trusty paintbrush or cotton swab, and start pollinating like a pro.
Your future salads, sauces, and sandwiches will thank you!