
Pests
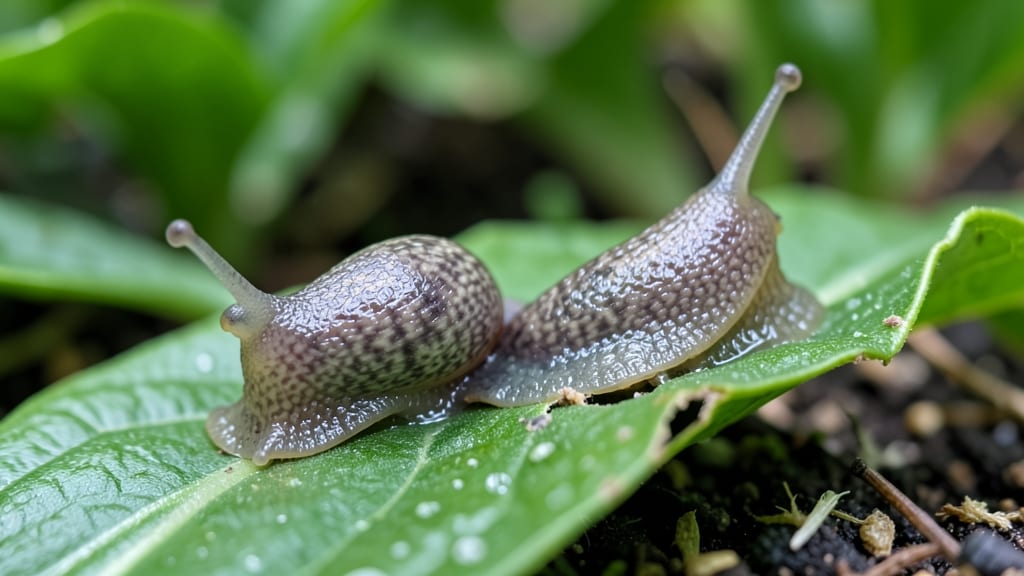
How to control slugs in your garden overnight is easier than you think—until you discover copper tape. This simple, chemical-free barrier creates an invisible electric field that sends slugs packing without harming your plants or the planet.
The beauty of copper is its dual action: it repels slugs while looking completely unobtrusive. You won’t need expensive traps or harmful sprays—just a roll of tape, a few minutes of setup, and your plants will finally get the protection they deserve.
It’s especially effective around raised beds, containers, and delicate seedlings.
What you’ll end up with is a garden where slugs think twice before crossing paths. The tape lasts for years, requires zero maintenance, and works even in rainy weather. No more waking up to skeletonized lettuce or ragged hosta leaves.
Perfect for organic gardeners, busy parents, or anyone tired of losing crops to these slimy pests. Here’s exactly how to install it for maximum effectiveness—no guesswork, just results.
📚 In This Guide
- What you need
- Instructions
- Tips and common mistakes
- Wrapping up and next steps
What you need
- ● Copper tape or sheeting: At least 1-2 inches wide and long enough to encircle your garden beds, pots, or vulnerable plants. Pro tip: 💡 Use 0.016-inch thick copper for best results!
- ● Measuring tape or ruler: To ensure precise placement (slugs are sneaky!).
- ● Scissors or tin snips: For cutting copper to size—safety first! Wear gloves if handling sharp edges.
- ● Sticky tape or double-sided tape: A small roll (e.g., ½-inch wide) to secure the copper to edges like pot rims or uneven surfaces.
- ● Water and a sponge: To clean the copper surface before installation (dirt can reduce effectiveness).
- ● Copper corner pieces: Pre-made connectors for seamless edges around garden beds.
- ● Garden stakes or clips: To anchor the copper to vertical surfaces like trellises.
- ● Gloves: Protect your hands from copper edges or sticky residue.
- ● Beer traps (DIY):strong> For extra slug control—fill shallow containers with beer (slugs love it!).
Instructions for creating an effective copper slug barrier
This method works because slugs hate the electrical charge copper creates—no chemicals, no traps, just a simple barrier they avoid.
Measure and Mark Your Garden Beds
Walk your garden perimeter and measure the exact dimensions of each bed or planting area. Use a tape measure to note the width and length, then mark the outer edge with stakes or spray paint. Slugs can travel up to 3 feet per night, so extend the barrier 6 inches beyond the bed's edge to create a complete perimeter. I always overestimate slightly—better to have extra copper than gaps where slugs can sneak in.
For raised beds or containers, measure the base circumference and note the height. Copper strips need to be at least 1 inch wide and tall enough to cover the entire exposed edge. If your container has a lip, the barrier should sit flush against it to prevent slugs from climbing over. Double-check your measurements before cutting—once you start installing, you won’t want to stop halfway.
Cut Copper Strips to Size
Purchase 1-inch-wide copper tape or sheeting from a hardware store or online supplier. Unroll the copper and use tin snips to cut strips matching your measured dimensions. For straight edges, a ruler and straightedge tool helps—slugs won’t hesitate to exploit even a slight gap. I like to cut strips 12-18 inches long at a time, testing their flexibility before committing to longer pieces. Copper is durable but can bend if overstretched, so handle it gently.
If you’re working with corners or curves, pre-bend the copper strips slightly to follow the contour of your bed. A 180-degree bend works well for most garden edges, but sharper turns may require overlapping strips or using corner connectors designed for copper. Avoid sharp bends—cracks or breaks reduce effectiveness. Test-fit each strip before securing it in place.
Install the Copper Barrier Securely
Start at one corner of your garden bed and press the copper strip firmly into the soil, ensuring it stands upright along the entire edge. For in-ground beds, bury the bottom 1-2 inches to anchor it while leaving the top exposed. Use galvanized nails or copper-specific stakes to secure the strip every 12 inches—this prevents wind or animals from dislodging it. I’ve found that copper staples work best because they don’t rust and won’t conduct electricity like steel nails might.
For raised beds or containers, attach the copper to the outer edge using copper-compatible adhesive or small screws. If your container has a lip, wrap the copper around it smoothly—slugs are persistent climbers and will exploit any rough edges. Double-check that no part of the barrier sags or lies flat; even a slight dip can let slugs bypass it. Once installed, the copper should form an unbroken line from one end of the garden to the other.
Connect Strips for Continuous Protection
Slugs are clever and will try to bypass the barrier if there’s a gap. To create a fully sealed perimeter, overlap copper strips by at least 1 inch at corners and seams. Use a copper soldering kit or conductive copper tape to bond overlapping edges—this ensures the electrical charge remains consistent. If soldering isn’t an option, secure overlaps with copper wire twisted tightly around the junction. Test the connection by touching the overlapping sections with your finger; you should feel a slight tingle, confirming the circuit is complete.
For larger gardens, connect strips end-to-end using copper jump wires or by burying a copper rod vertically every 10 feet to ground the system. This prevents the barrier from becoming ineffective due to static buildup. I’ve seen gardens where the copper was installed in sections without grounding—slugs eventually learned to cross the gaps. A properly connected system acts as one continuous deterrent.
Monitor and Maintain the Barrier
After installation, check the copper barrier weekly for damage, especially after rain or strong winds. Copper can corrode over time, particularly in acidic soils, so inspect for green patina or pitting—these are signs it’s losing effectiveness. If you notice gaps, overlaps, or bent sections, repair them immediately. A light sanding with fine-grit sandpaper can restore conductivity to dull areas. I keep a small roll of copper tape on hand for quick fixes—it’s easier than recutting and reinstalling entire strips.
Slug populations can fluctuate seasonally, so be vigilant during spring and fall, when slug activity peaks. If you notice slugs attempting to cross the barrier, reinforce high-risk areas with additional copper or a secondary deterrent like diatomaceous earth (though this is optional). The copper barrier alone is usually enough, but combining methods ensures long-term success. With proper maintenance, your copper system can last 3-5 years before needing replacement.
Tips & tricks for effective copper slug barriers
These practical strategies ensure your copper barrier stays slug-proof and lasts for years.
Precision Measurement: In Step 1, when marking your garden beds, use a laser measuring tool if available—it eliminates human error and ensures perfect alignment. Slugs can exploit even a 1/4-inch gap, so verify measurements twice before cutting copper. For curved beds, consider using a flexible measuring tape to follow the contour accurately, then transfer those measurements to your copper strips before bending.
Copper Bend Technique: When pre-bending strips for corners in Step 2, create a gentle arc rather than sharp angles. A 180-degree bend works best for most garden edges, but for tighter curves, use overlapping strips secured with copper wire. Test each bend by pressing it against the garden edge—if it doesn't sit flush, adjust before installation. Remember, slugs are persistent climbers and will exploit any rough edges or gaps.
Installation Anchoring: For in-ground beds in Step 3, bury the copper 1-2 inches deep and use copper staples every 12 inches to prevent wind displacement. In my experience, galvanized nails can corrode over time and may conduct unwanted electricity—stick with copper-specific fasteners. For raised beds, secure the copper to the outer edge using copper-compatible adhesive designed for outdoor use, as it won't degrade like regular glue.
Continuity Testing: After completing Step 4, verify the electrical circuit by testing connections every 5 feet. A simple finger touch should produce a slight tingle—if not, check for loose connections or corroded overlaps. For large gardens, bury a copper rod vertically every 10 feet to ground the system properly. I've seen installations where sections weren't grounded, leading to slugs bypassing the barrier after just a few weeks.
Pro Tips for Control Slugs
- These practical strategies ensure your copper barrier stays slug-proof and lasts for years.
- Precision Measurement: In Step 1, when marking your garden beds, use a laser measuring tool if available—it eliminate...
- Copper Bend Technique: When pre-bending strips for corners in Step 2, create a gentle arc rather than sharp angles. A...
Frequently asked questions
Got questions about slug control? You’re not alone! Here are some of the most common concerns—and straightforward answers—to help you tackle those slimy pests with ease.
Do copper barriers really work, or is it just a myth?
A copper barrier is one of the most effective non-toxic methods for slug control. When slugs crawl over copper, they receive a mild electric shock (thanks to their slimy bodies conducting electricity), which they hate. Studies and gardeners alike confirm it works—just make sure the barrier is at least 12–18 inches tall and buried slightly into the soil for best results.
How long does a copper barrier last before needing replacement?
With proper care, a copper slug barrier can last 5–10 years or even longer! Over time, exposure to weather (rain, sun, or snow) may cause minor oxidation, but this doesn’t reduce its effectiveness. If you notice cracks or sharp edges wearing down, simply bend or smooth them out. Pro tip: Coat it with clear sealant every few years to extend its life!
Will copper harm my plants or pets if installed?
Not at all! Copper is 100% pet-safe and won’t harm plants, soil, or wildlife. Unlike chemical slug baits, it doesn’t leave toxic residues. Just ensure the edges are smooth to prevent pets from chewing on it (though they’ll likely avoid it due to the shock). For extra peace of mind, opt for food-grade copper strips.
Does rain or snow affect the copper barrier’s effectiveness?
Rain, snow, or even heavy dew won’t stop a copper barrier from working—if anything, moisture makes slugs more active, so they’ll hit the barrier more often. However, if copper gets buried under thick mulch or soil, it loses its effectiveness. Keep the top 1–2 inches exposed at all times for maximum slug-repelling power.
Is a copper barrier more cost-effective than chemical slug pellets?
While the upfront cost of copper (~$10–$20 per 10 feet) might seem higher than pellets (~$5–$10 for a bag), it’s a one-time investment that lasts years. Chemical pellets require repeated purchases and pose risks to pets and beneficial insects. Over time, copper pays for itself—and your garden stays safe!
Wrapping up and next steps
Controlling slugs doesn’t have to mean harsh chemicals or endless battles—with a simple copper barrier, you’ve got a natural, effective, and eco-friendly solution at your fingertips! 🌱 By understanding their behavior and setting up your defenses proactively, you’ll protect your garden without harming the environment. Now’s the time to take action: measure, install, and enjoy a slug-free space in no time!
Next step: Grab your copper tape or sheets and start transforming your garden today—your plants will thank you! 🌿