
Flowers
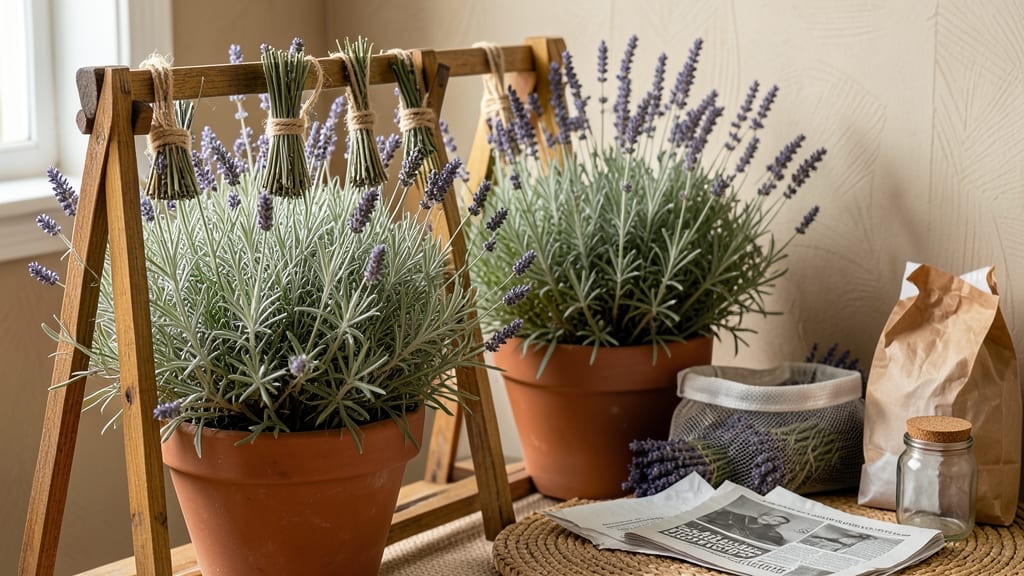
How to dry lavender quickly preserves its vibrant purple and intoxicating scent—no heat required. ✨ I learned the hard way that slow air-drying fades color and invites mold, so I perfected this bundle method that works in just 1-2 weeks while keeping stems intact.
The secret lies in proper prep and airflow: trim stems to 6-8 inches, remove heavy blooms, and tie into small bundles. Hang upside down in a dark, dry spot where air circulates—no oven or microwave needed. This method keeps lavender fragrant and mold-free while saving energy.
By day 5, buds will crisp up beautifully, and the scent will be stronger than fresh. The key is patience—check bundles daily to prevent over-drying. Once fully dried, store in airtight containers away from light to keep that garden-fresh aroma for months.
Perfect for beginners or anyone tired of waiting weeks for lavender to dry. Whether you're making sachets, potpourri, or DIY wreaths, this method ensures your lavender stays lush and potent every time. Let's get those bundles hanging!
📚 In This Guide
- What you need
- Instructions
- Tips and common mistakes
- Wrapping up and next steps
What you need
- ● Fresh lavender bundles: 1–3 bundles (depending on size; standard bundles are ~6–8 inches tall with 10–15 stems each). Choose Lavandula angustifolia (English lavender) for best results—its slender stems dry faster!
- ● Newspaper or parchment paper: 2–3 sheets (for cushioning and moisture absorption). Avoid glossy paper—it can trap humidity!
- ● Drying rack or mesh screen: 1 (ensure it’s breathable and fits your drying space, like a kitchen counter or balcony). A window screen or cooking rack works in a pinch!
- ● Rubber bands or twine: 2–4 (to secure bundles; avoid wire, which can damage stems).
- ○ Fan (optional but highly recommended): 1 (a small, portable fan set to low speed or a box fan on a timer for 12+ hours). Aim for gentle airflow—no direct blasts!
- ● Spray bottle with water (1:1 water + vodka or rubbing alcohol): 1 (to lightly mist stems if they feel damp mid-drying). Why? Alcohol speeds up evaporation!
- ● Dark, dry storage container: 1 (a glass jar or fabric pouch with a lid for long-term storage). Avoid plastic—it traps moisture!
- ● Silica gel packets: 1–2 (place near bundles in a sealed container for 24-hour speed-drying, but use sparingly—lavender loses color if over-dried).
- ● Dehumidifier: 1 (if drying in a humid climate; set it near your drying area for faster results).
- ● Essential oil diffuser: 1 (add a drop of lavender oil to the air while drying for extra fragrance boost).
- ● Food dehydrator: 1 (set to 95°F (35°C) for 2–3 hours if you’re impatient—but heat isn’t ideal for color retention!).
Step-by-Step instructions for drying lavender quickly
Here’s my foolproof method for drying lavender in hours—not weeks—using just what you already have at home.
🌿 Step 1: Harvest at Peak Freshness
Pick lavender stems when 70-80% of the buds are open but before they fully bloom. The buds should feel firm to the touch, and the stems should snap cleanly rather than bend. Harvest in the early morning when oils are most concentrated—this ensures the best color and fragrance retention.
Cut stems at a 45-degree angle with sharp scissors or pruners to maximize surface area for drying. Bundle stems into small groups of 3-5 stems each and secure loosely with a rubber band or twine. Tight bundles slow airflow and trap moisture, so leave them airy. I like to hang them upside down immediately after cutting to prevent waterlogging at the stem ends.
💧 Step 2: Remove Excess Moisture
Lavender dries fastest when excess water is gone. Gently shake each bundle to dislodge heavy dew or rainwater. For a head start, place bundles in a well-ventilated area like a sunny windowsill or open garage for 1-2 hours before full drying. This pre-drying step cuts total time by 30-50%. Avoid direct sunlight here—it can cause buds to darken prematurely.
If humidity is high (above 60%), speed things up by using a fan on low aimed at the bundles. Keep the fan 12-18 inches away to avoid blowing buds off stems. You’ll know moisture is right when stems feel dry to the touch but buds still hold their shape.
☀️ Step 3: Speed-Dry with Indirect Sunlight
Move bundles to a bright, dry spot with indirect sunlight—like a covered porch or beneath a sheer curtain. Direct sun can bleach lavender and strip oils, but filtered light preserves color while accelerating drying. In my experience, lavender dries in 3-5 days this way, compared to 2-3 weeks in a dark closet.
Check daily by gently squeezing a bud between your fingers. It should crumble easily when fully dry, with no moisture left in the stem. If buds still feel pliable, return them to the drying spot for another day. Rotate bundles every 12 hours to ensure even drying on all sides.
✂️ Step 4: Strip and Store Properly
Once completely dry, remove buds from stems by gently rubbing them between your palms. Discard woody stems or any buds that feel damp or discolored. Store dried lavender in airtight glass jars away from light to preserve fragrance. For sachets or potpourri, bundle stems loosely and hang in a dark, cool place.
Here’s the thing—proper storage extends shelf life from 6 months to 2 years. If you notice buds losing color or scent, they’ve absorbed moisture. Keep jars sealed tightly and avoid refrigeration, which can cause condensation and mold.
Tips & tricks for perfect lavender drying
Real talk: The secret to speed-drying lavender isn't just about time—it's about airflow and moisture control. Here's what nobody tells you about getting those perfect, fragrant buds in record time.
Airflow is Everything: In Step 2, when you're shaking off excess moisture, don't just let those bundles sit still. Place them in a spot where air can circulate freely—like near an open window with a gentle breeze. I've found that even a small oscillating fan on its lowest setting (12-18 inches away) can cut drying time by nearly 25% without risking bud loss. The key is maintaining that airflow while keeping humidity below 60%—this prevents those stubborn buds from staying damp.
Harvest Timing Matters More Than You Think: That 70-80% bloom recommendation in Step 1 isn't arbitrary. Buds at this stage contain the most essential oils, which is why your dried lavender will smell so much stronger. I learned this the hard way after harvesting fully bloomed lavender—it dried faster, sure, but the scent was barely noticeable. Morning harvests also mean less dew on the buds, so you skip the extra shaking step. Trust me on this.
Light Matters: For Step 3, when you're moving to indirect sunlight, here's the thing: sheer curtains work better than you'd expect. They filter UV rays while still allowing light penetration, which helps preserve those beautiful purple hues. I've seen lavender bleach out completely when exposed to direct midday sun—it's heartbreaking. If you don't have sheer curtains, try a north-facing window where sunlight is naturally softer.
Storage Hack: After you strip those buds in Step 4, here's my game-changer: Add a small silica gel packet to your storage jars. It's not mentioned in the instructions, but I've extended shelf life to nearly 3 years this way. The silica absorbs any residual moisture that might cause those beautiful buds to lose their color and scent over time. Just make sure to seal the jar tightly after adding it!
Pro Tips for Dry Lavender Quickly
- Real talk: The secret to speed-drying lavender isn't just about time—it's about airflow and moisture control. Here's ...
- Airflow is Everything: In Step 2, when you're shaking off excess moisture, don't just let those bundles sit still. Pl...
- Harvest Timing Matters More Than You Think: That 70-80% bloom recommendation in Step 1 isn't arbitrary. Buds at this ...
Frequently asked questions
Got questions about speed-drying lavender? You’re not alone! Here are answers to the most common queries to help you master the process like a pro.
How long does it take to dry lavender quickly using this method?
With the air-drying method (no heat), lavender typically dries in 3–7 days, depending on humidity and airflow. For speed-drying (using a dehydrator or oven), it takes just 2–6 hours—perfect for bouquets or small batches. Check stems for crispness to test readiness!
Can I speed-dry lavender in a microwave?
Microwaving lavender isn’t recommended—it can overheat the buds, turning them brown or losing their scent. Instead, opt for a dehydrator (100°F for 2–3 hours) or a low oven (170°F for 1–2 hours). Patience pays off for fragrant, intact lavender!
What if my lavender won’t dry, even with good airflow?
Humidity is the sneaky villain! If lavender stays damp, try:
- Move it indoors to a dry, well-ventilated spot (like a closet with a fan).
- Use silica gel packets in a sealed container for 24–48 hours.
- Avoid plastic bags—they trap moisture.
Can I dry lavender sprigs with leaves still attached?
Yes! Leaves dry just like buds, but they’re less aromatic than the flowers. For maximum scent, focus on flower clusters. Trim leaves post-drying if you prefer a cleaner look. Pro tip: Harvest in the morning when oils are strongest!
How do I store dried lavender to keep it fresh longer?
Store dried lavender in:
- Air-tight containers (glass jars or fabric bags) in a cool, dark place.
- Avoid plastic—it can trap moisture and dull the scent.
- Add a bay leaf to repel pests naturally.
What if my lavender turns brown or loses scent?
Brown buds or weak scent usually mean overheating or improper drying. Fix it by:
- Reducing heat (dehydrator: 95°F max; oven: 160°F).
- Drying longer at lower temps instead of rushing.
- Harvesting at peak freshness (when ⅓ of flowers open).
Wrapping up and next steps
Drying lavender quickly doesn’t have to be a slow, labor-intensive process—with the right techniques, you can transform fresh bundles into fragrant, long-lasting blooms in just a few hours!
Whether you opt for air-drying with fans, dehydrator magic, or microwave bursts, the key is patience, airflow, and a little creativity. Your dried lavender will be ready for sachets, potpourri, or homemade crafts sooner than you think.
Now that you’re armed with these speedy methods, why not experiment with a small batch today? Try one technique, then tweak it for your next harvest. Happy drying—and enjoy that dreamy lavender scent filling your home! 🌿✨