
How To
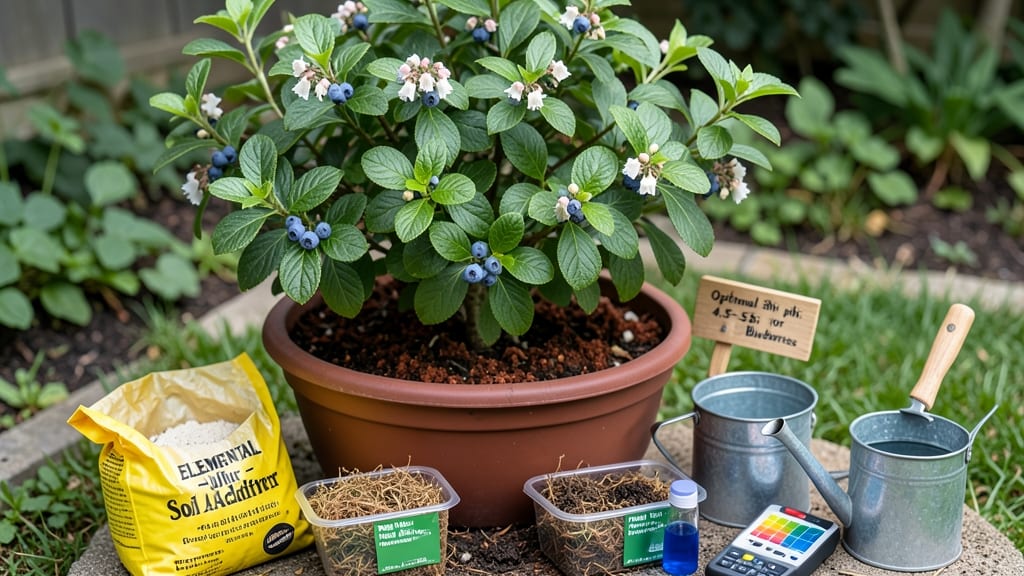
Your azaleas are begging for a pH adjustment—but how to make potting soil more acidic is simpler than you think. 🌿 The secret to lush, vibrant blooms lies in soil that’s properly acidic—think pH 4.5 to 5.5—and it’s easier than you’d expect with the right amendments.
I’ve turned my own struggling azaleas into showstoppers using just two key ingredients: elemental sulfur and peat moss, both of which lower pH naturally over time.
The magic happens when you mix these amendments into your potting soil before planting. Sulfur works slowly (takes 4-6 weeks to fully acidify), while peat moss provides immediate organic acidity.
For fast results, combine 1 part sulfur with 3 parts peat moss per 5 gallons of soil, then water thoroughly to activate. Safety tip: always wear gloves when handling sulfur, and work in a well-ventilated area.
Test your soil’s pH before and after with a simple kit—most garden centers sell $10 strips that give accurate readings. Aim for below 6.0 for acid-loving plants like azaleas, blueberries, and gardenias.
The payoff? Darker green leaves, bigger blooms, and plants that thrive instead of just surviving. Once you see the difference, you’ll never ignore soil pH again.
Pro tip: For container gardens, recheck pH every 3-4 months—rain and watering can gradually raise it. If your soil feels too sandy or drains too fast, add 1 part perlite to retain moisture and help amendments work evenly.
This method works for both in-ground and potted plants, so you can apply it anywhere your acid-loving favorites need a boost.
📚 In This Guide
- What you need
- Instructions
- Tips and common mistakes
- Wrapping up and next steps
What you need
- ● Sulfur (elemental or aluminum sulfate): 1–2 cups per 5-gallon bucket of potting soil (adjust based on soil volume and current pH)
- ● Note: Elemental sulfur works slower (weeks to months) but lasts longer, while aluminum sulfate acts faster (days to weeks).
- ● Peat moss (sphagnum preferred): 1–2 parts peat moss per 1 part existing potting soil (e.g., 2 cups peat moss per 1 cup soil)
- ● Tip: Look for sphagnum peat moss—it’s the gold standard for acidity!
- ● Potting soil (existing): 5–10 gallons (depending on your project size)
- ● Note: Avoid soil with high lime or composted materials that may neutralize acidity.
- ● pH testing kit: Digital or liquid test kit (e.g., LaMotte Soil pH Test Kit or Bluelab pH Pen)
- ● Why? You’ll need to monitor progress—aim for a pH of 4.5–5.5 for azaleas!
- ● Garden gloves (to protect your hands from sulfur dust)
- ● Garden trowel or shovel (for mixing)
- ● Wheelbarrow or large bucket (for blending materials)
- ● Watering can or hose (to moisten soil before testing)
- ○ Lime-free compost or pine bark fines (optional, for bulk and texture)
- ○ Plastic sheeting (optional, to contain mess while mixing)
Step-by-Step guide to acidifying potting soil for acid-loving plants
Here's how to transform your mix into the perfect acidic home for azaleas, blueberries, and other acid-lovers.
🌱 Step 1: Test Your Current Soil pH
Before adding anything, test your existing potting soil's pH using a digital meter or test kit. Most garden centers sell these for under $15. Acid-loving plants thrive between pH 4.5 and 5.5, so aim for that range. If your soil tests above 6.0, it's too alkaline and needs adjustment. I like to test in multiple spots of the same pot—pH can vary even within a small container.
Take a small sample from the center and edges of your mix. Moisten it according to the test kit's instructions, then wait 5-10 minutes for accurate results. If the reading shows 6.5 or higher, you'll need to acidify significantly. Keep this test result handy—it'll guide how much sulfur or peat moss you'll need to add.
💧 Step 2: Incorporate Elemental Sulfur for Long-Term Acidification
For lasting results, mix in elemental sulfur at a rate of 1 pound per cubic foot of potting mix. Sulfur works slowly, breaking down into sulfuric acid over 4-6 weeks as soil microbes process it. Sprinkle the sulfur evenly over the soil surface before adding other amendments. I use a fine-mesh strainer to distribute it uniformly—this prevents clumping and ensures even coverage.
Work the sulfur into the top 4-6 inches of soil using a garden fork or your hands. Avoid over-mixing, which can create pockets of concentrated sulfur that may harm roots. Water the mix thoroughly after adding sulfur to activate the acidification process. You'll see the most dramatic pH changes within 2-3 weeks, but full acidification takes 6-8 weeks. This makes sulfur ideal for container plants that need long-term acidity.
🌿 Step 3: Add Peat Moss for Immediate pH Adjustment
For quicker results, blend in sphagnum peat moss at a ratio of 20-30% by volume. Peat moss lowers pH by 1.0-1.5 points immediately and continues to acidify as it breaks down. I measure peat moss by volume rather than weight—fill a container with your existing mix, then fill 1/3 to 1/2 of it with peat moss. Mix thoroughly until the color turns a rich, dark brown and the texture becomes uniformly fine.
Peat moss also improves moisture retention and aeration, which acid-loving plants adore. Water the amended mix again to help the peat moss settle and integrate. If you're repotting, add peat moss directly to the new container before transferring your plant. For established plants, work it into the top 3-4 inches of soil. You'll notice a difference in plant health within 1-2 weeks, especially in foliage color and growth vigor.
☀️ Step 4: Maintain Acidic Conditions Through Regular Care
Acidification isn't a one-time fix—soil pH naturally drifts over time. To maintain the ideal range, water your plants with rainwater or distilled water instead of tap water, which often contains alkaline minerals. If you must use tap water, let it sit in an open container for 24 hours to allow some minerals to settle before watering. I also add a small handful of aluminum sulfate (about 1/4 cup per gallon of water) every 2-3 months as a maintenance treatment.
Monitor your soil's pH every 3-4 months using your test kit. If the pH starts creeping above 5.5, repeat the sulfur or peat moss adjustment. Avoid over-acidifying—soil with a pH below 4.0 can become toxic to plants. You'll know you've got it right when your azaleas bloom profusely, blueberries produce sweet fruit, and your gardenias grow lush and healthy. This ongoing care keeps your acid-loving plants thriving season after season.
Tips & tricks for perfect acidic potting soil
These pro strategies will help you dial in the perfect acidic environment for your acid-loving plants—without the guesswork.
Testing Accuracy: In Step 1, when testing your soil's pH, take samples from both the center and edges of your pot—pH can vary dramatically even within the same container. I've seen readings differ by up to 0.5 points between samples! For the most accurate baseline, average your results before deciding how much sulfur or peat moss to add. This prevents over- or under-correcting, which can stress your plants.
Sulfur Distribution: For Step 2, that 1 pound per cubic foot of elemental sulfur might seem like a lot, but it's crucial for even acidification. I use a fine-mesh strainer to sift it directly onto the soil surface—this prevents clumping and ensures uniform coverage. After sprinkling, gently work it into the top 4-6 inches with a garden fork. The key is to avoid creating concentrated pockets, which can harm roots during the 4-6 week breakdown process.
Peat Moss Integration: When adding peat moss in Step 3, don't just dump it in—measure by volume for consistency. Fill a container with your existing mix, then add peat moss until it reaches 1/3 to 1/2 of that volume. Mix thoroughly until the color becomes uniformly dark brown. This visual cue confirms proper integration. The peat moss will lower pH immediately by 1.0-1.5 points, so you'll see results within 1-2 weeks in your plants' foliage color and growth vigor.
Maintenance Shortcut: In Step 4, if you don't have rainwater or distilled water, try this trick: fill a clean bucket with tap water and let it sit uncovered for 24 hours. The minerals will settle at the bottom, leaving the top layer slightly less alkaline. Use the top layer for watering—this simple step helps maintain your soil's acidity between adjustments. I've found this makes a noticeable difference in my blueberry bushes' fruit production.
Pro Tips for Make Potting Soil More Acidic
- These pro strategies will help you dial in the perfect acidic environment for your acid-loving plants—without the gue...
- Testing Accuracy: In Step 1, when testing your soil's pH, take samples from both the center and edges of your pot—pH ...
- Sulfur Distribution: For Step 2, that 1 pound per cubic foot of elemental sulfur might seem like a lot, but it's cruc...
Frequently asked questions
Got questions about lowering your potting soil’s pH? You’re not alone! Here are some of the most common concerns—and clear, actionable answers to help you get it right.
How quickly will my soil become more acidic after adding amendments?
Acidity changes aren’t instant! Sulfur takes weeks to months to break down and lower pH, while peat moss or pine fines work faster (usually 2–4 weeks). Test your soil again after 4–6 weeks for accurate results. Patience is key—rushing can harm plants.
Can I over-acidify my potting soil? What are the signs?
Yes, but it’s rare. Signs of too much acidity (pH < 4.5) include yellowing leaves, stunted growth, or nutrient deficiencies (like magnesium or calcium). If this happens, mix in lime (calcium carbonate) or wood ash sparingly and retest. Always aim for targeted ranges (e.g., 4.5–5.5 for azaleas).
Are there budget-friendly alternatives to sulfur or peat moss?
Try these cost-effective swaps:
- Pine needles or bark: Decompose slowly, adding organic acidity over time.
- Coffee grounds: Mix into soil (1–2 cups per gallon) for a mild pH drop.
- Vinegar (diluted): Use 1 tbsp per gallon of water as a quick rinse for pots (not long-term).
Does weather affect how well amendments work?
Yes! Warm, moist conditions speed up sulfur’s breakdown and microbial activity, making pH adjustments faster. In cold or dry climates, amendments work slower. Water soil thoroughly after adding them to activate the process—think of it like jumpstarting a sluggish engine.
How often should I check my soil’s pH after making changes?
Check pH every 4–6 weeks until you hit your target range. Once stable, monitor annually or if plants show stress. Use a digital pH meter or test kit for accuracy—strip tests can be less reliable. Pro tip: Keep a soil journal to track trends!
Wrapping up and next steps
Transforming your potting soil into the perfect acidic haven for acid-loving plants like azaleas is simpler than you think! By using sulfur, peat moss, or pine needles, you’re giving your greens the ideal growing conditions to thrive.
Remember, consistency and patience are key—monitor your soil’s pH regularly to keep those roots happy and healthy.
Ready to see your plants flourish? Grab your gloves and get experimenting—your azaleas (or blueberries, rhododendrons, and more!) will thank you. 🌱✨ Next up: Test your soil’s pH in a few weeks and adjust as needed—happy gardening!