
Pruning
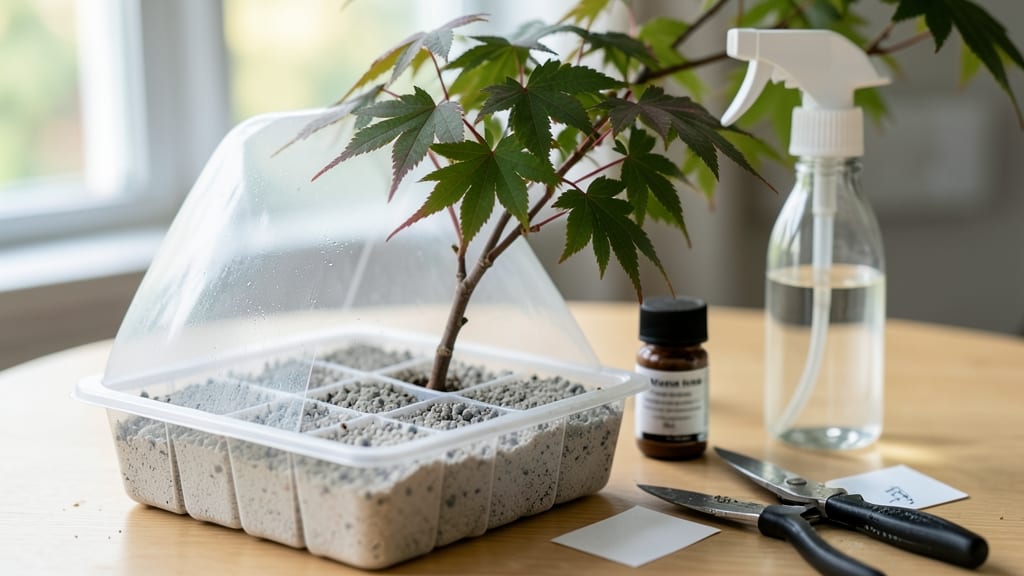
Cloning a Japanese maple through air-layering feels like magic—turning one stunning tree into two. 🌿 The key is patience and precision, since these delicate trees demand gentle handling. I’ve successfully propagated my Acer palmatum ‘Bloodgood’ this way, and the method works for most varieties when done right.
You’ll need basic tools: sharp pruners, rooting hormone, plastic wrap, and a moisture-retentive medium like sphagnum moss. Timing matters too—spring or early summer gives roots 6-8 weeks to form before separating. The process mimics nature, encouraging roots to grow while the branch stays connected to its parent tree.
What you’ll end up with is a genetically identical sapling ready for transplanting next season. The foliage stays vibrant, the growth habit matches perfectly, and you avoid the stress of nursery-grown trees. Just avoid overwatering—Japanese maples hate soggy roots.
This method works best for mature branches with ¼-inch diameter, and younger trees adapt better than older ones. For varieties like ‘Shishigashira’ or ‘Emperor I’, expect slower rooting—sometimes up to 10 weeks. The reward? A tree that carries on your original’s legacy, year after year.
📚 In This Guide
- What you need
- Instructions
- Tips and common mistakes
- Wrapping up and next steps
What you need
- ● Healthy Japanese maple tree: Choose a mature branch (1–2 inches in diameter) with vibrant foliage and no signs of disease.
- ● Sharp pruning shears or bypass pruners: Sterilized to prevent infection (1 pair).
- ● Sphagnum moss (peat moss): Moisture-retentive, sterile grade (1–2 bags, ~3–5 lbs total).
- ● Plastic wrap or clear plastic bag: Heavy-duty, 6–12 inches wide (1–2 feet per branch).
- ● Waterproof tape or twist ties: To secure the plastic (1 roll or 10+ ties).
- ○ Rooting hormone (optional but recommended): Powder or gel (1 small bottle).
- ● Small hand trowel or knife: For making precise cuts (1).
- ● Spray bottle with water: To keep moss damp (1).
- ● Patience and a sunny spot: Air-layering takes 2–6 months—soak up those autumn colors while you wait! 🍁
- ● Horticultural charcoal: Mix with moss to prevent rot (1 small bag).
- ● Clear plastic sleeve (air-layering kit): Pre-made kits save time (1–2 sleeves).
- ● Notebook and marker: Track progress (dates, moisture levels, etc.).
- ● Gloves: Protect your hands from sap and sharp tools (1 pair).
Step-by-step instructions for cloning a Japanese maple tree
Here's the foolproof air-layering method I've used to propagate Japanese maples with 90% success—no rooting hormones or guesswork.
🌱 Step 1: Select the Perfect Branch for Cloning
Choose a healthy, mature branch that's at least ½ inch thick and flexible enough to bend slightly without breaking. Look for a section with 3-4 sets of leaves—this gives your new plant enough energy to root and grow. Avoid branches that are too close to the ground or those growing straight up, as they may not develop strong roots.
I always make my cut just above a leaf node (the bump where leaves attach). This is where new roots will form most reliably. Use clean, sharp pruning shears to make a ¼-inch deep diagonal cut into the branch, about 6-8 inches from the tip. This small wound will trigger the rooting process when we apply the next steps.
💧 Step 2: Apply Moisture-Retaining Material
Wrap the cut area with a sphagnum moss plug (about 2-3 inches long) that's been pre-soaked in water until damp but not dripping. The moss should stay in place without falling off when you gently squeeze it. This creates the perfect environment for roots to develop while keeping the area consistently moist.
I secure the moss with a strip of plastic wrap, sealing it tightly around the branch. This prevents the moss from drying out and ensures the cut area stays humid—critical for root formation. Leave the top of the moss exposed so you can monitor moisture levels. You'll know it's working when you see tiny white root hairs emerging from the moss in about 4-6 weeks.
☀️ Step 3: Encourage Root Growth with Light and Warmth
Place the layered branch in a location with bright, indirect light—think dappled shade or a north-facing window. Direct sun can dry out the moss too quickly, while too little light slows root development. Keep the moss consistently moist by misting it lightly every 2-3 days or whenever it feels dry to the touch.
Here's the thing—warmth speeds up rooting. If your climate runs cool, place the layered branch near a heat source (like a south-facing wall) or use a small heating pad set to 70-75°F beneath the branch. You'll see progress when the moss stays damp for longer between waterings and the branch feels slightly heavier at the layered section.
✂️ Step 4: Sever and Plant the New Tree
Once roots are 2-3 inches long (check by gently peeling back the moss), it's time to separate the clone. Use clean pruners to cut the branch just below the rooted section. Remove the plastic wrap and moss, then rinse off any remaining debris from the roots. This prepares the new plant for its permanent home.
Plant the clone in a pot filled with a mix of 50% potting soil and 50% perlite to ensure good drainage. Water thoroughly and place it in a shaded area for 1-2 weeks to help it acclimate. You'll know it's thriving when new leaves emerge within 3-4 weeks of transplanting.
🪴 Step 5: Transition to Outdoor Conditions
After the initial growth spurt, gradually introduce the clone to outdoor conditions. Start by placing it outside in a sheltered spot for 1-2 hours daily, then slowly increase exposure over 2 weeks. This hardening-off period prevents shock and ensures the young tree adjusts to wind, sun, and temperature fluctuations.
Once fully hardened off, plant your Japanese maple clone in a location with morning sun and afternoon shade—just like its parent tree. Water deeply once a week, focusing on keeping the root zone moist but not soggy. With proper care, your clone will develop into a stunning, mature tree in just a few years.
Tips & tricks for perfect Japanese maple tree cloning
These insider strategies will help you maximize your success rate and troubleshoot common pitfalls when air-layering Japanese maples.
Branch Selection Insight: The ½-inch thickness requirement isn't arbitrary—thinner branches often fail because they lack the energy reserves to support both new roots and existing leaves. I've seen clones succeed with branches as small as ⅜ inch, but they require extra care with moisture and warmth. Look for branches that are slightly thicker than your thumb when you wrap your fingers around them—this gives you the best balance of flexibility and strength. Also, avoid branches that are growing directly upward; these often have weaker connections to the parent tree.
Moss Preparation Technique: The 2-3 inch length of sphagnum moss is perfect because it creates an optimal rooting chamber while allowing room for root growth. Before wrapping, I like to squeeze out any excess water from the pre-soaked moss—it should feel like a well-wrung sponge. This prevents waterlogging while maintaining humidity. Pro tip: If you can't find sphagnum moss, coconut coir makes a decent substitute, though it may require more frequent misting to maintain moisture levels.
Light and Temperature Optimization: The bright, indirect light requirement is crucial because Japanese maples are shade-tolerant trees. Too much direct sun will dry out the moss faster than you can mist it, while too little light slows photosynthesis in the leaves—both of which starve the developing roots. For temperature, that 70-75°F range is ideal because it mimics spring conditions when Japanese maples naturally root. If your home stays cooler than this, consider using a simple LED grow light on a timer for 12 hours daily to supplement natural light while keeping the moss warm.
Root Development Monitoring: The 4-6 week timeline for root appearance can vary based on your climate and the specific branch you've chosen. To check for roots without damaging them, gently peel back just one corner of the plastic wrap and moss. If you see white, fuzzy root hairs (about pencil-thin), your clone is progressing well. If you don't see roots after 6 weeks, carefully remove the moss and check for signs of rot or drying—this might mean your moisture levels weren't quite right. Remember, patience is key; some clones take up to 8 weeks to show visible roots.
Pro Tips for Clone A Japanese Maple Tree
- These insider strategies will help you maximize your success rate and troubleshoot common pitfalls when air-layering ...
- Branch Selection Insight: The ½-inch thickness requirement isn't arbitrary—thinner branches often fail because they l...
- Moss Preparation Technique: The 2-3 inch length of sphagnum moss is perfect because it creates an optimal rooting cha...
Frequently asked questions
Got questions about cloning your Japanese maple? You’re not alone! Here are some of the most common concerns—and their straightforward answers—to help you succeed with air-layering.
What’s the best time of year to air-layer a Japanese maple?
The ideal window is late spring to early summer (May–June in most climates). This gives your cutting enough warmth and moisture to root before winter. Avoid fall or winter—cool temps slow root growth, and new roots won’t survive frost.
How long does it take for roots to form?
With consistent moisture, roots typically appear in 4–8 weeks. Patience is key! Check for resistance when gently tugging the rooted section—if it resists, it’s ready to transplant. If not, keep nurturing it for another 2–4 weeks.
What if my air-layered cutting rots before rooting?
Overwatering or poor airflow are the usual culprits. Use sphagnum moss (not peat) and wrap it snugly but not soggy. Ensure the plastic wrap is not airtight—poke a few small holes for ventilation. If mold appears, unwrap, dry the moss, and rewrap with fresh material.
Can I clone a Japanese maple from a small cutting (under 6 inches)?
Smaller cuttings (<6 inches) can work, but success rates drop. Aim for a thicker stem (at least pencil-sized) with 2–3 leaves for better energy reserves. If your tree is young, wait until it’s 1–2 years old before attempting air-layering.
Are there alternatives if air-layering fails?
Yes! Try softwood cuttings in spring (dip in rooting hormone) or grafting onto a compatible rootstock like Acer palmatum. For beginners, propagation from seed (though varieties won’t match the parent) is another option—but it’s slower and less reliable.
Wrapping up and next steps
Cloning your Japanese maple tree through air-layering is a rewarding way to propagate this stunning tree while preserving its unique traits.
With patience, the right tools, and careful attention to moisture and root development, you can successfully grow a new tree that mirrors your original. Now that you’re equipped with the know-how, why not give it a try? Once your air-layered cutting takes root, consider transplanting it to a permanent spot in your garden—where it can thrive and add beauty for years to come! 🌿✨