
Tools
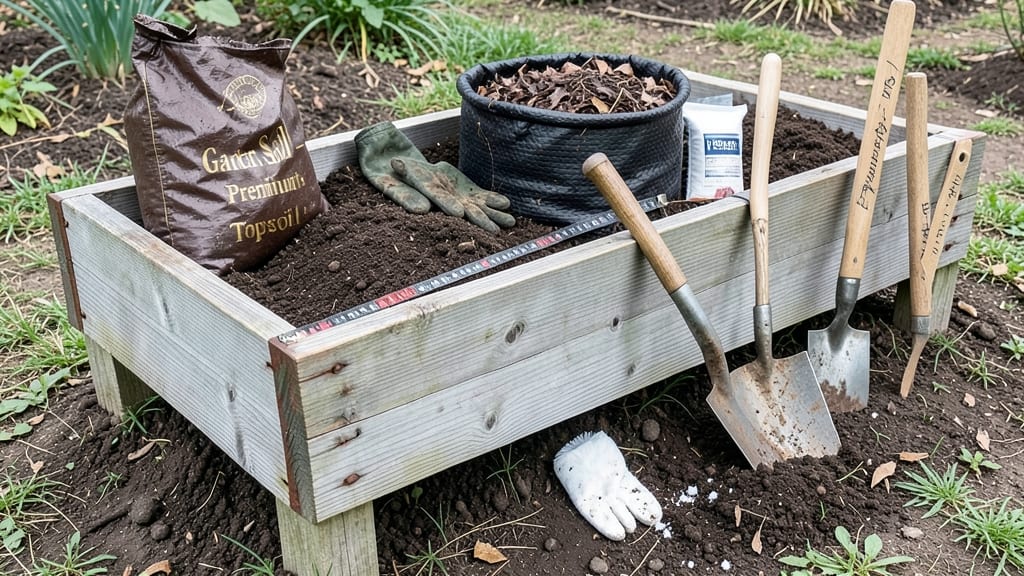
Learning how to fill a raised garden bed with soil wrong means plants fight for space instead of thriving. ✨ The secret isn't just dumping dirt—it's layering for roots that stretch deep and soil that holds nutrients like a sponge.
My first attempt used only topsoil, and the tomatoes struggled by midsummer. This method changed everything.
Start with cardboard or landscape fabric at the bottom to block weeds, then add 2-3 inches of coarse material—gravel, wood chips, or even broken bricks—for drainage.
Next comes the soil mix: half topsoil, a quarter compost, and a quarter perlite or sand. This combo prevents compaction while keeping roots happy.
By the time you're done, your bed will have fluffy, aerated soil that holds moisture without drowning roots. Plants grow faster, yield bigger, and resist diseases better.
The best part? You can adjust the mix based on what you're growing—heavy feeders like tomatoes need more compost, while herbs prefer lighter soil.
Works for any raised bed size and climate. Just remember: never use fresh manure (it burns plants) and avoid clay-heavy soil unless you're mixing in plenty of organic matter. Your first harvest will prove it was worth the effort.
📚 In This Guide
- What you need
- Instructions
- Tips and common mistakes
- Wrapping up and next steps
What you need
- ● Topsoil: 4–6 bags (or ~1 cubic yard per 4’x8’ bed, ~12” deep) – Look for "garden soil" or "topsoil" labeled for planting.
- ● Compost: 2–4 bags (or ~1/3 of the total soil volume) – Use well-aged, organic compost for nutrients.
- ○ Perlite or Vermiculite: 1–2 bags (optional but helpful for drainage) – ~10% of the total mix for aeration.
- ● Garden Gloves: 1 pair – Protects your hands from rough soil and debris.
- ● Wheelbarrow or Large Container: 1 – For mixing and transporting soil.
- ● Rake or Shovel: 1 each – For leveling and spreading soil evenly.
- ● Level or Straightedge: 1 – Ensures your bed is perfectly flat for drainage.
- ● Water Hose or Spray Nozzle: 1 – Keeps soil moist while layering.
- ● Cocoa Peat or Coconut Coir: 1–2 bags – Improves moisture retention in sandy soil.
- ● Slow-Release Fertilizer: 1 bag – Mix in for a nutrient boost at planting.
- ● Landscape Fabric: 1 roll – Lays under the bed to block weeds (if not already installed).
- ● Soil Test Kit: 1 – Check pH and nutrient levels before filling.
Step-by-Step instructions for layering a raised garden bed
Here's how I build a root-friendly foundation that keeps plants thriving for years.
🪴 Step 1: Start with a Sturdy Base Layer
Begin by lining the bottom of your raised bed with 2-4 inches of coarse material—I use cardboard or landscape fabric to block weeds while allowing water drainage. This prevents roots from growing into the ground below, which can introduce pests or compete for nutrients. For extra stability, especially in windy areas, add 1-2 inches of gravel or broken bricks on top of the cardboard. This creates airflow and prevents soil compaction over time.
Press everything lightly but firmly into place. You want a snug fit that won't shift when you add soil later. If your bed is particularly deep (over 12 inches), consider adding a second layer of cardboard to reinforce the structure. The goal is to mimic natural soil conditions where roots can spread freely without hitting barriers.
🌱 Step 2: Build the Foundation with Carbon-Rich Materials
Next, add 4-6 inches of carbon-rich material—I use shredded leaves, straw, or untreated wood chips—to create a loose, airy base. This layer breaks down slowly, improving soil structure as it decomposes. Avoid fresh grass clippings or manure here; they’re too nitrogen-heavy and can rob the soil of oxygen. Spread the material evenly, fluffing it up to avoid compaction. You’ll see the texture become light and crumbly, which is perfect for root growth.
Water this layer lightly if it feels dry, but don’t soak it—you want it damp enough to settle but not soggy. This step is critical for preventing future waterlogging, which can suffocate roots. If you’re working with heavy clay soil, add a handful of perlite or coarse sand to improve drainage. The key is to create a balance: enough structure to hold moisture without becoming waterlogged.
🌿 Step 3: Add a Balanced Mix of Nitrogen and Organic Matter
Now, layer 2-3 inches of compost—I use a well-aged, dark, crumbly compost—to introduce essential nutrients. This is where the magic happens: compost provides microbes that break down organic matter, releasing nutrients slowly over time. Mix in 1-2 inches of finished compost tea or worm castings for an extra boost of beneficial bacteria. You’ll notice the soil darken and smell earthy, which signals healthy microbial activity.
If your compost is chunky, sift it to remove large pieces that won’t break down quickly. For beds planted with heavy feeders like tomatoes or peppers, add a handful of bone meal or kelp meal now to ensure long-term fertility. Avoid fresh manure—it can burn plants and disrupt the soil’s pH balance. The goal is to create a nutrient-rich environment where roots can access food as they grow.
💧 Step 4: Top with Finished Soil for Planting
Finish with 4-6 inches of high-quality topsoil or potting mix, depending on your plants. For vegetables and flowers, I use a 50/50 blend of garden soil and compost to ensure good drainage while retaining moisture. If your bed is for ornamentals, a lighter, well-draining mix works better. Smooth the surface with a rake, leaving it slightly uneven—this helps water distribute evenly when you water.
Press down lightly with your hands or a board to eliminate air pockets, but don’t compact it too much. You want roots to push through easily, not struggle against resistance. For beds planted with perennials or shrubs, add a 1-inch layer of mulch (like straw or wood chips) on top to retain moisture and suppress weeds. This final layer should feel like a soft, fluffy blanket—just right for seeds or transplants to settle into.
⏰ Step 5: Water and Let It Settle Before Planting
Give the bed a deep watering to help the layers meld together. You’ll see the soil sink slightly as it absorbs moisture, which is normal—this settles everything into place. Wait 24-48 hours before planting to let the soil structure stabilize. This step is often skipped, but it prevents roots from drying out or shifting after you plant. For beds filled ahead of time, I like to water lightly every few days to encourage microbial activity before the growing season starts.
Test the soil’s readiness by pressing your finger 1-2 inches deep—it should feel moist but not wet. If it’s too dry, water again; if it’s soggy, let it dry out slightly. The perfect planting soil holds moisture without feeling clammy. Now your bed is ready for seeds or transplants, with a foundation that supports strong root growth and healthy plants for seasons to come.
Tips & tricks for perfect raised garden bed soil mix
These practical strategies will help you create a thriving root environment that supports healthy plant growth for years.
Layering Precision: When building your drainage layer in Step 1, think of it like a well-designed drainage system—each component serves a purpose. The 2-4 inch coarse material creates air pockets, while the 1-2 inch gravel/perlite layer acts as the final drainage escape route. I find it helpful to visualize this as a "soil sandwich" where the bottom layer is the foundation that prevents soggy roots.
Organic Matter Integration: In Step 2, don't just dump the 4-6 inch carbon layer—actively mix it with your existing materials using a garden fork. This creates micro-channels that improve aeration and water penetration. For wider beds (over 4 feet), I recommend dividing the layer into two sections to ensure even distribution without creating compacted pockets.
Soil Texture Secret: The 60% topsoil to 40% compost ratio in Step 3 is ideal, but texture matters just as much as ratio. After spreading, lightly rake the surface to create a fine, crumbly texture that resembles crumbled cake crumbs. This texture allows roots to penetrate easily while maintaining structure. Press gently with your hands—you should feel slight resistance, not hardness.
Mulch Application: When applying your 1-2 inch mulch layer in Step 4, leave that crucial 1-2 inch gap around plant stems. This prevents rot while still allowing water to reach the roots. I've found that straw works best because it breaks down slowly and doesn't attract pests like wood chips can. Spread it evenly to maintain consistent moisture levels throughout the bed.
Pro Tips for Fill A Raised Garden Bed With Soil
- These practical strategies will help you create a thriving root environment that supports healthy plant growth for ye...
- Layering Precision: When building your drainage layer in Step 1, think of it like a well-designed drainage system—eac...
- Organic Matter Integration: In Step 2, don't just dump the 4-6 inch carbon layer—actively mix it with your existing m...
Frequently asked questions
Got questions about filling your raised garden bed? Here are answers to the most common ones to help you get started with confidence!
What’s the best soil mix for a raised garden bed?
A balanced mix of 60% topsoil, 30% compost, and 10% perlite or coarse sand works best. Avoid pure garden soil—it compacts easily and drains poorly. For veggies, add a handful of worm castings for extra nutrients!
When is the best time to fill a raised garden bed?
Fill your bed in early spring or fall when soil is workable but not frozen. Avoid extreme heat—it can dry out the mix too quickly. If planting immediately, wait 2–4 weeks after filling to let the soil settle and microbes activate.
Can I use regular yard soil instead of store-bought mix?
Not ideal! Yard soil often contains clay, rocks, or weeds. If you must use it, sift it first and amend with 50% compost to improve drainage and fertility. For best results, opt for a pre-mixed garden soil or DIY blend.
Why is my soil sinking or settling after planting?
This happens when organic matter (like compost) breaks down over time. To prevent it, fill the bed 2–3 inches below the top edge—it’ll settle as you water and plant. Top off with fresh compost or mulch after planting to maintain depth.
How deep should the soil be in a raised bed?
Aim for 6–12 inches of soil depth. Shallow beds (under 6") limit root growth, while deeper beds (12"+) are great for tubers like potatoes or taproot veggies. If your bed is taller, add cardboard or straw at the bottom to reduce wood decomposition.
Wrapping up and next steps
Filling your raised garden bed with the right soil mix is the foundation for a thriving garden! 🌱 By blending organic matter, compost, and native soil in layers, you create an ideal environment for roots to grow strong and plants to flourish.
Now that you’re ready to roll up your sleeves, take the next step—plant your first seeds or seedlings and watch your garden come to life!
Remember, every expert gardener started with their first bed. Happy planting! 🌿