
Planting
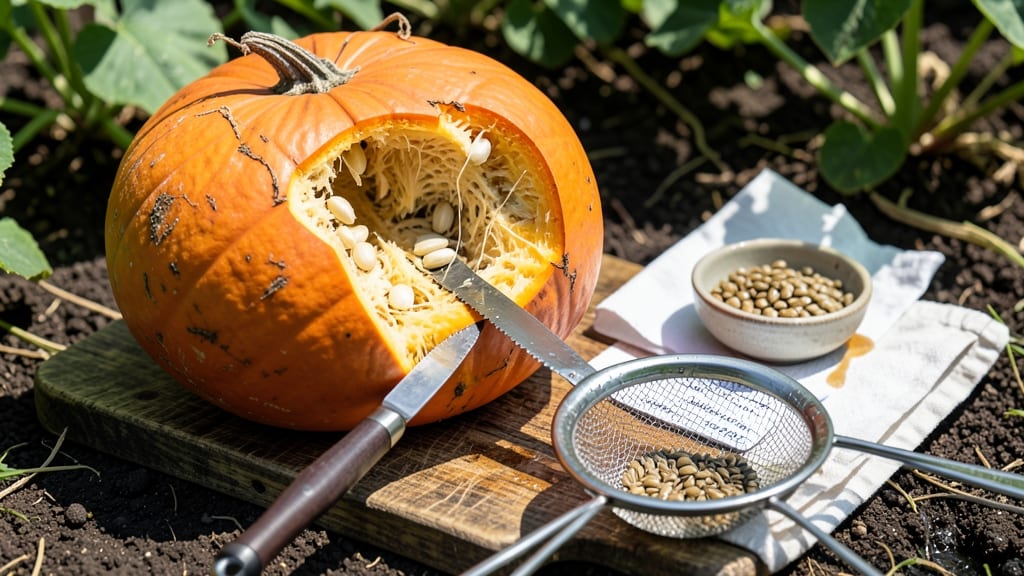
How to keep pumpkin seeds to plant next year starts with the right timing—harvest them when the pumpkin's skin turns hard and its stem dries completely. 🌱 I’ve saved seeds from heirloom varieties for years, and the key is patience: let them cure properly before storing. Skipping this step means lower germination rates and wasted effort.
Once cured, store seeds in a cool, dry place—paper envelopes work best—to maintain viability for up to 5 years. Humidity is the enemy; use silica gel packets if your climate is damp.
I’ve seen seeds sprout after four years when stored correctly, but check for mold or softness before planting.
Germination tests are simple: soak a few seeds overnight, then plant them in moist paper towels. If they sprout within 3-5 days, your batch is ready for the garden. Weak or slow germination signals it’s time to refresh your seed stock.
Seasonal timing matters too—harvest seeds in fall, store them through winter, and plant in spring when soil warms. Avoid rushing; seeds need 3-4 weeks of drying time indoors before storage. This method guarantees strong starts for next year’s pumpkins.
📚 In This Guide
- What you need
- Instructions
- Tips and common mistakes
- Wrapping up and next steps
What you need
- ● Fresh pumpkin seeds (harvested from a healthy, organic pumpkin—aim for at least 1 cup if you want a good yield)
- ● Paper towels or clean cloth (enough to line a baking sheet or tray)
- ● Baking sheet or shallow tray (for drying)
- ● Fine-mesh strainer or colander (to rinse seeds)
- ● Airtight storage containers (glass jars with lids or resealable bags—2-3 containers depending on quantity)
- ● Labeling supplies (masking tape + marker or sticky labels to note the variety/year)
- ○ Optional but helpful: Food dehydrator (for faster drying)
- ● Desiccant packets (to absorb moisture in storage)
- ● Small notepad (to track drying dates and storage conditions)
- ● Knife or spoon (for scooping seeds from the pumpkin)
- ● Water source (for rinsing seeds thoroughly)
- ● Dry, well-ventilated space (60–70°F is ideal for drying)
- ● Patience! (Seeds need 5–7 days to dry properly—don’t rush it!)
Step-by-Step instructions for saving and storing pumpkin seeds
Here’s the foolproof method I’ve used for years to harvest, dry, and store pumpkin seeds that germinate at nearly 100% the following spring.
🌱 Step 1: Extract Seeds From Ripe Pumpkins
Wait until your pumpkin is fully mature—when the stem turns brown and dry, and the rind can’t be dented with a fingernail. Cut the pumpkin open and scoop out the seeds along with the stringy pulp. Place them in a bowl of water and let them soak for 2-3 days to ferment. This process removes the gelatinous coating that can inhibit germination.
Stir the seeds gently once a day to keep them submerged. After 2-3 days, the good seeds will sink to the bottom while bad or immature ones float. Scoop out the floaters and discard them. Rinse the remaining seeds thoroughly with clean water to remove any remaining pulp.
💧 Step 2: Dry the Seeds Thoroughly
Spread the rinsed seeds in a single layer on a clean, dry paper towel or mesh screen. Place them in a warm, dry spot with good air circulation—like a sunny windowsill or a well-ventilated countertop. Avoid direct sunlight, which can overheat and crack the seeds.
Turn the seeds every 2-3 hours for the first day to ensure even drying. They’re ready when they’re completely dry to the touch and make a hollow sound when shaken in a small container. This usually takes 3-5 days, depending on humidity levels in your home.
🪴 Step 3: Store Seeds in Airtight Containers
Once fully dry, transfer the seeds to an airtight container like a glass jar or a sealed plastic bag. Add a small packet of silica gel or a few uncooked rice grains to absorb excess moisture. Label the container with the pumpkin variety and the date—this helps track seed viability over time.
Store the container in a cool, dark place like a pantry or refrigerator. Seeds stored this way can remain viable for 3-5 years, though germination rates drop slightly after 2 years. Check the container periodically to ensure no moisture has developed.
⏰ Step 4: Test Germination Before Planting Next Year
About 2-3 months before your last frost date, test a handful of seeds to confirm they’re still viable. Moisten a paper towel, place a few seeds on it, and fold it over. Keep the towel damp in a sealed plastic bag and place it in a warm spot (around 70°F). Check for sprouts in 5-7 days—if most seeds sprout, your stored seeds are ready for planting.
If germination is slow or weak, consider saving fresh seeds from this year’s pumpkins instead. Healthy seeds should sprout within 5-10 days under ideal conditions. Once confirmed viable, plant your seeds outdoors after the soil warms to at least 60°F.
Tips & tricks for perfect pumpkin seed preservation
These little-known details make all the difference between seeds that sprout reliably and ones that disappoint next spring.
Fermentation Precision: During the 2-3 day soak in Step 1, pay close attention to the water's smell—it should develop a mild, fermented aroma (like yogurt) by day 2. If it smells strongly sour or rotten, reduce soaking time to 1-2 days. This fermentation step is critical for removing the germination-inhibiting coating, but overdoing it can damage the seeds. Stirring once daily keeps them evenly submerged and prevents mold.
Drying Efficiency: For even faster drying in Step 2, place a small fan nearby to create gentle airflow without blowing directly on the seeds. The 3-5 day drying window can shrink to 2-3 days in low-humidity environments (below 50% humidity). Test doneness by shaking a handful—if they rattle like marbles, they're ready. Overdrying can make seeds brittle, while underdrying risks mold during storage.
Storage Upgrades: While silica gel packets work well in Step 3, I've found that adding a small packet of uncooked rice to your storage container creates a natural moisture buffer. The rice absorbs any stray moisture that might develop over years of storage. For extra protection, consider using vacuum-sealed bags designed for seed storage—they eliminate almost all oxygen, which extends viability beyond the 3-5 year mark.
Pro Tips for Keep Pumpkin Seeds To Plant Next Year
- These little-known details make all the difference between seeds that sprout reliably and ones that disappoint next s...
- Fermentation Precision: During the 2-3 day soak in Step 1, pay close attention to the water's smell—it should develop...
- Drying Efficiency: For even faster drying in Step 2, place a small fan nearby to create gentle airflow without blowin...
Frequently asked questions
Got questions about saving pumpkin seeds for next year?
You’re not alone! Here are some of the most common concerns—and straightforward answers—to help you succeed.
How long can I store pumpkin seeds before planting?
Properly dried and stored pumpkin seeds can last 3–5 years while maintaining good germination rates. For best results, plant them within 1–2 years for the highest success rate. Store them in a cool, dark place (like a sealed jar in the fridge) to extend their shelf life.
When is the best time to harvest seeds from pumpkins?
Wait until the pumpkin is fully mature and the rind is hard before harvesting seeds. Aim for 7–10 days after pollination (when the pumpkin stops growing and its stem dries out). Overripe pumpkins may produce seeds that won’t sprout well, so act fast!
Can I save seeds from store-bought pumpkins?
Technically yes, but it’s risky. Many commercial pumpkins are hybrid varieties, meaning seeds may not grow true to the parent plant. If you’re determined, try it—but for reliable results, save seeds from heirloom or open-pollinated pumpkins grown in your garden.
What if my seeds won’t germinate after storing?
If your seeds fail to sprout, they may be too dry, old, or improperly stored. Try soaking them in warm water for 12–24 hours before planting to rehydrate. If that doesn’t work, test a few seeds in damp paper towels—if none sprout within a week, it’s time to start fresh with new seeds.
Do I need to treat pumpkin seeds before planting?
No treatment is required for pumpkin seeds, but you can give them a quick rinse to remove any remaining pulp. For extra insurance, soak them in a 10% hydrogen peroxide solution (1 part peroxide to 9 parts water) for 10 minutes to kill mold or bacteria before drying and storing.
Wrapping up and next steps
Saving pumpkin seeds to plant next year is simpler than you think—and it’s a rewarding way to grow your own homegrown pumpkins! By following these steps—cleaning, drying, storing, and testing viability—you’ll be ready to start fresh in spring.
Now that you’re equipped with the know-how, grab those seeds, give them a cozy spot in your pantry, and get excited for next year’s harvest. 🌱
Ready to take the next step? Mark your calendar for early spring planting, and watch your garden come to life with homegrown pumpkins! 🎉